Topic:
How do I connect with a RapidLog technician to get support through live chat?
Instructions:
- Click on the My Account page.
- Type in your credentials and click Login.
- Info: If you are already logged in you can skip this step.
- Hover over Support option in the Menu bar.
- Click on the Live Chat option.
- Info: It will show either OnDemand or Self-Hosted depending on your subscription.
- Fill out your contact information and click on the Submit button
- Click on the ‘Click Here to Start Your Chat Session Now!’ link.
- Google Chrome – Click the ‘Open Citrix Online Launcher’ button.
- Mozilla Firefox – Click the ‘Open Link’ button.
- Internet Explorer – It should open up automatically. If it doesn’t click on the ‘download & run GoToAssist Corporate’ option and then run the program.
- Microsoft Edge:
- Click on the ‘Save’ button down below.
- Click on the ‘Run’ button after the download has finished.
- Click on the ‘Yes’ button when Windows asks you if you want to run the program.
- Note: At this point the install should be finishing up and connecting you to a RapidLog technical support representative.
Instructions:
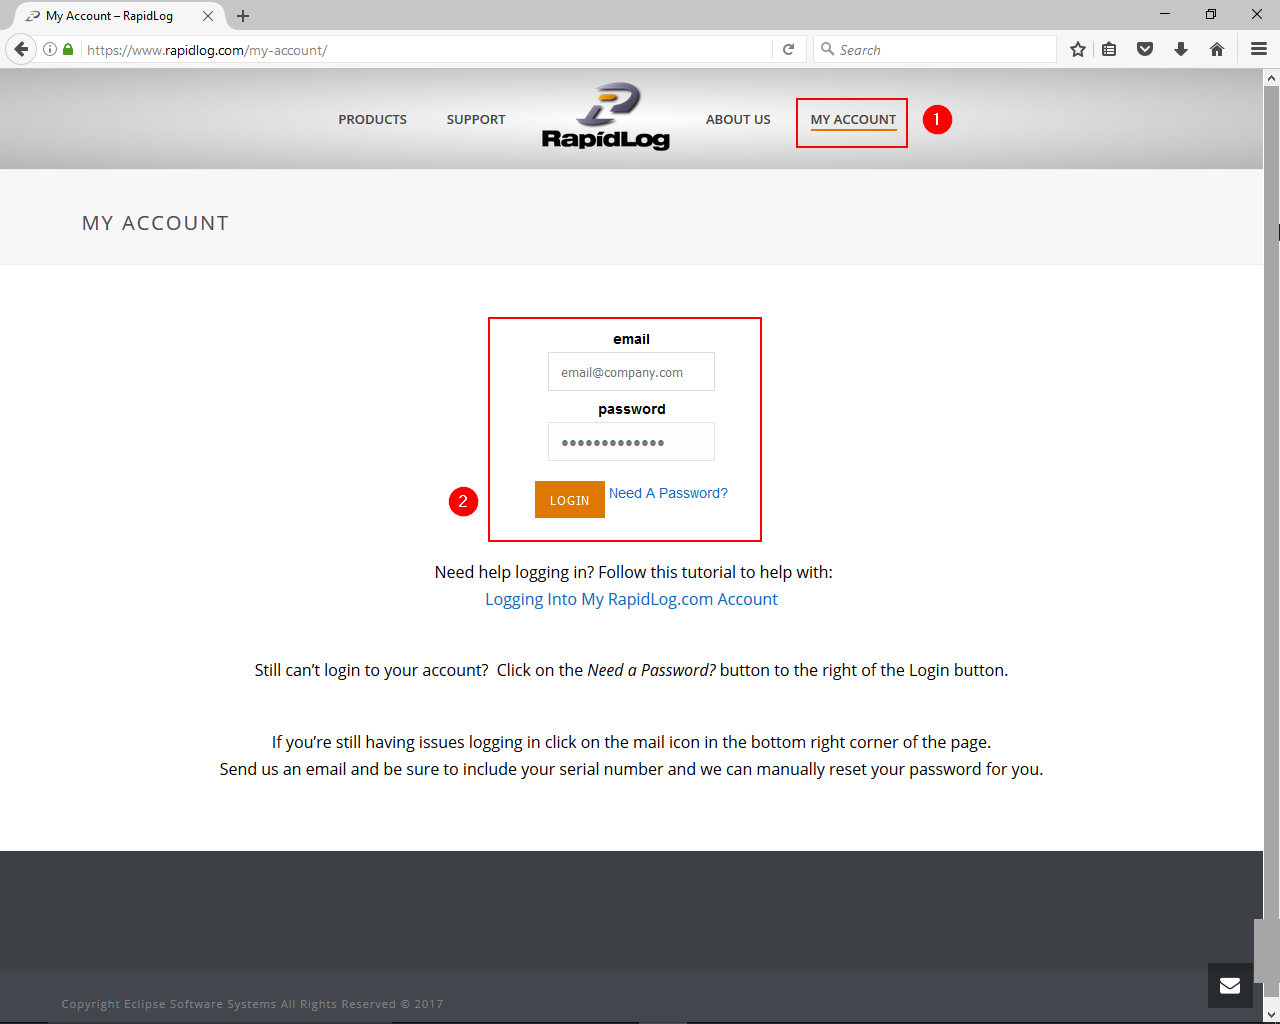
Step 1: Click on the My Account page.
Step 2: Type in your credentials and click Login.
Info: If you are already logged in you can skip this step.
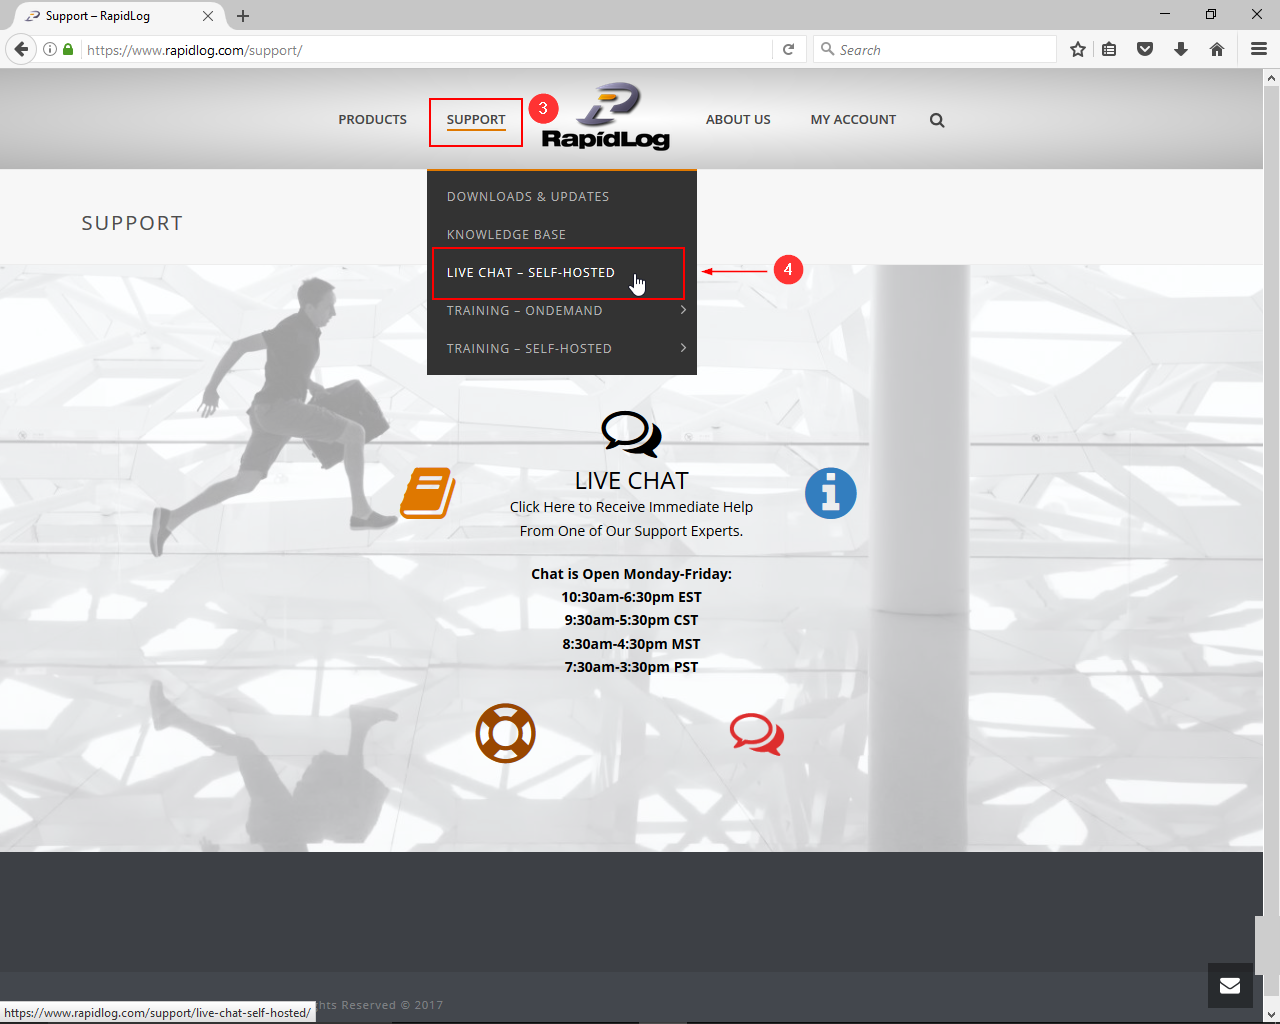
Step 3: Hover over Support option in the Menu bar.
Step 4: Click on the Live Chat option.
Info: It will show either OnDemand or Self-Hosted depending on your subscription.
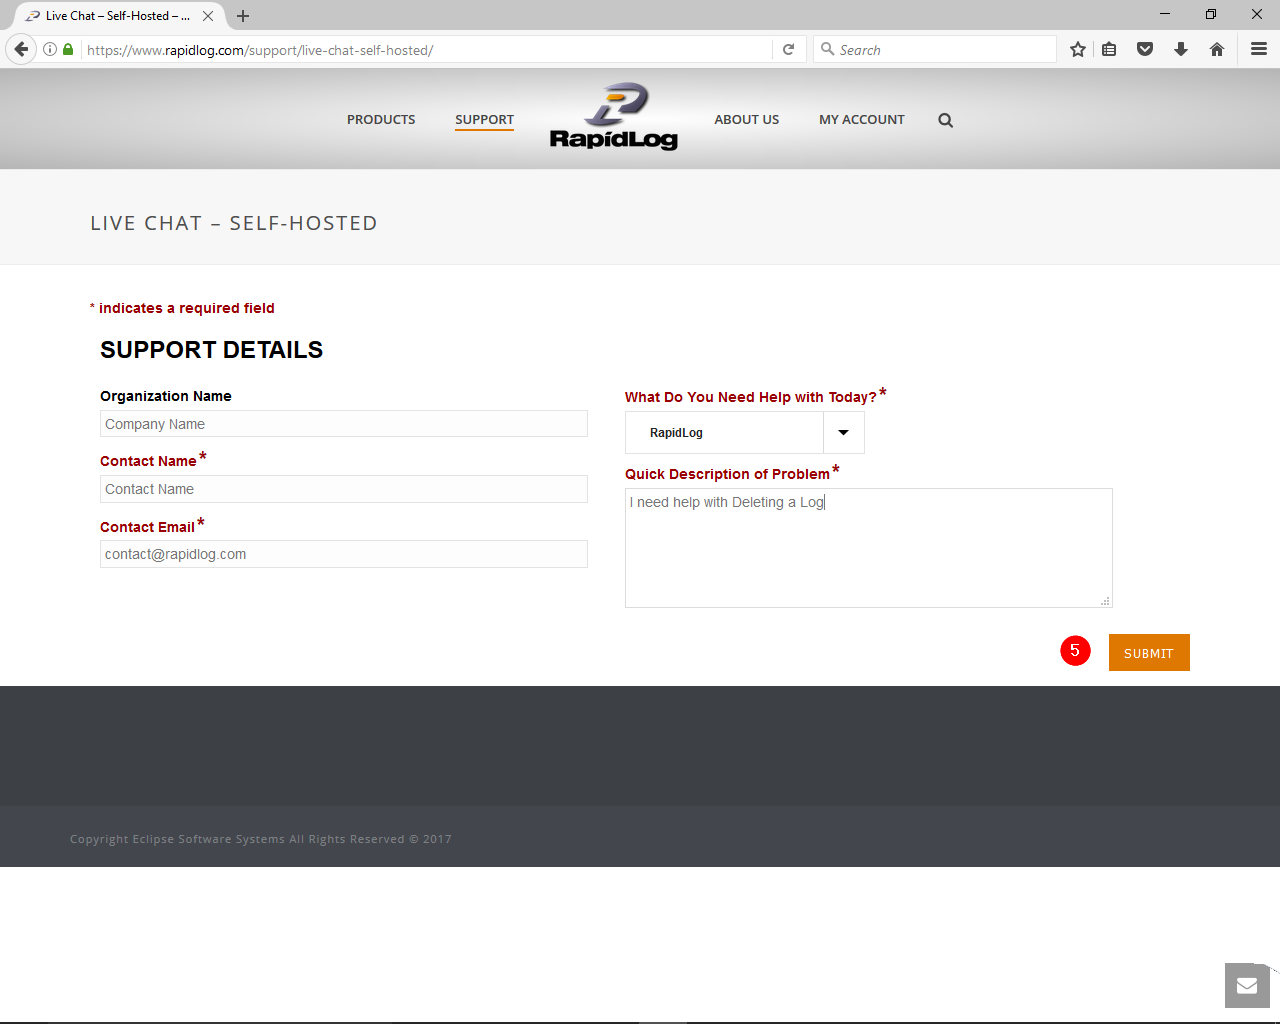
Step 5: Fill out your contact information and click on the Submit button.
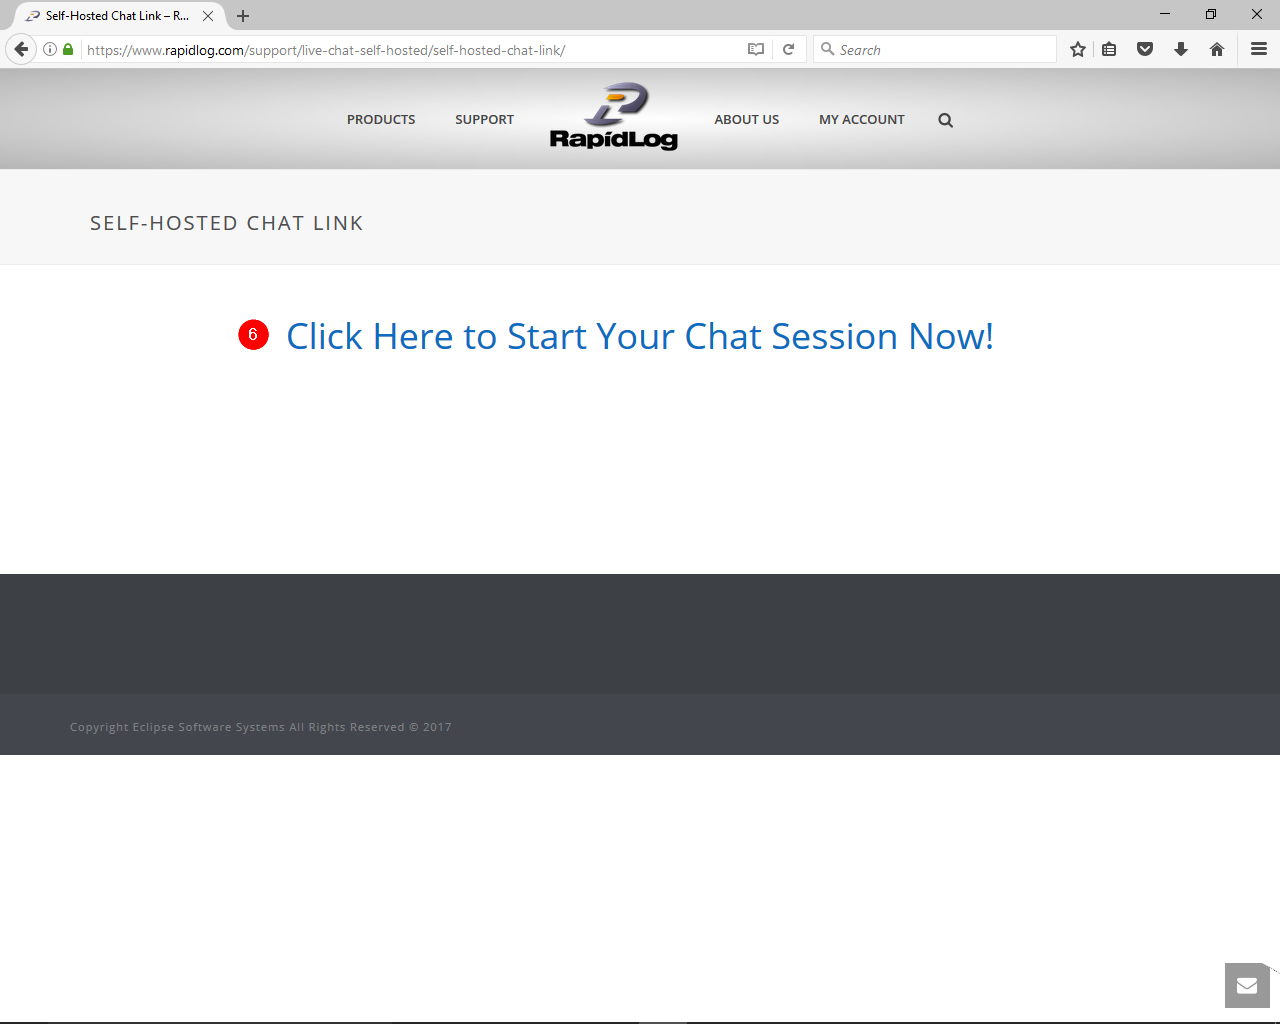
Step 6: Click on the ‘Click Here to Start Your Chat Session Now!’ link.
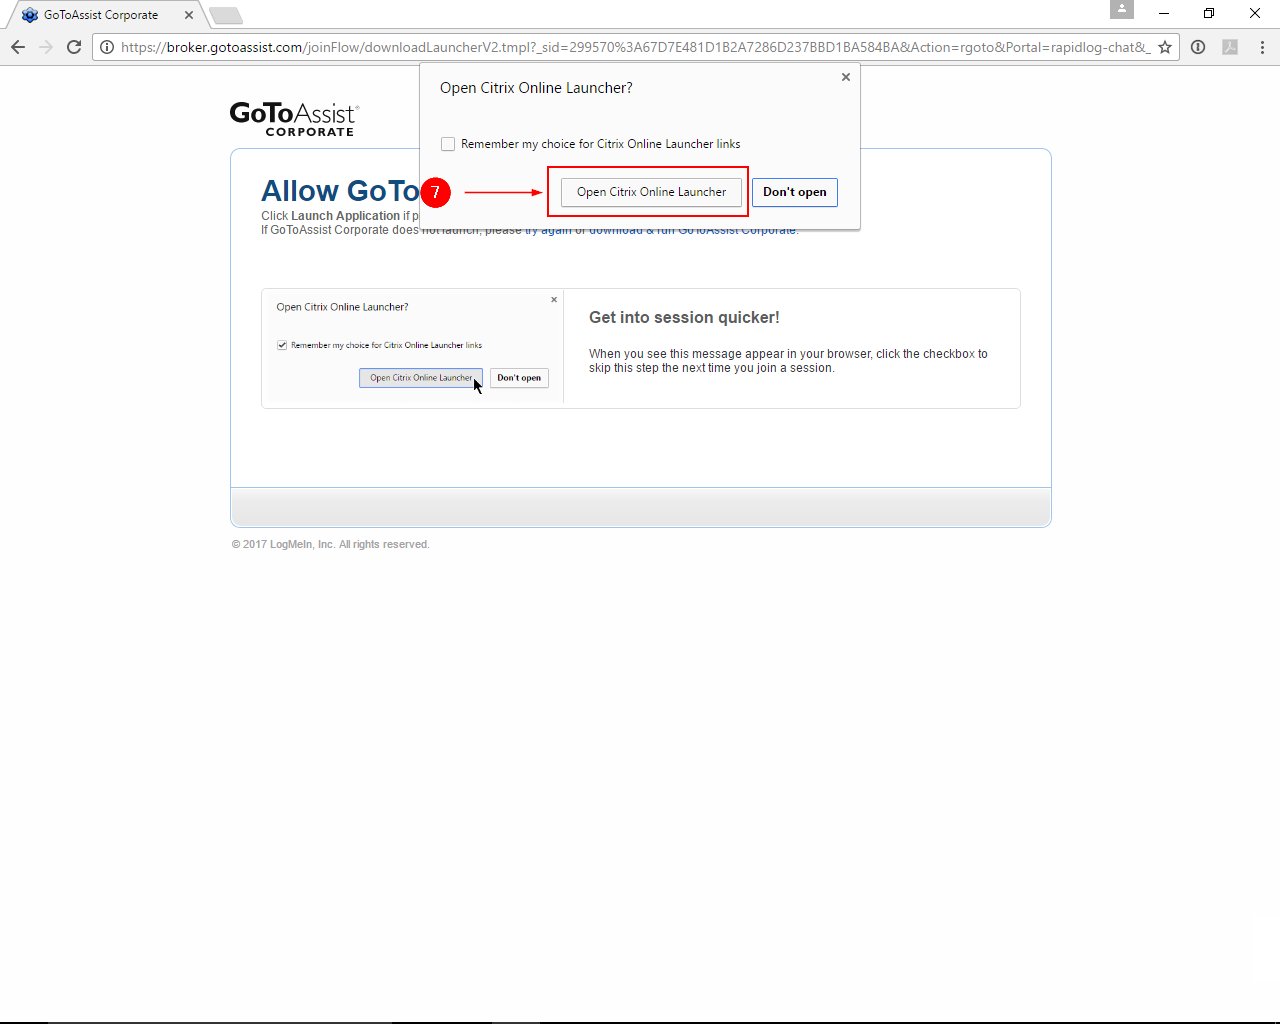
Step 7 – Google Chrome: Click the ‘Open Citrix Online Launcher’ button.
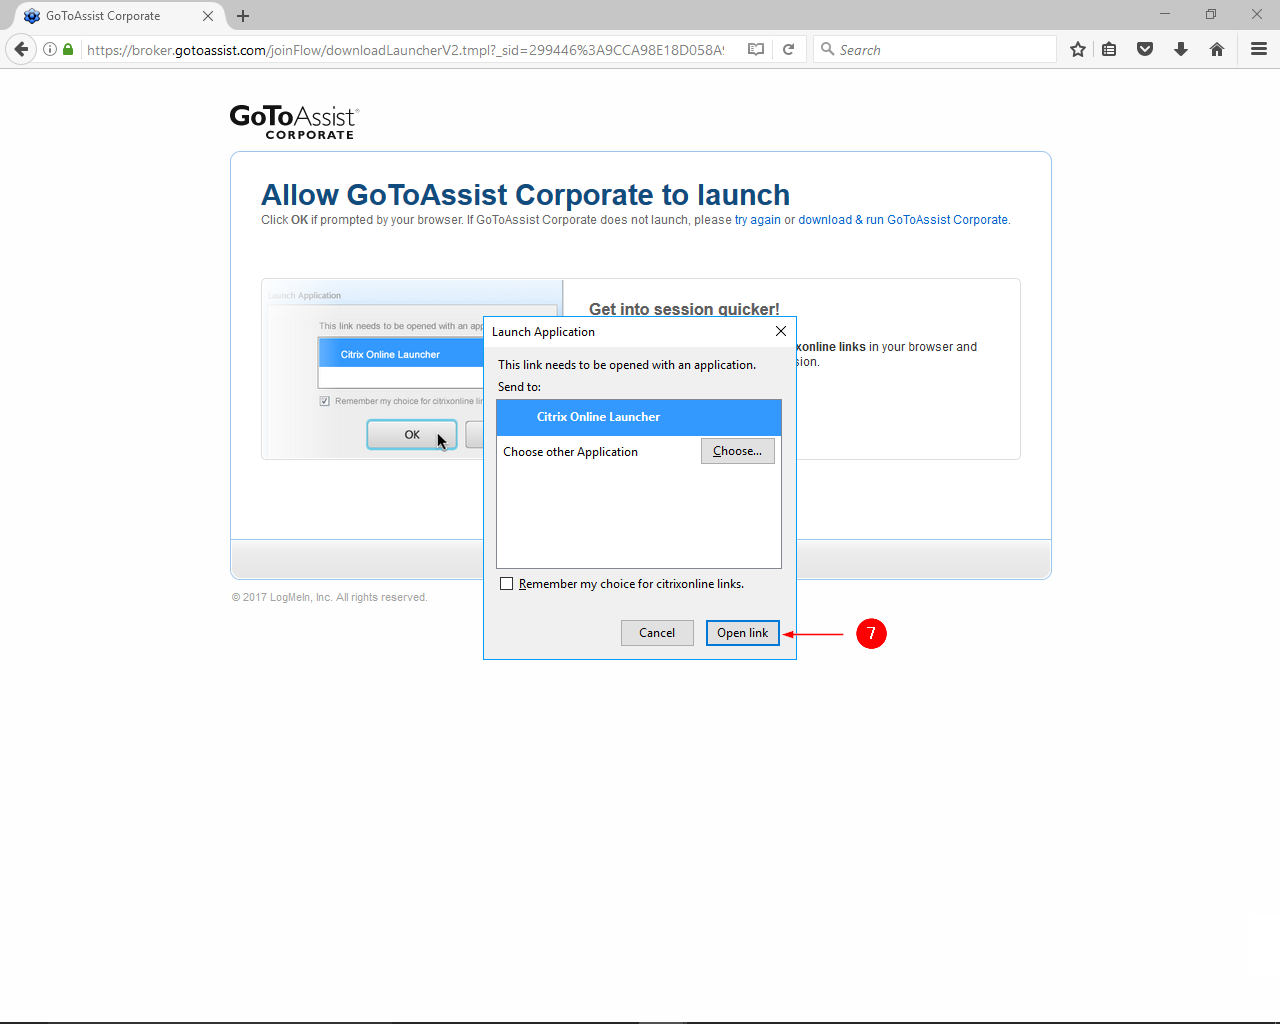
Step 7 – Mozilla Firefox: Click the ‘Open Link’ button.
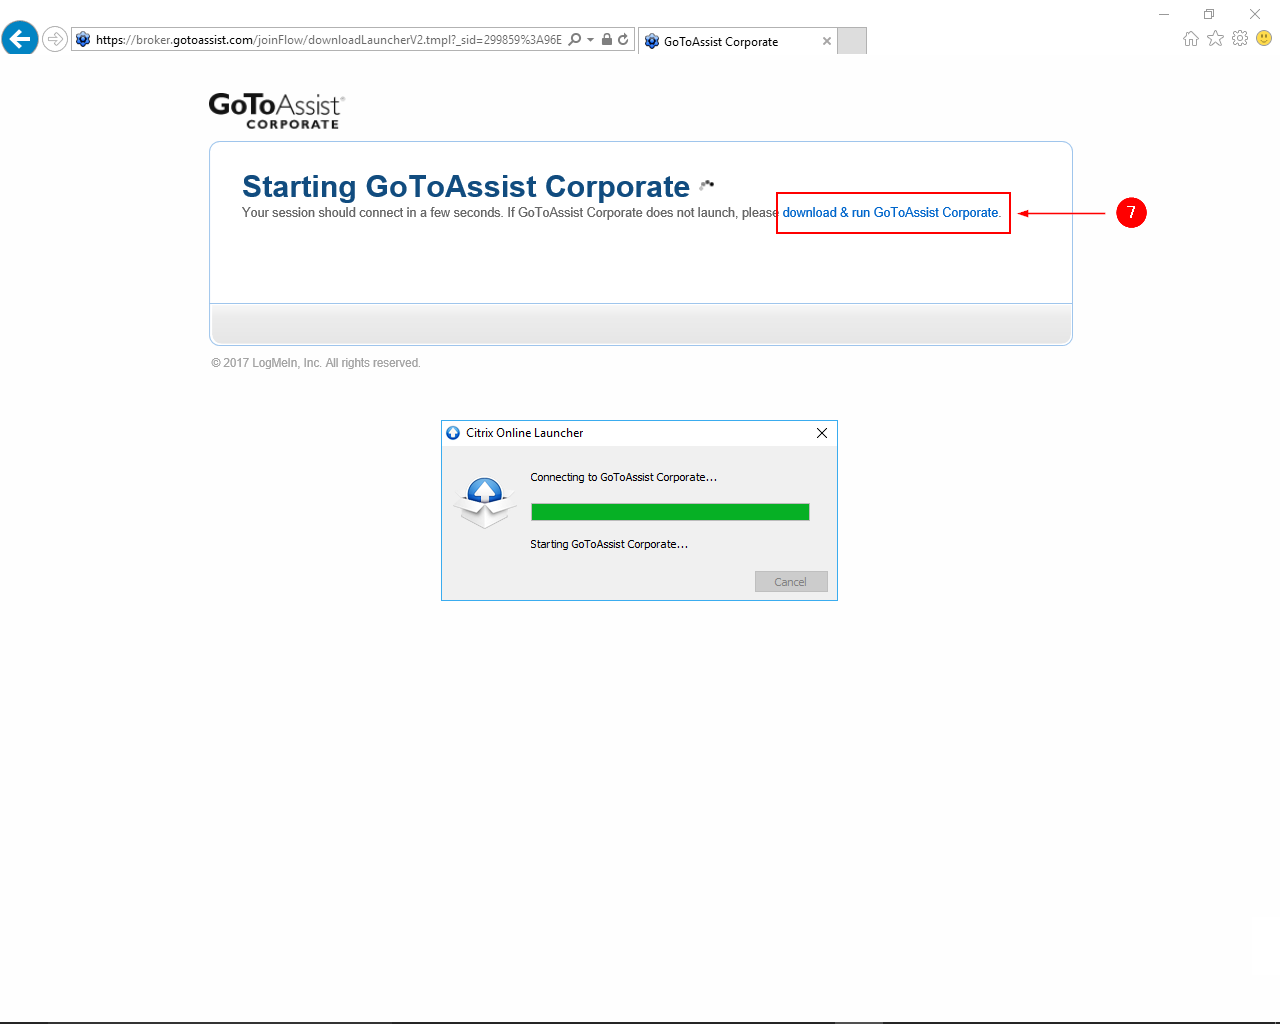
Step 7 – Internet Explorer: It should open up automatically. If it doesn’t click on the ‘download & run GoToAssist Corporate’ option and then run the program.
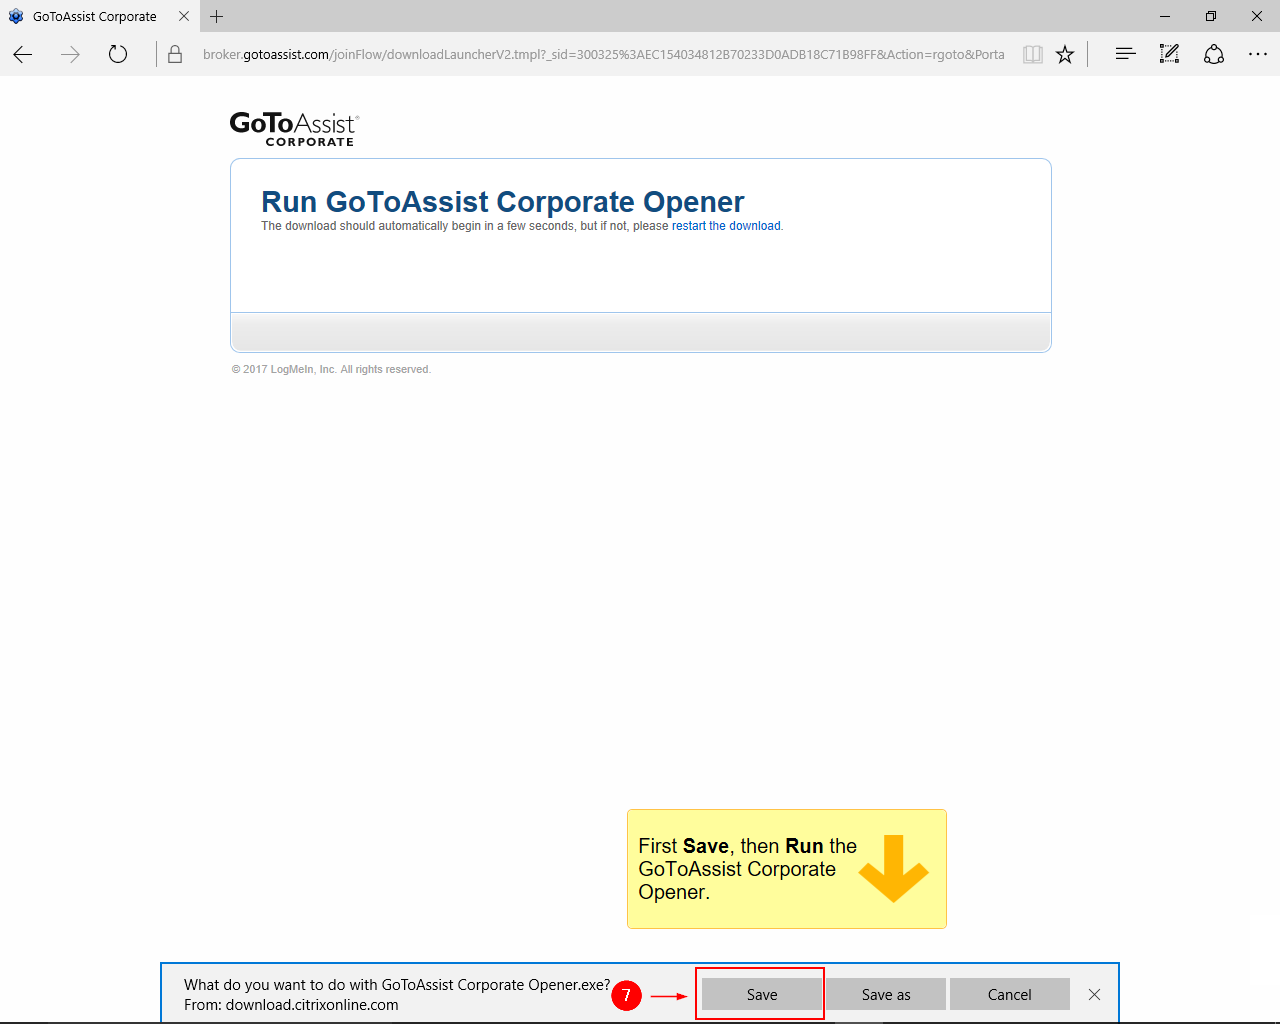
Step 7 – Microsoft Edge: Click on the ‘Save’ button down below.
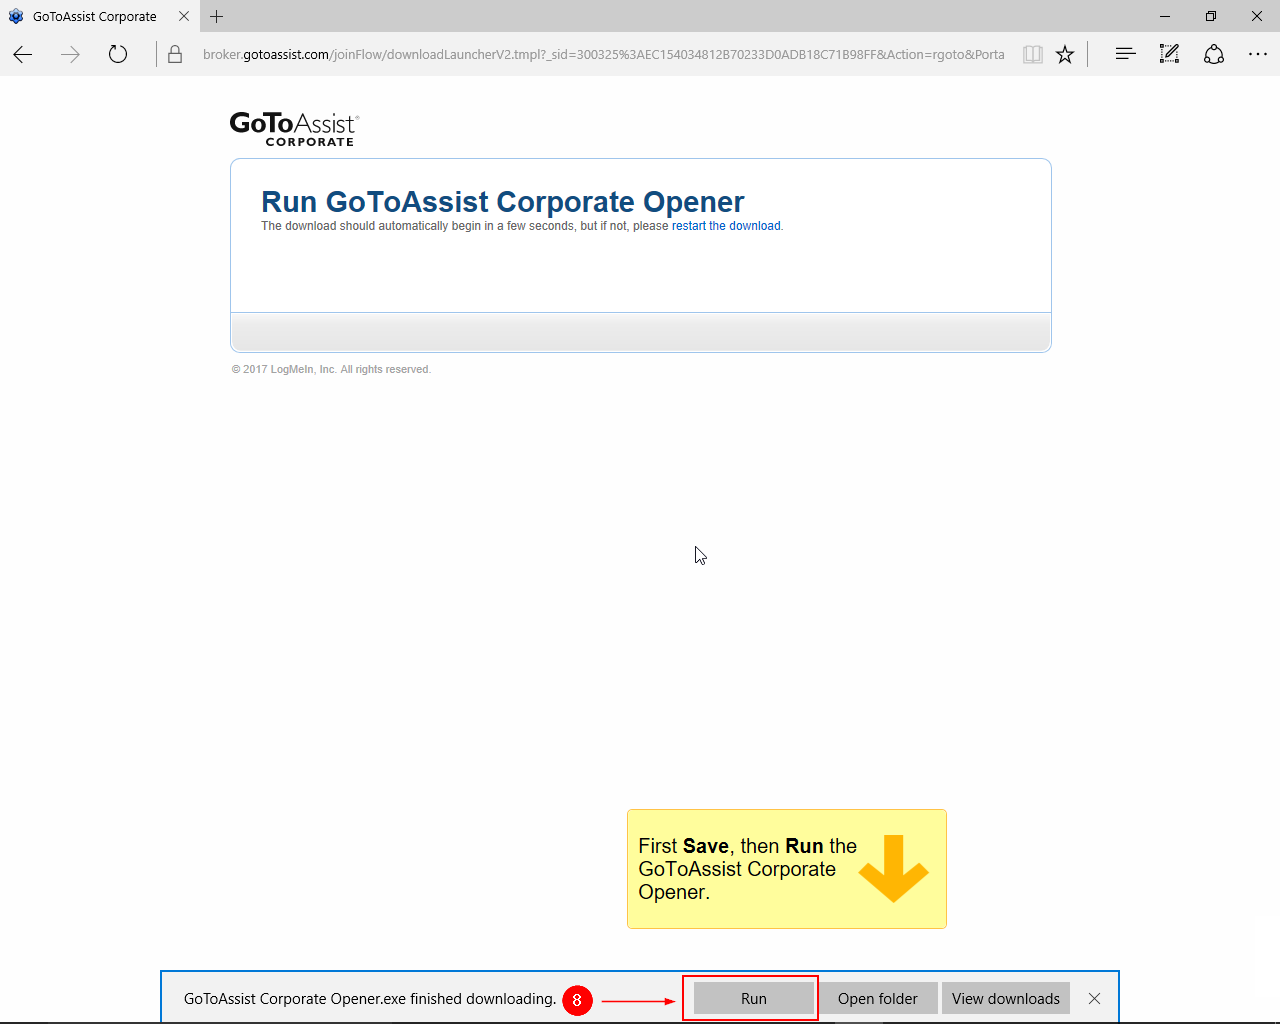
Step 8 – Microsoft Edge: Click on the ‘Run’ button after the download has finished.
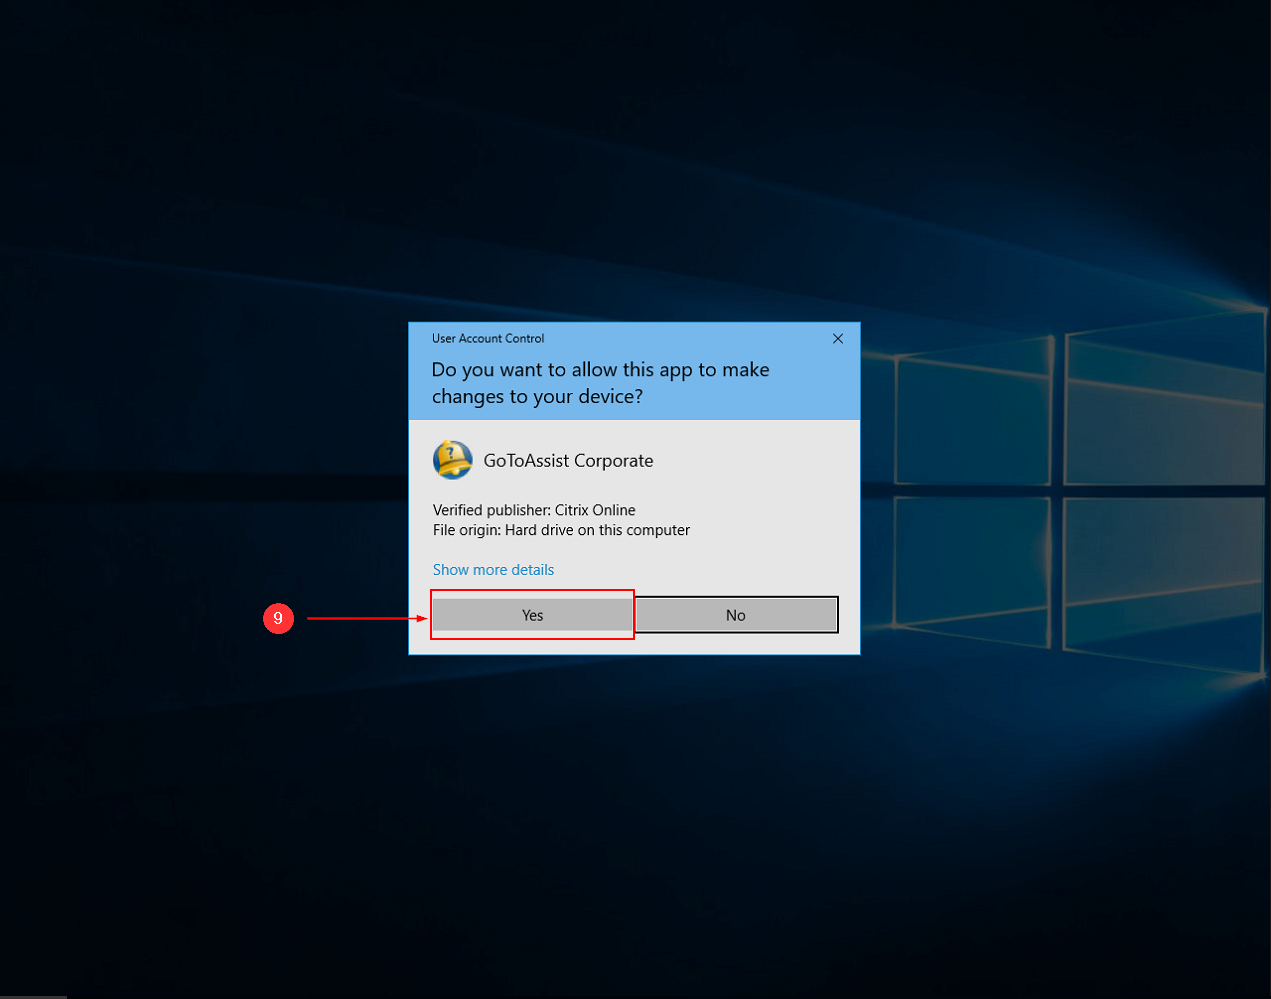
Step 9: Click on the ‘Yes’ button when Windows asks you if you want to run the program.
Note: At this point the install should be finishing up and connecting you to a RapidLog technical support representative.