In the ‘Violation Classes: Regular’ Table List, highlight the field you wish to edit
a. You can choose to edit the A-Z current violation list or edit the <unused> sections to be the new violations.
Rename the the violation in the “Class Name” field.
a. You can choose to edit the comment that the violation will display under the “Comment” section.
b. You can also add up to 9 individual comments for the new violation.
c. You can assign these comments to the violation by right clicking the violation and selecting the comment that was entered.
After the edits have been made, close and re-open RapidLog. Now you’ll be able to assign the violation manually when processing in either Rapidlog Lite or Rapidlog Pro.
Instructions with Images:
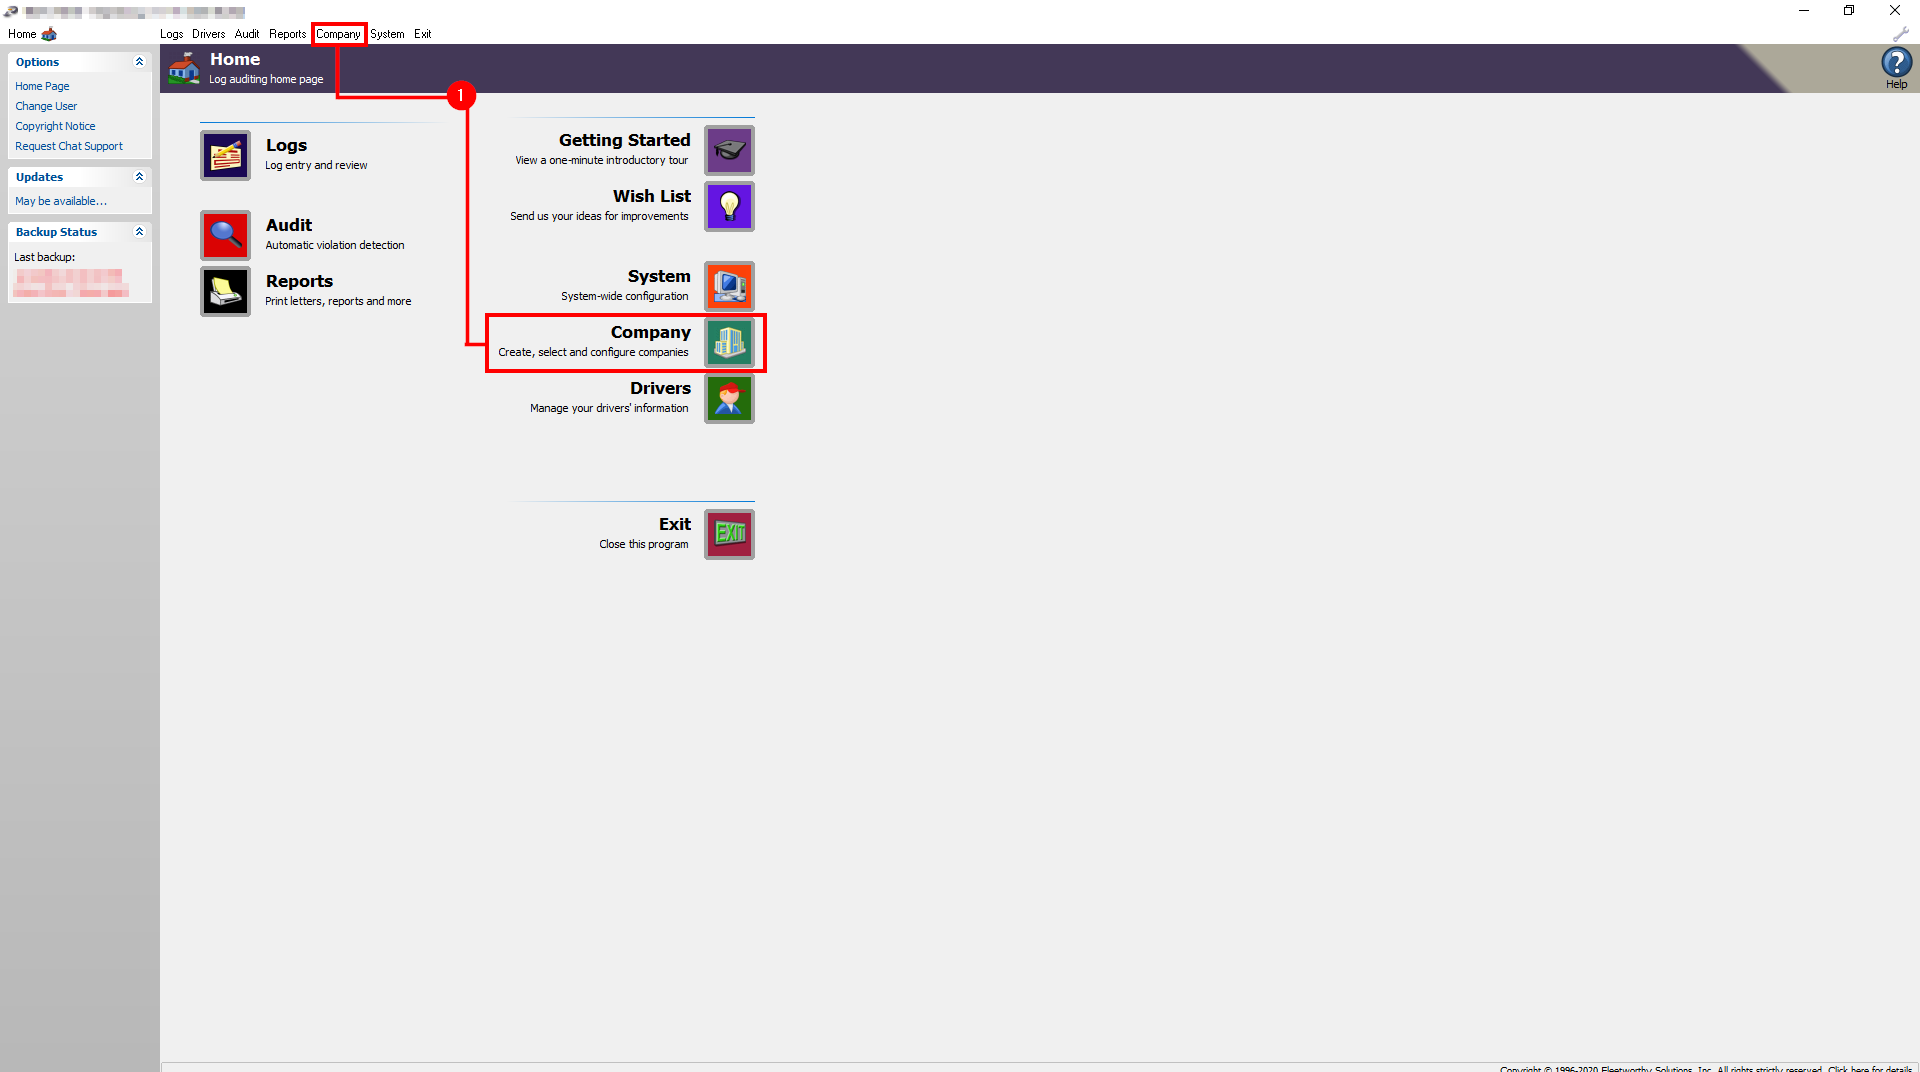
Step 1: From the home page of RapidLog, click “Company”
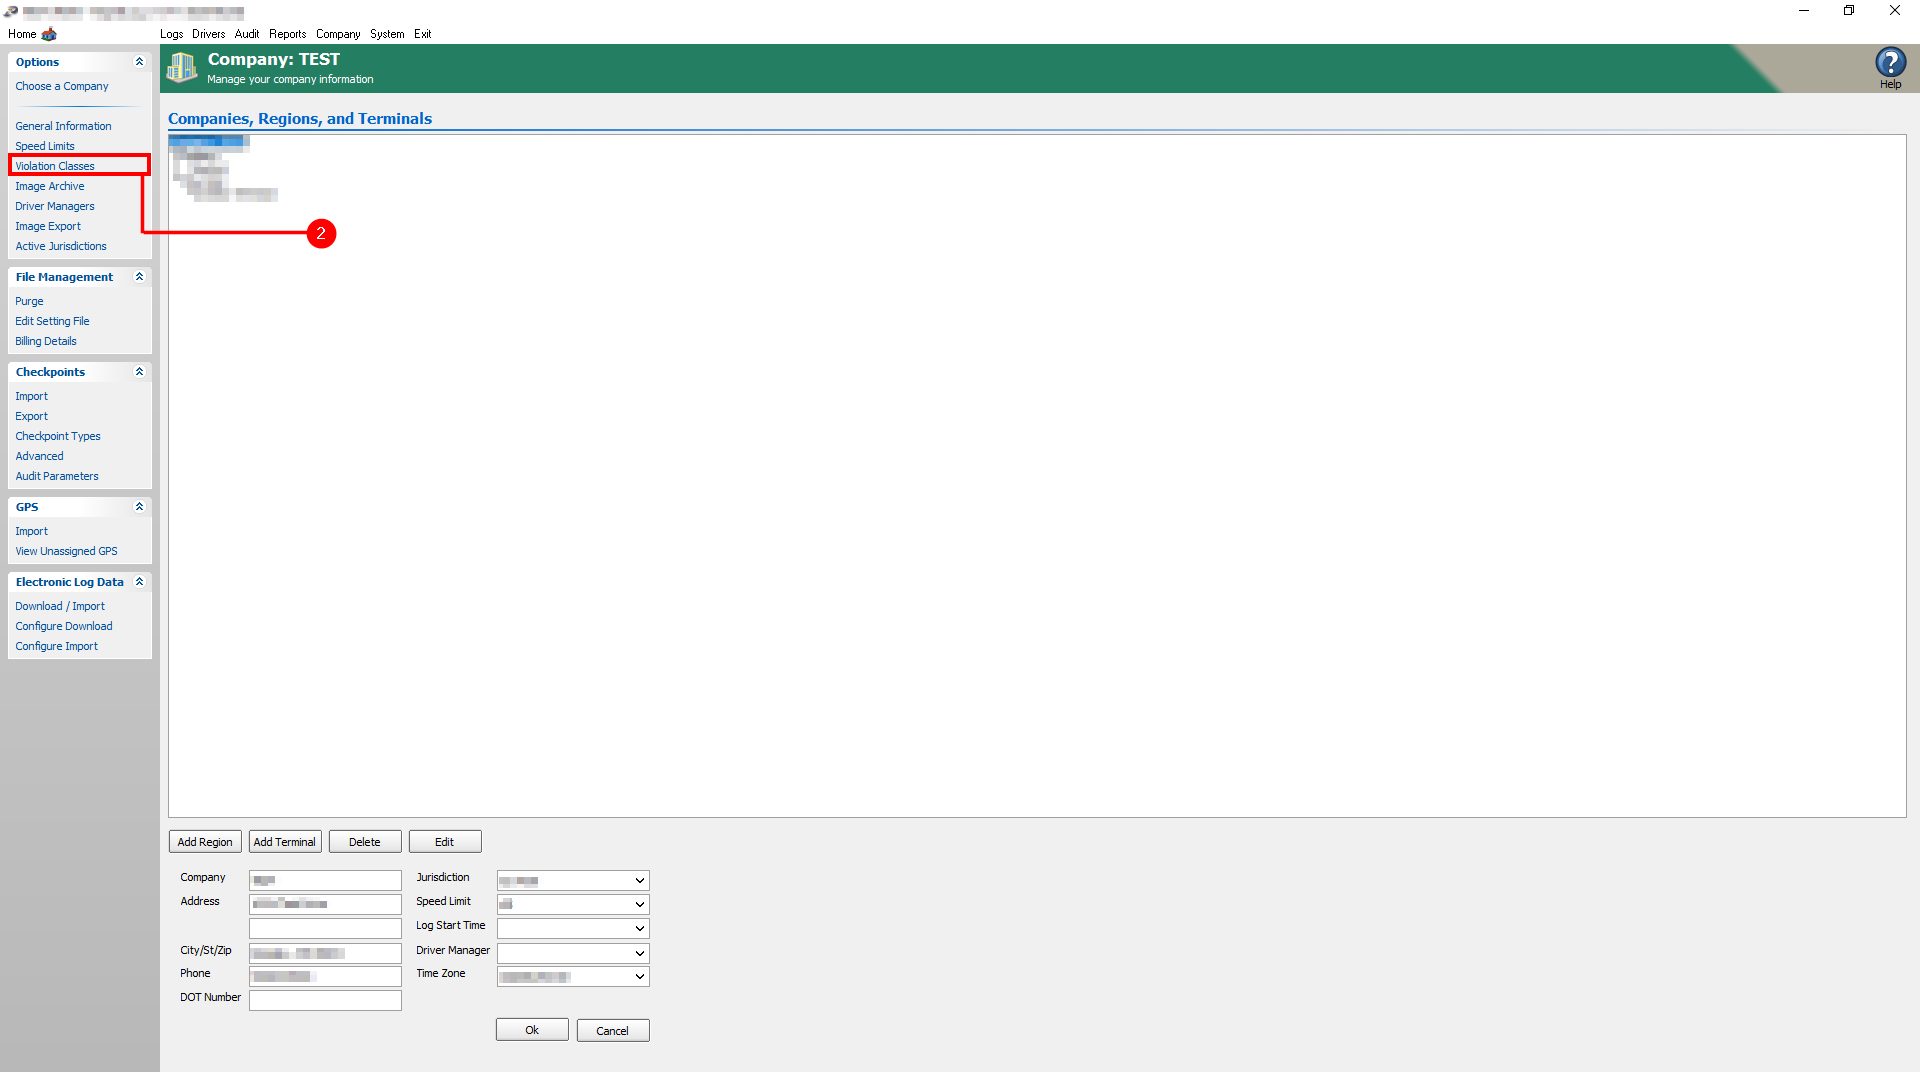
Step 2: Click “Violation Classes” from the left menu
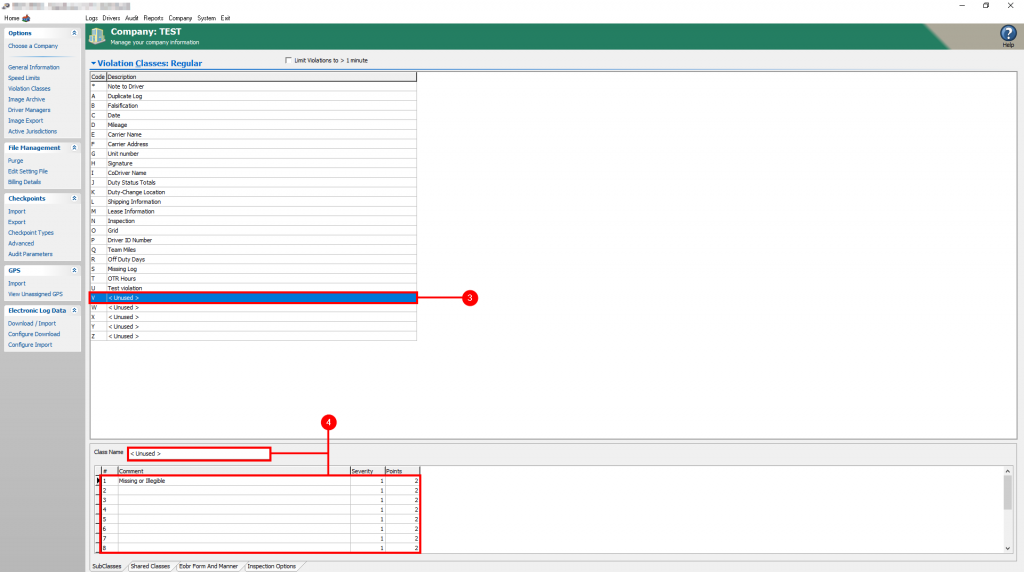
Step 3: In the ‘Violation Classes: Regular’ Table List, highlight the field you wish to edit
a. You can choose to edit the A-Z current violation list or edit the <unused> sections to be the new violations.
Step 4: Rename the the violation in the “Class Name” field.
a. You can choose to edit the comment that the violation will display under the “Comment” section.
b. You can also add up to 9 individual comments for the new violation.
i. You can assign these comments to the violation by right clicking the violation and selecting the comment that was entered.
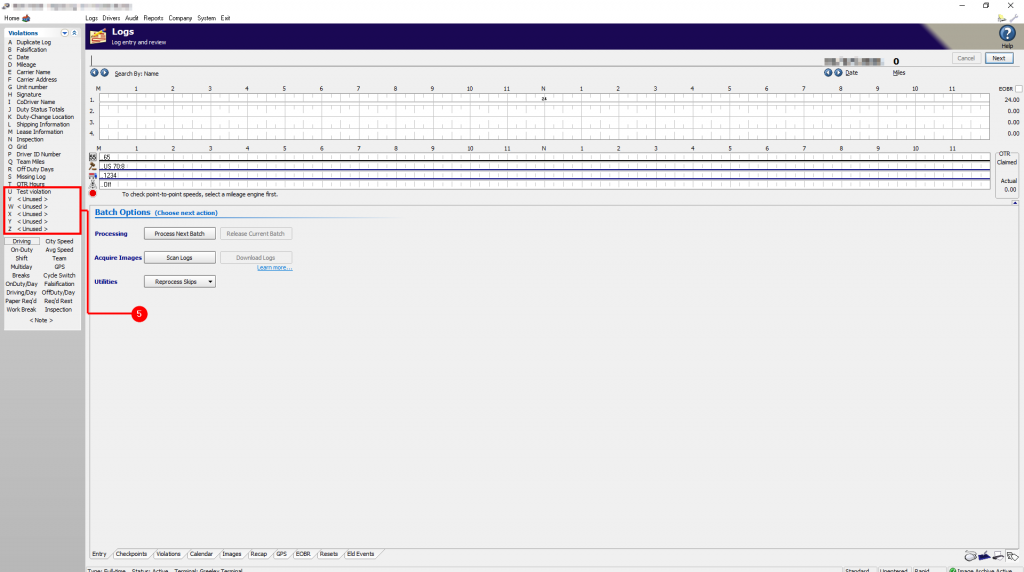
Step 5: After the edits have been made, close and re-open RapidLog. Now you’ll be able to assign the violation manually when processing in either Rapidlog Lite or Rapidlog Pro.
Go to the company page in Rapidlog, then click on the purge button on the left side.
Click Purge. Depending on how much data you have it would take a while for the purge to complete, and Rapidlog may say “Not Responding”, don’t worry it is still working.
Info: Rapidlog allows you to choose how many months of data you would like to keep. By defalut it is set to 6. Also note that you have the option to delete terminated driver. You can also choose how long the driver has to be terminated for before Rapidlog deletes them.
Instructions with Images:
Step 1: Go to the Company page in Rapidlog
Step 2: Click on the Purge button on the left side.
Step 3: Click Purge. Depending on how much data you have it would take a while for the purge to complete, and Rapidlog may say ‘Not Responding’, don’t worry it is still working. Info: Rapidlog allows you to choose how many months of data you would like to keep. By defalut it is set to 6. Also note that you have the option to delete terminated driver. You can also choose how long the driver has to be terminated for before Rapidlog deletes them.