07/31/2020 | Software Update

The following changes, fixes and modifications are included in the 07/31/2020 build of RapidLog

  • Fixed Checkpoint audit issue with seeing falsification on an unentered log.
  • Added new FMCSA rules to be in effect on 9/29/2020.
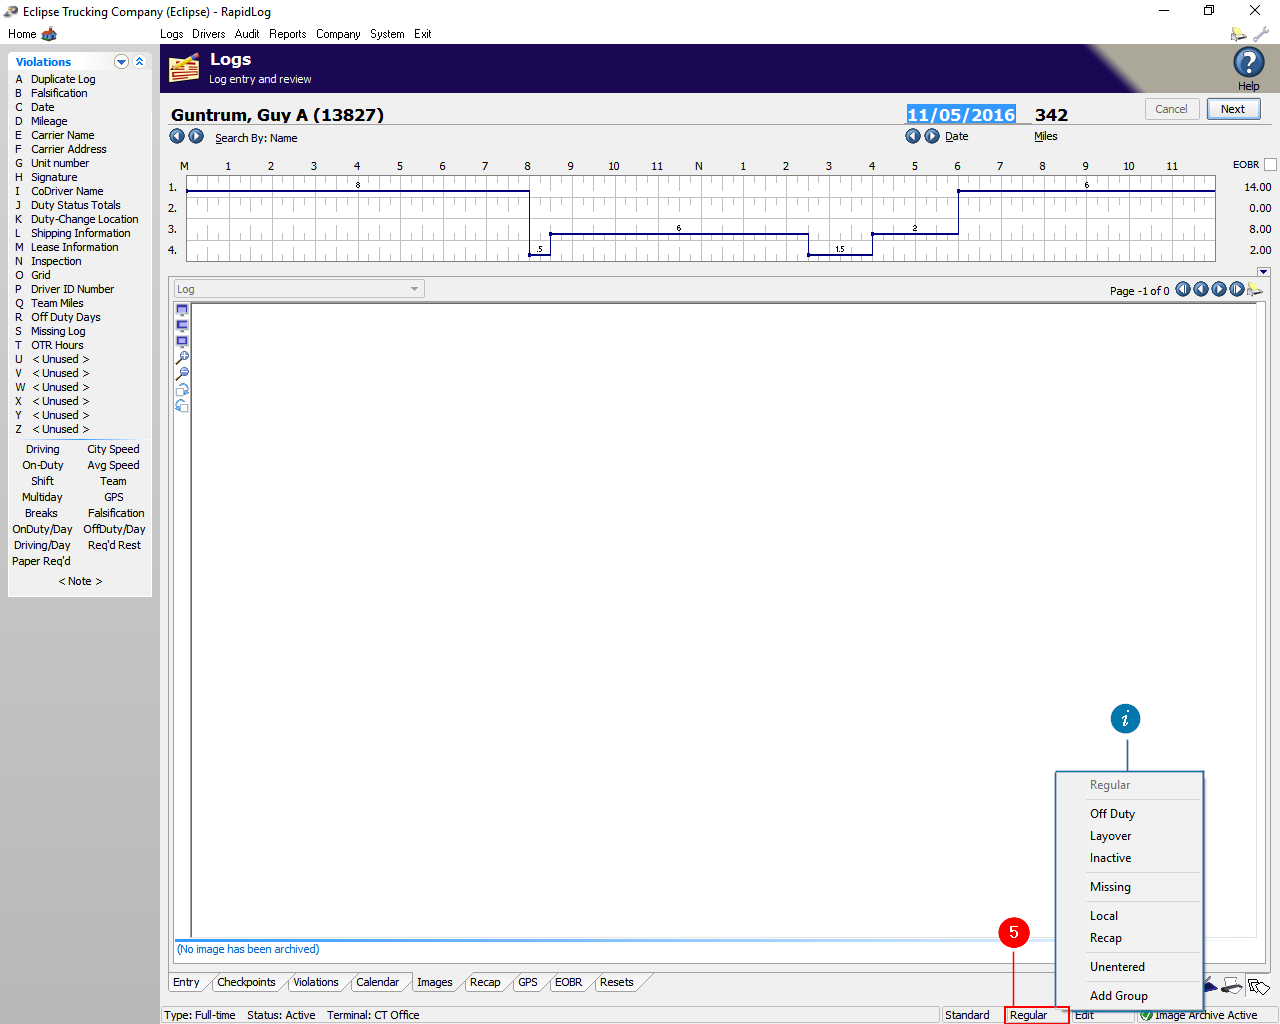
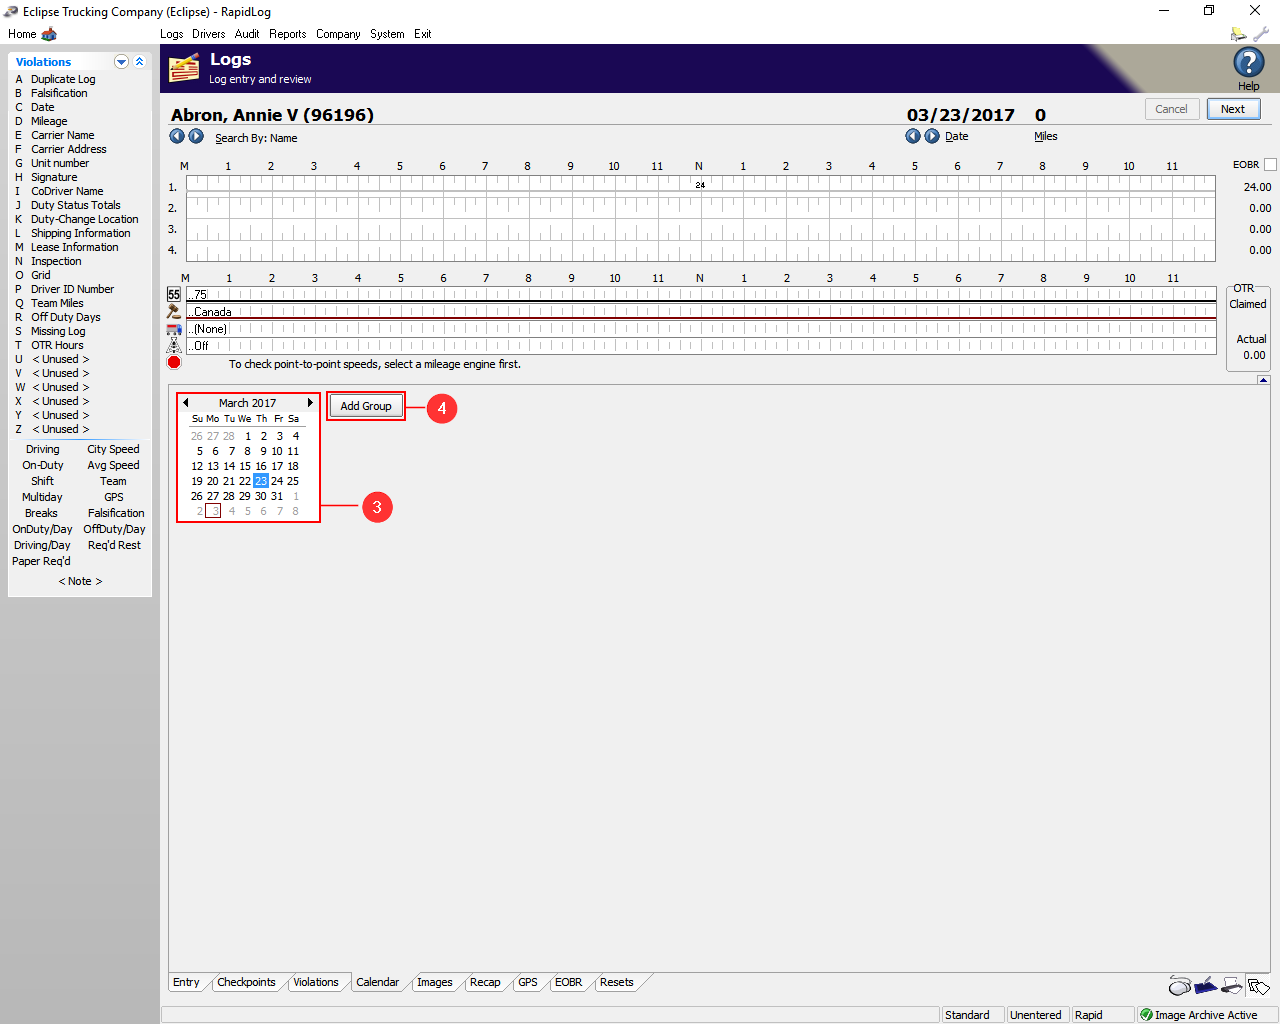
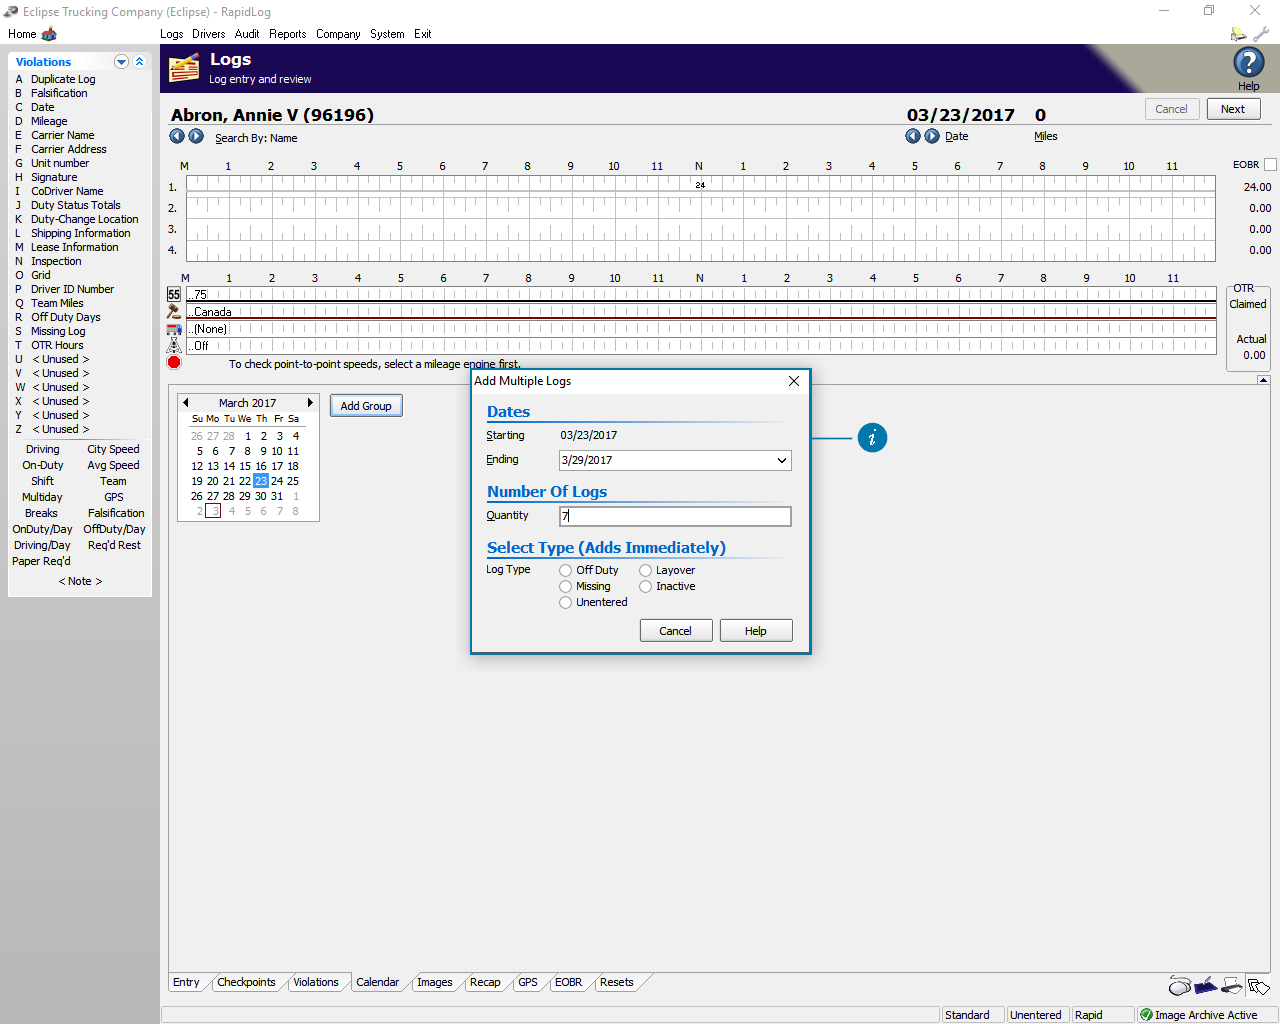
  • Added feature to allow inactive days to be added for old logs when importing ELD data.
  • Added Forward Thinking Systems to Eobr Downloader.
  • Added check to see if Eobr Downloader was available.
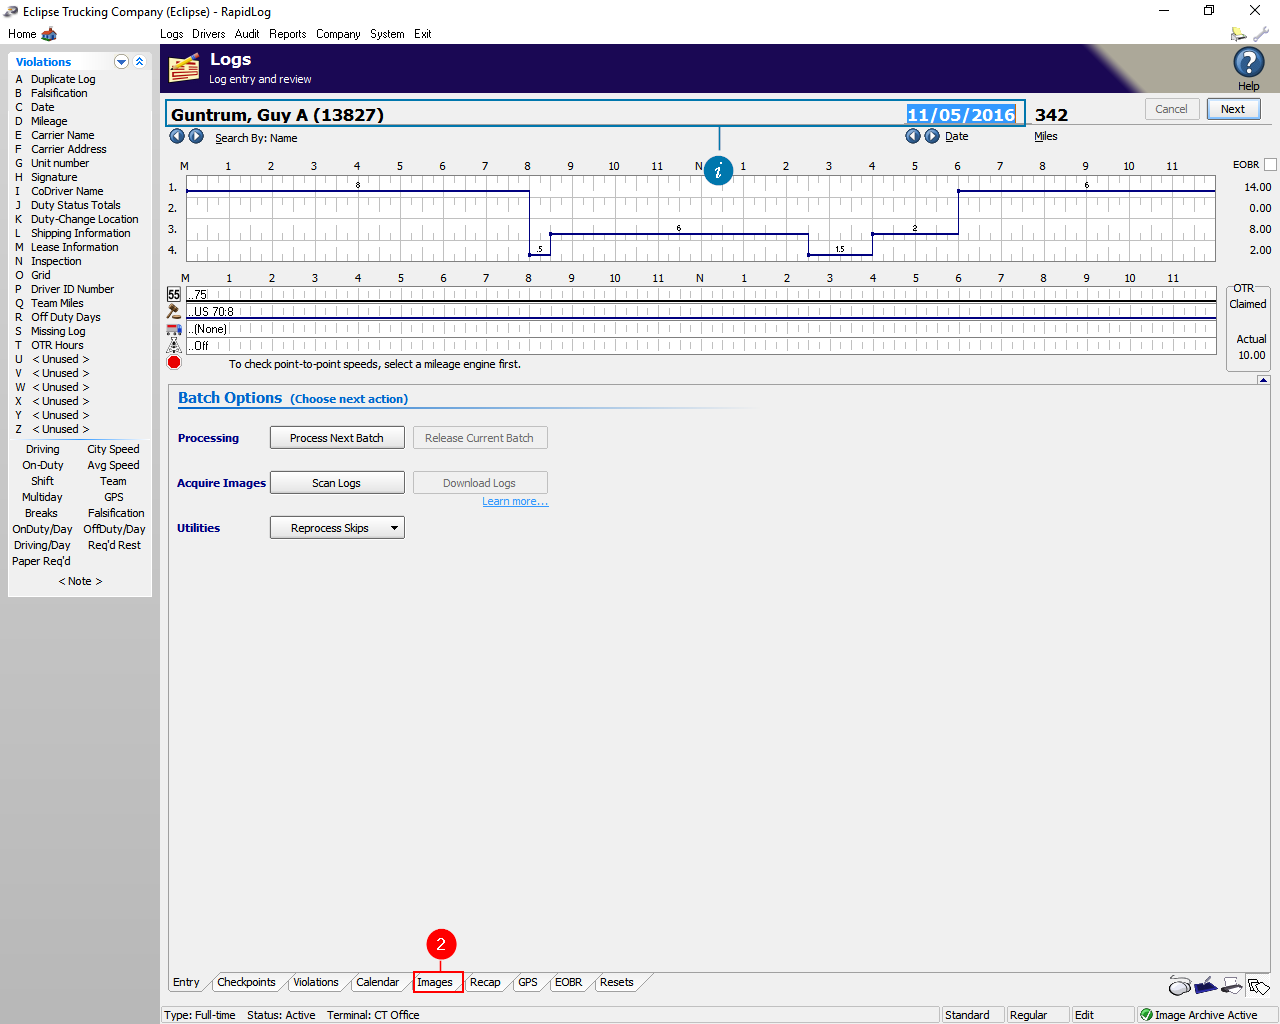
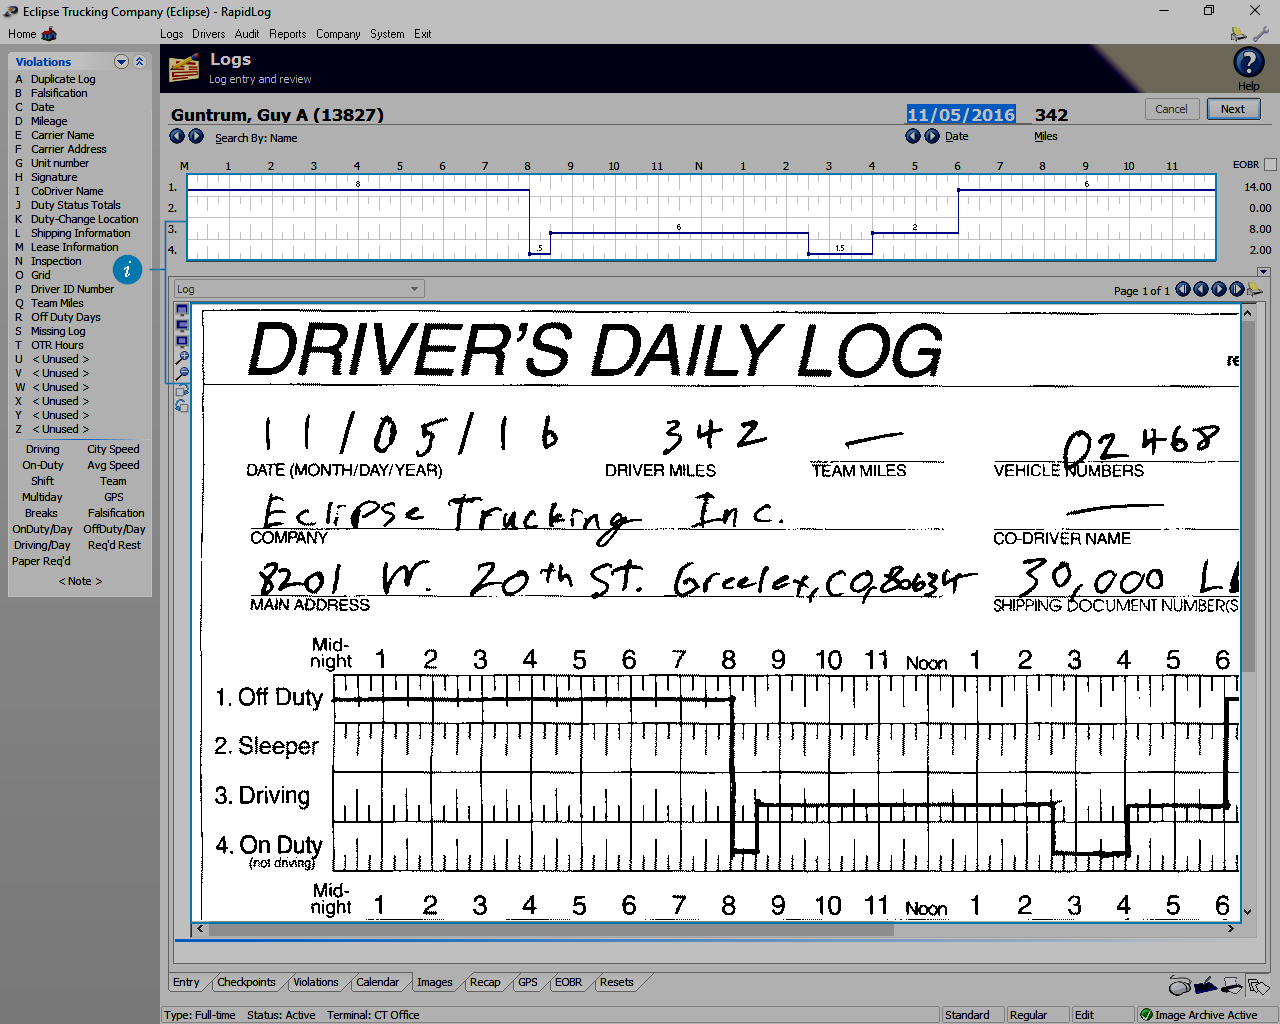
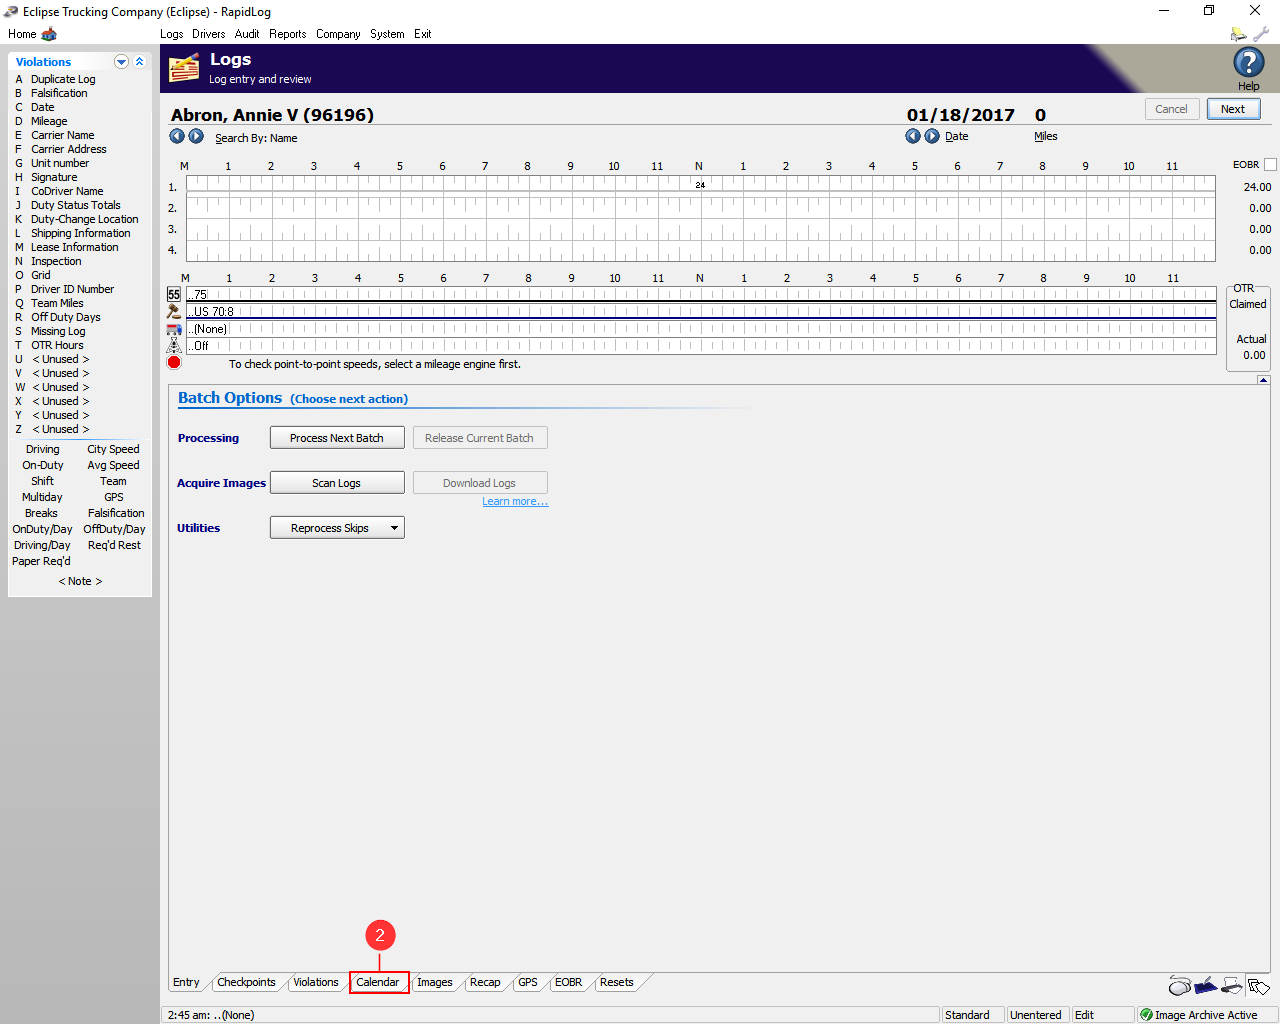
  • Enalrged icons on Log Entry page for image processing.
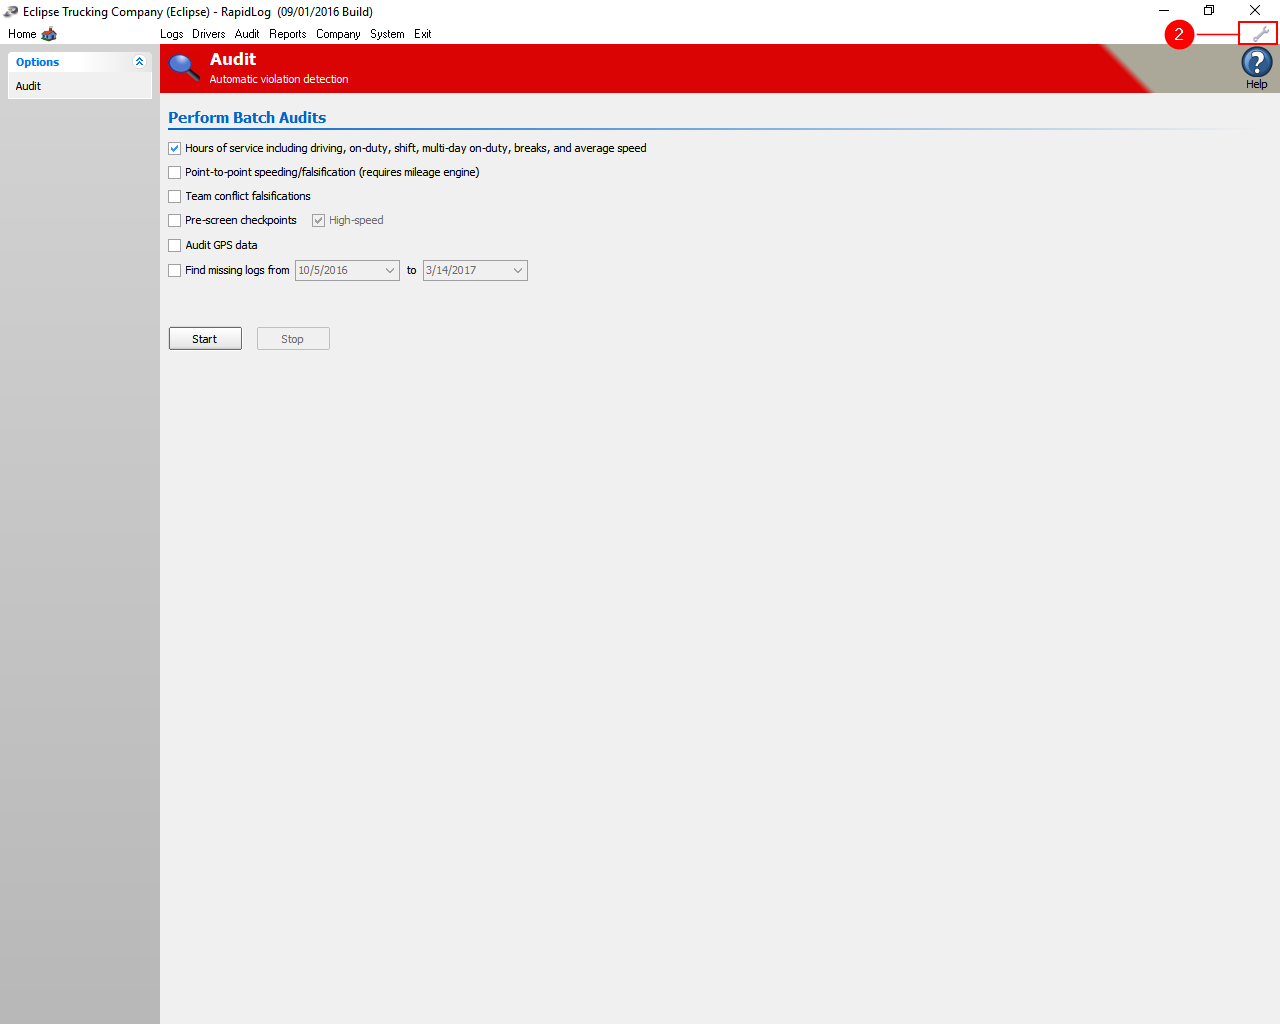
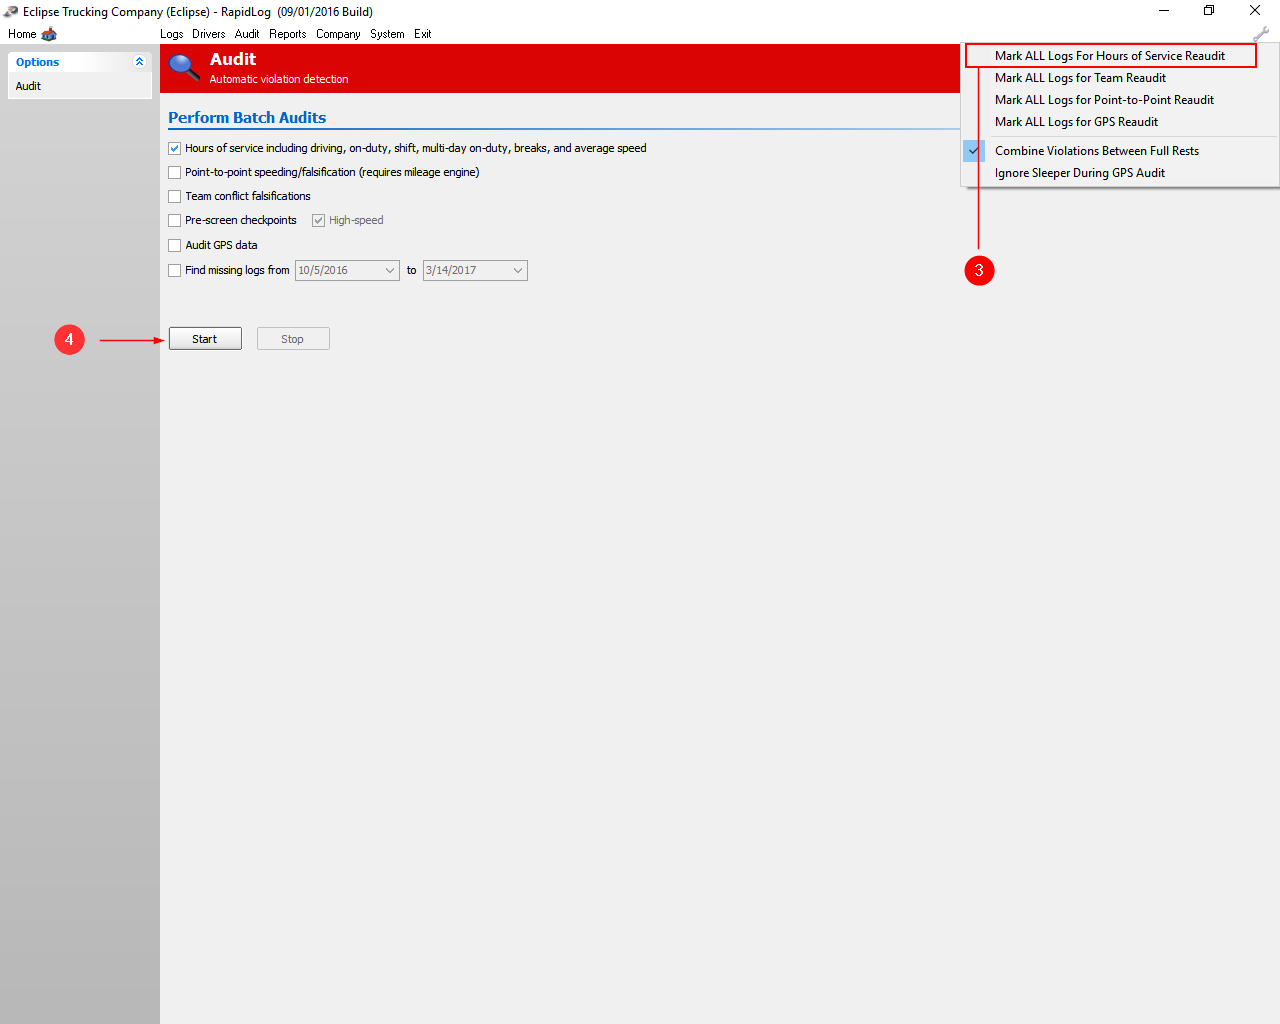
  • Added audit feature for auditing On Duty time at checkpoints.
  • Added Manual Miles override to allow EOBR log data to have miles entered manually and remain after a reimport
  • Added ability to get miles in PeopleNet import
  • Added feature to download distance from VisTracks based downloaders; Cyntrx, GFI Systems, Nextraq
  • Added feature to get ELD distances in Miles or KM correctly for the company settings in RapidLog
  • Added shipping docs and location details in GeoTab download

How to Delete a Driver

Instructions with Images:

Step 1: Click on the ‘Driver’ page.

Step 2: Click in the ‘Search Bar’ and enter the drivers last name.


Step 3: Verify you have the correct driver selected.
Step 3: Click on the ‘Delete’ button.

Step 4: Click ‘Yes’ to confirm.

Unable to Write to RapidLog\Prefs\USER.INI File

Topic:

How to Fix Error: Unable to Write to the SUP.INI File in the Prefs Directory

Instructions:

  1. Info – This error message is usually caused by a permissions issue. Frist follow the steps to fix the permissions on the RapidLog folder.
  2. Right click the RapidLog icon on your desktop, then select Open File Location.
  3. Right click in the blank white space.
  4. Select Properties.
  5. In the Properties window, click on the Security Tab.
  6. Click on Edit.
  7. Scroll down and find the Users group, click on it to select it.
  8. Check the box for Modify permissions.
  9. Click OK to save the changes.
  10. Click the OK button to close the properties window.

Future Date Not Allowed

Topic:

How to Fix Error: Future Date Not Allowed in RapidLog Pro

Instructions:

  1. Info – This error is either because you’re entering a date into the future or because your date format isn’t compatible with RapidLog. Rapidlog can only hand a US date format MM/DD/YYYY
  2. First click on your start button, then type in control. You should see control panel in the top of the list. Click on
    Control Panel.
  3. Click on Region
    • Info – Use the view by to sort by Icons.
  4. Use the drop down menu in the format section. Scroll until you find English (United States).
  5. Click OK to save the changes. Now you can open RapidLog Pro and continue processing.

Instructions with Images:

Info – This error is either because you’re entering a date into the future or because your date format isn’t compatible with RapidLog. RapidLog can only hand a US date format MM/DD/YYYY

Step 1: First click on your start button, then type in control. You should see control panel in the top of the list. Click on Control Panel.

Step 2: Click on Region.
Info – Use the view by to sort by Icons.

Step 3: Use the drop down menu in the format section. Scroll until you find English (United States).

Step 4: Click OK to save the changes. Now you can open RapidLog Pro and continue processing.

Deleting Logs

Topic:

How do I delete a Log entered in RapidLog?

Instructions:

  1. Go to the ‘Logs’ page in Rapidlog.
  2. Click on the ‘Images’ tab at the bottom.
  3. Info: Make sure you’re on the correct driver and date you want to delete.
  4. Click the ‘Wrench’ in the upper right.
  5. Then select ‘Delete Image’. If you do not see ‘Delete Image’, then click on the ‘Image’ tab at the bottom.
  6. Click the ‘Regular’ button at the bottom right, then select ‘Unentered’ to clear the log data.
  7. Info: You have other options besides ‘Unentered’ if you don’t need to fully remove the log. 

Instructions with Images:

Step 1: Go to the ‘Logs’ page in Rapidlog.

Step 2: Click on the ‘Images’ tab at the bottom.
Info: Make sure you’re on the correct driver and date you want to delete.

Info: There are two separate parts of data that need to be deleted. One is the image and the other is the grid data.

Step 3: Click the ‘Wrench’ in the upper right.
Step 4: Then select ‘Delete Image’. If you do not see ‘Delete Image’, then click on the ‘Image’ tab at the bottom.

Step 5: Click the ‘Regular’ button at the bottom right, then select ‘Unentered’ to clear the log data.
Info: You have other options besides ‘Unentered’ if you don’t need to fully remove the log.

Logs Page Calendar

Topic:

How can I skip to a different day, on the logs page, quickly without having to type it in?

Instructions:

  1. Click on the ‘Logs’ page.
  2. Click the ‘Calendar’ tab at the bottom.
  3. Here you can change the Month, Day, and year you want to view.
  4. Add Group allows you to add a group of logs for a date range.
  5. Info: The logs Calendar allows you to move to dates quickly on one driver. It also allows you to add multiple log types to a date range.

Instructions with Images:

Step 1: Go to the ‘Logs’ page.

Step 2: Click the ‘Calendar’ tab at the bottom.

Step 3: Here you can change the Month, Day, and year you want to view.
Step 4: Add Group allows you to add a group of logs for a date range.
Info: The logs Calendar allows you to move to dates quickly on one driver. It also allows you to add multiple log types to a date range.

Add Group Example: The driver is inactive for 7 days, from 3/23 – 3/27. First enter the date range, the hit the ‘Tab’ key on your key board, this will fill in the ‘Quantity’. Next select the log type you would like to add. Rapidlog will automatically add that log type to the date range you selected.

Mark All Logs for Hours of Service Reaudit

Topic:

How to Re-Audit All Logs in the System

Instructions:

  1. Go to the ‘Audit’ Page in Rapidlog.
  2. Click the ‘wrench’ in the upper right.
  3. Click ‘Mark all logs for hours of service reaudit’.
  4. Click on the Start button to run the hours of service audit
  5. Info: Use this feature if you have made a change to Company/region/Terminal speed limits or jurisdiction.

Instructions with Images:

Step 1: Go to the ‘Audit’ Page in Rapidlog.

Step 2: Click the ‘wrench’ in the upper right.

Step 3: Click ‘Mark all logs for hours of service reaudit’.
Step 4: Click on the Start button to run the hours of service audit.
Info: Use this feature if you have made a change to Company/region/Terminal speed limits or jurisdiction.

Change User in RapidLog

Topic:

How to change users in RapidLog without closing the program.

Instructions:

  1. If you’re already logged in as a user, then you’ll need to click change user on the left side of the Home page.
  2. Enter in your user initials.
  3. Enter in your password. You may not have a password, in which case you’ll just leave the password field blank.
  4. Click OK to login with your new credentials

Instructions with Images:

Step 1: If you’re already logged in as a user, then you’ll need to click change user on the left side of the Home page.

Step 2: Enter in your user initials.
Step 3: Enter in your password. You may not have a password, in which case you’ll just leave the password field blank.
Step 4: Click OK to login with your new credentials