When opening Rapidlog you get Load License Manager window. Clicking authorize doesn’t fix the issue and you get a -22, -24, or -103 error.
Instructions:
Press the Windows key and R key on your keyboard at the same time. This will bring up the Run window. In the run window type services.msc and then click OK.
In the services window scroll down till you find Crypkey License. Click Crypkey License to select it and then click Stop on the left side of the window.
Press the Windows key and R key on your keyboard at the same time. In the run window type C:\Windows\System32 and then click OK.
You’ll need to find two files and delete them. Look for Crypserv.exe and Ckldrv.sys and delete both of those files.
Press the Windows key and R key on your keyboard at the same time. In the run window type RL5.ini and then click OK.
Look for the Data= line. Copy that line without copying Data= part.
Press the Windows key and R key on your keyboard at the same time. Paste the data line you copied and click OK.
In that folder look for SetupEx.exe and then double-click to run it.
Reboot your computer. Rapidlog should be working now.
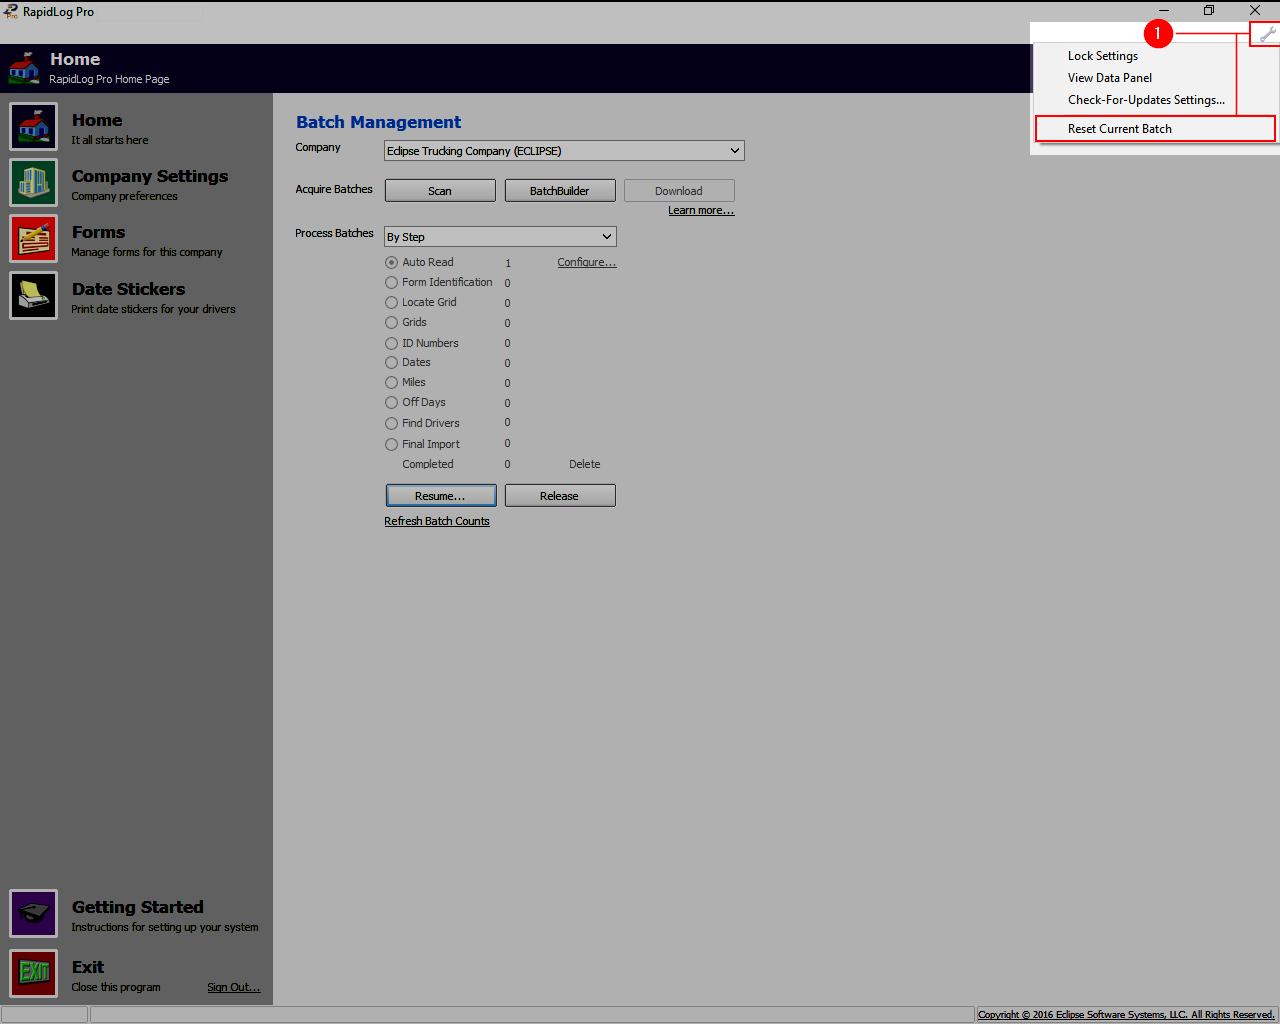
Click the wrench in the upper right, then select Reset Current batch.
Click the wrench again, then select Reset a batch.
Right click the folder.
Info – Use the date modified to sort by most recent date. This should bring the batch you just reset to the top of the list.
Select Open from the drop down list.
In the folder, find any blank images.
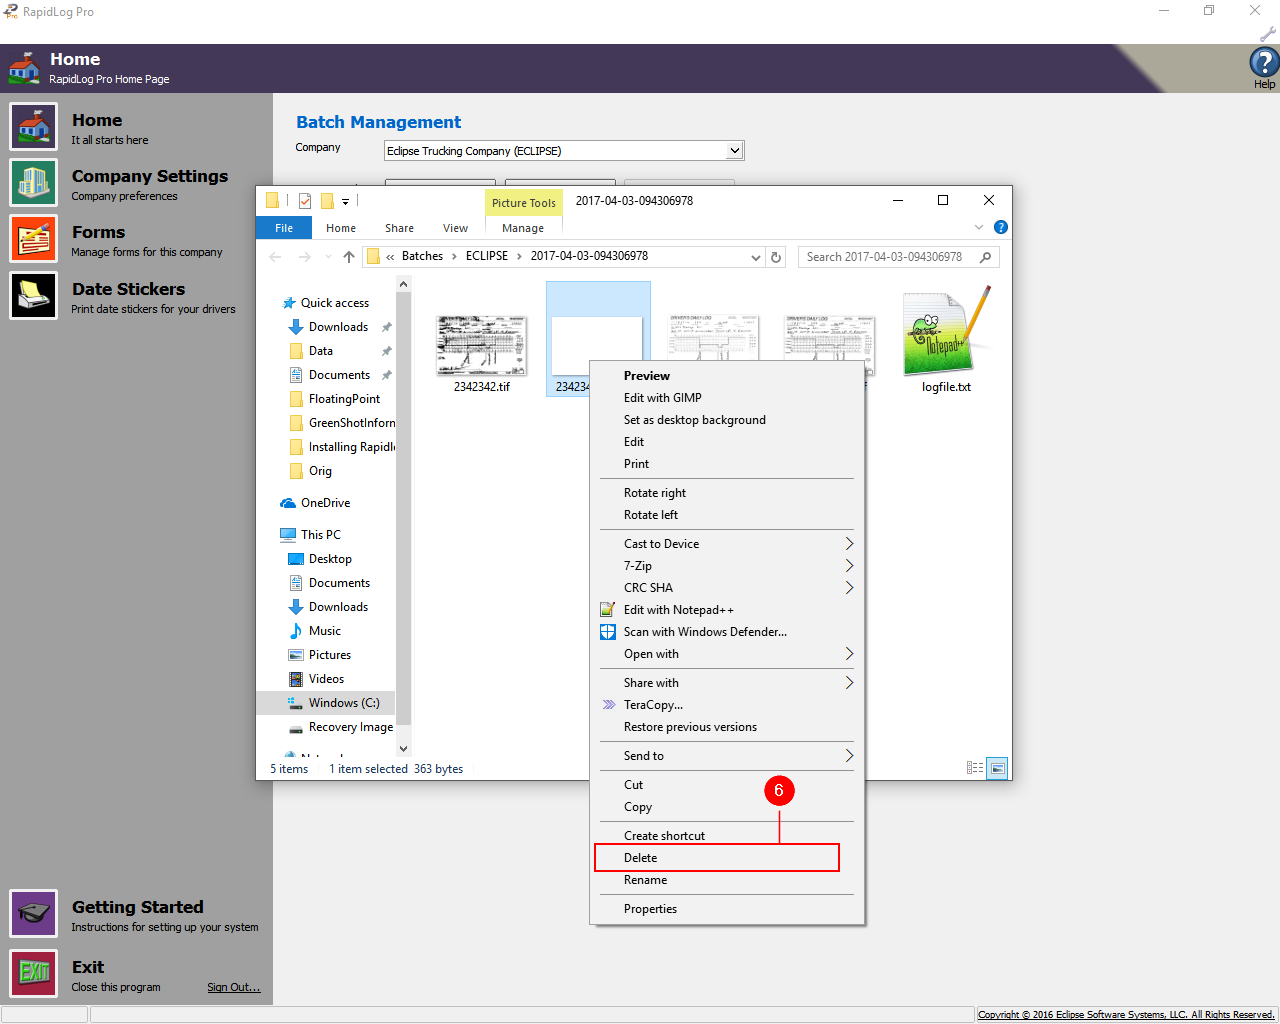
Right click the blank image, then select delete.
Info – This error is caused by having a blank image in the batch. This can happen when a log is put into the scanner incorrectly or when duplex scanning is turned on.
Instructions with Images:
Info – This error is caused by having a blank image in the batch. This can happen when a log is put into the scanner incorrectly or when duplex scanning is turned on.
Step 1: Click the wrench in the upper right, then select Reset Current batch.
Step 2: Click the wrench again, then select Reset a batch.
Step 3: Right click the folder. Info – Use the date modified to sort by most recent date. This should bring the batch you just reset to the top of the list.
Step 4: Select Open from the drop down list.
Step 5: In the folder, find any blank images.
Step 6: Right click the blank image, then select delete.
How to Fix Error: Future Date Not Allowed in RapidLog Pro
Instructions:
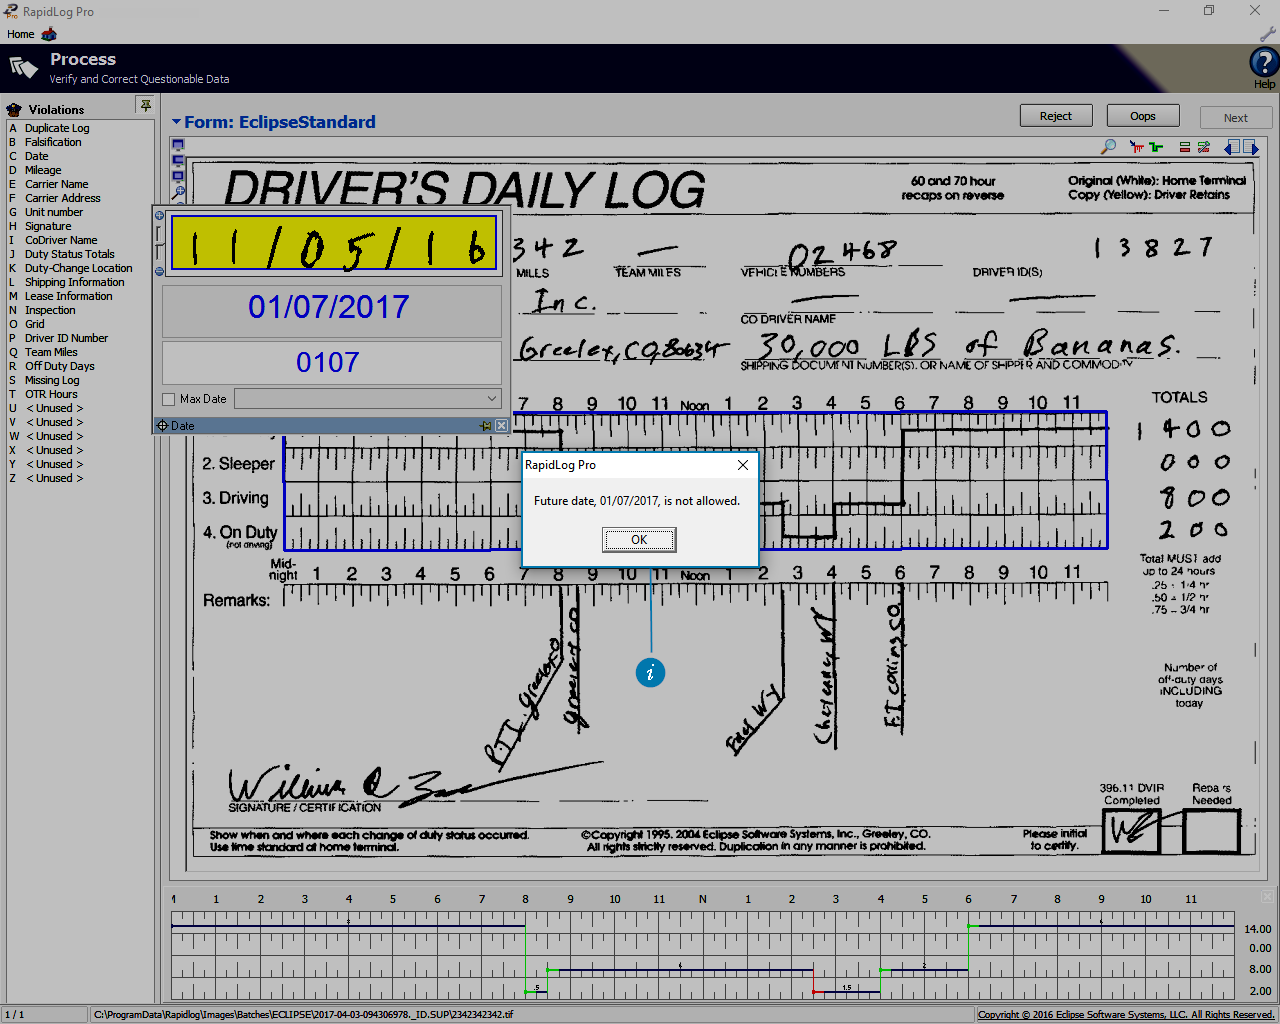
Info – This error is either because you’re entering a date into the future or because your date format isn’t compatible with RapidLog. Rapidlog can only hand a US date format MM/DD/YYYY
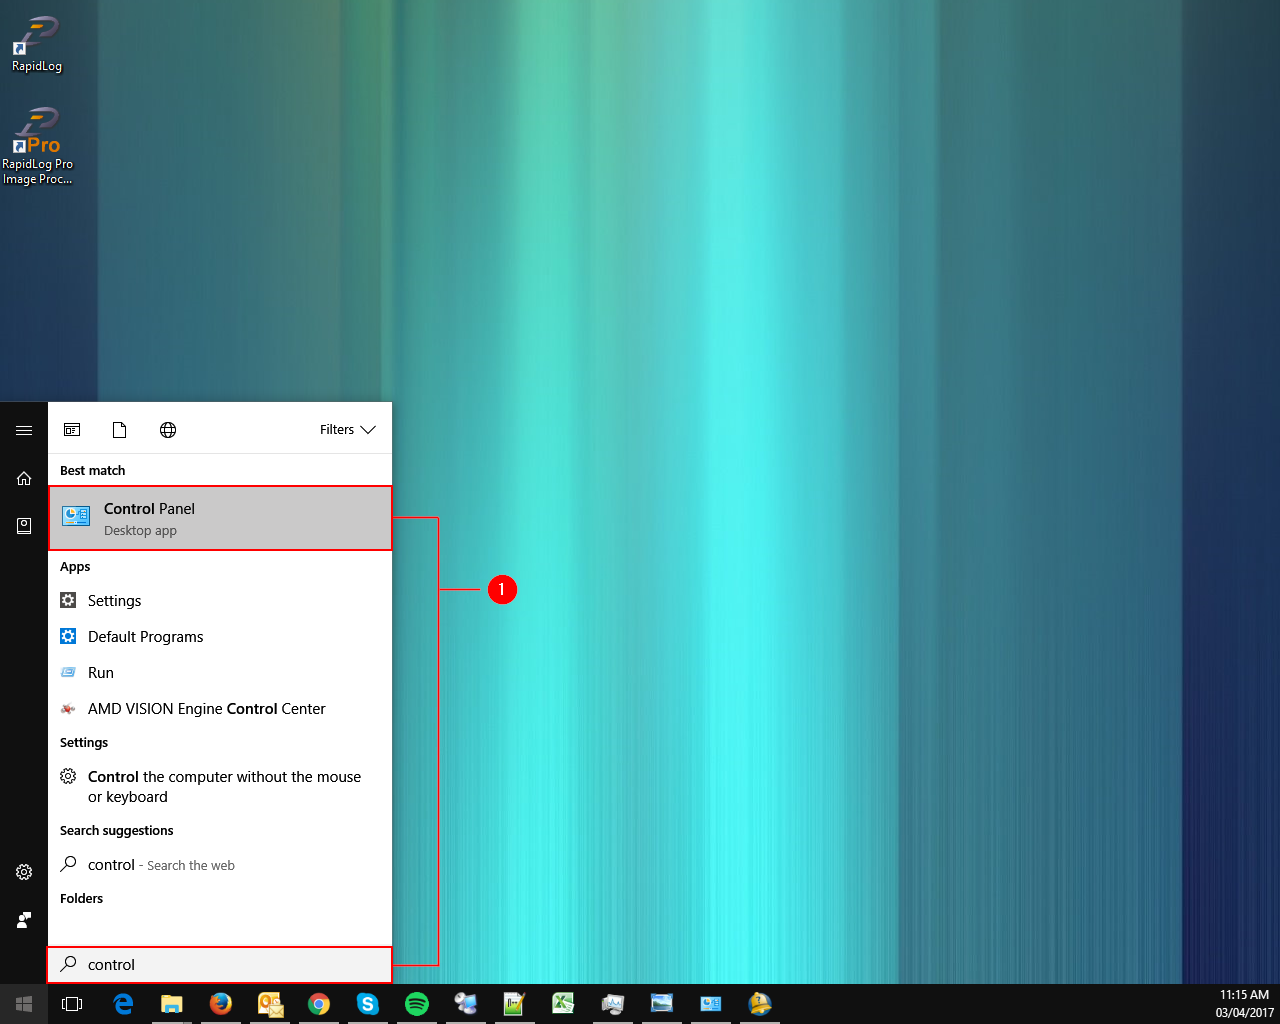
First click on your start button, then type in control. You should see control panel in the top of the list. Click on Control Panel.
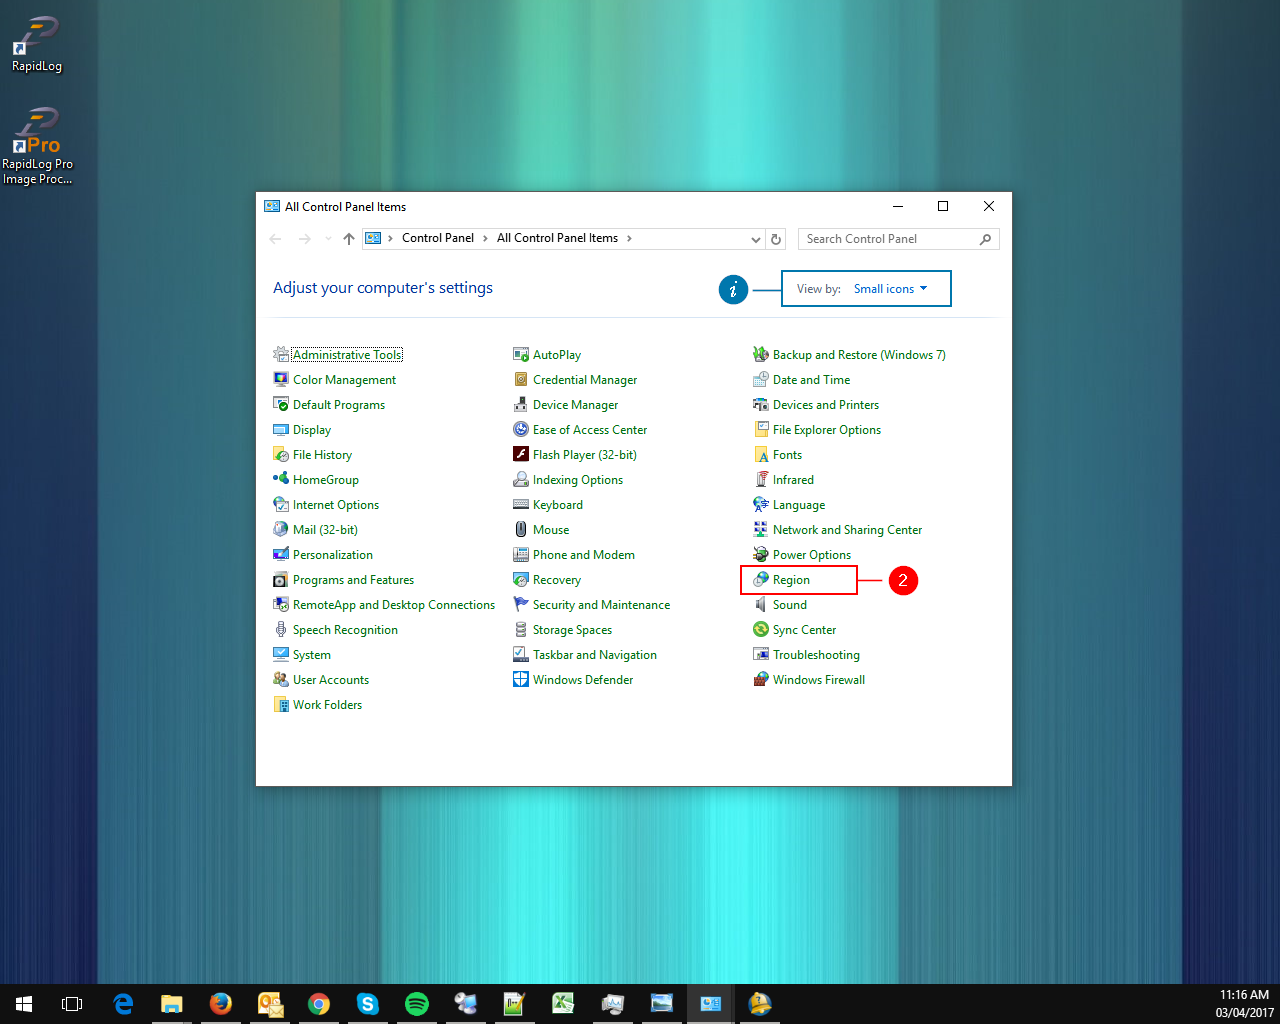
Click on Region
Info – Use the view by to sort by Icons.
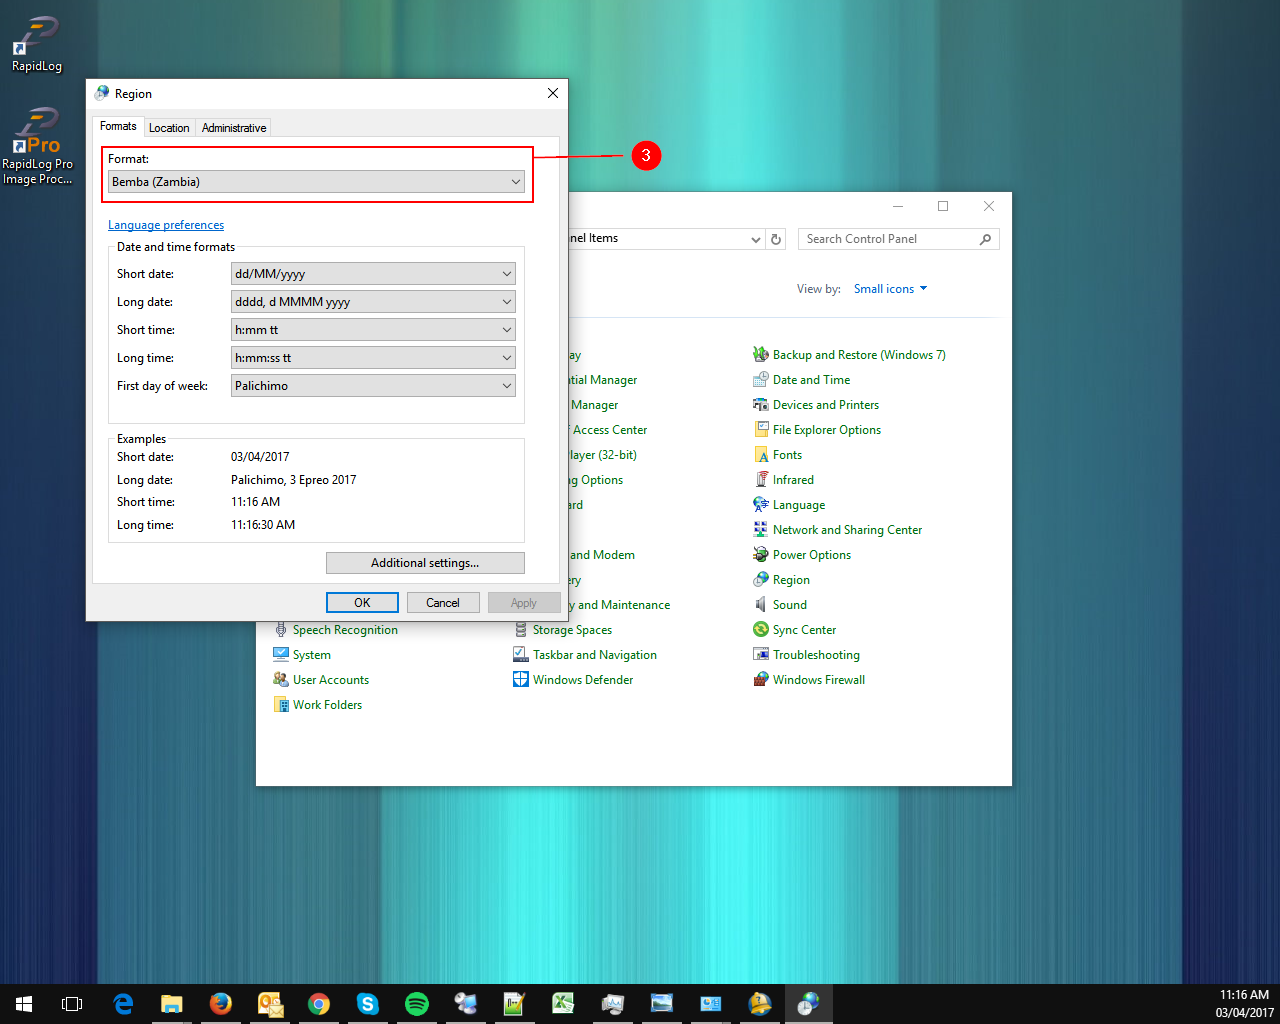
Use the drop down menu in the format section. Scroll until you find English (United States).
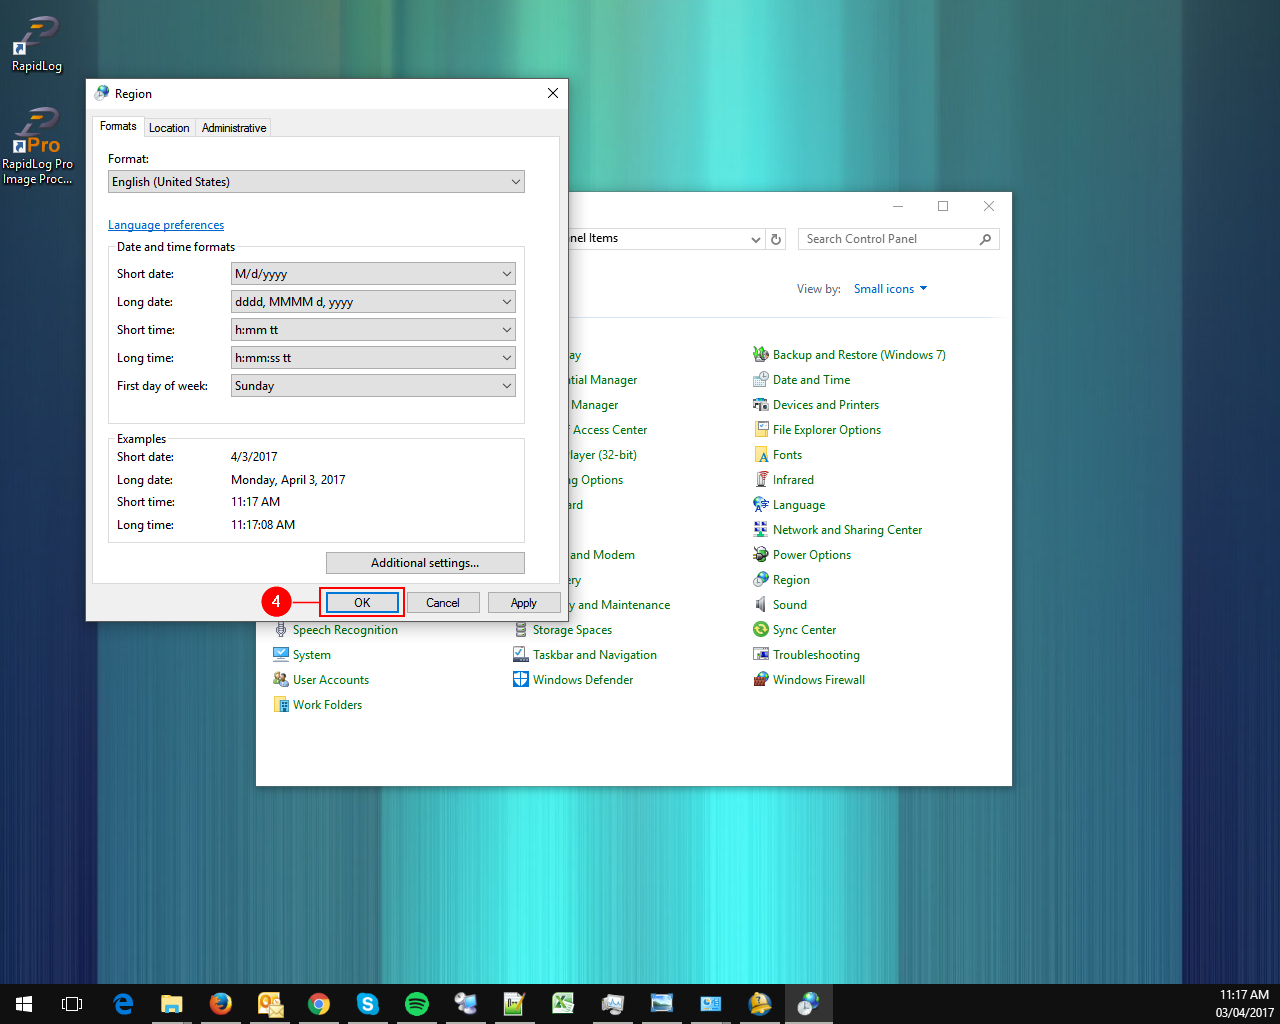
Click OK to save the changes. Now you can open RapidLog Pro and continue processing.
Instructions with Images:
Info – This error is either because you’re entering a date into the future or because your date format isn’t compatible with RapidLog. RapidLog can only hand a US date format MM/DD/YYYY
Step 1: First click on your start button, then type in control. You should see control panel in the top of the list. Click on Control Panel.
Step 2: Click on Region. Info – Use the view by to sort by Icons.
Step 3: Use the drop down menu in the format section. Scroll until you find English (United States).
Step 4: Click OK to save the changes. Now you can open RapidLog Pro and continue processing.
How do I connect with a RapidLog technician to get support through live chat?
Instructions:
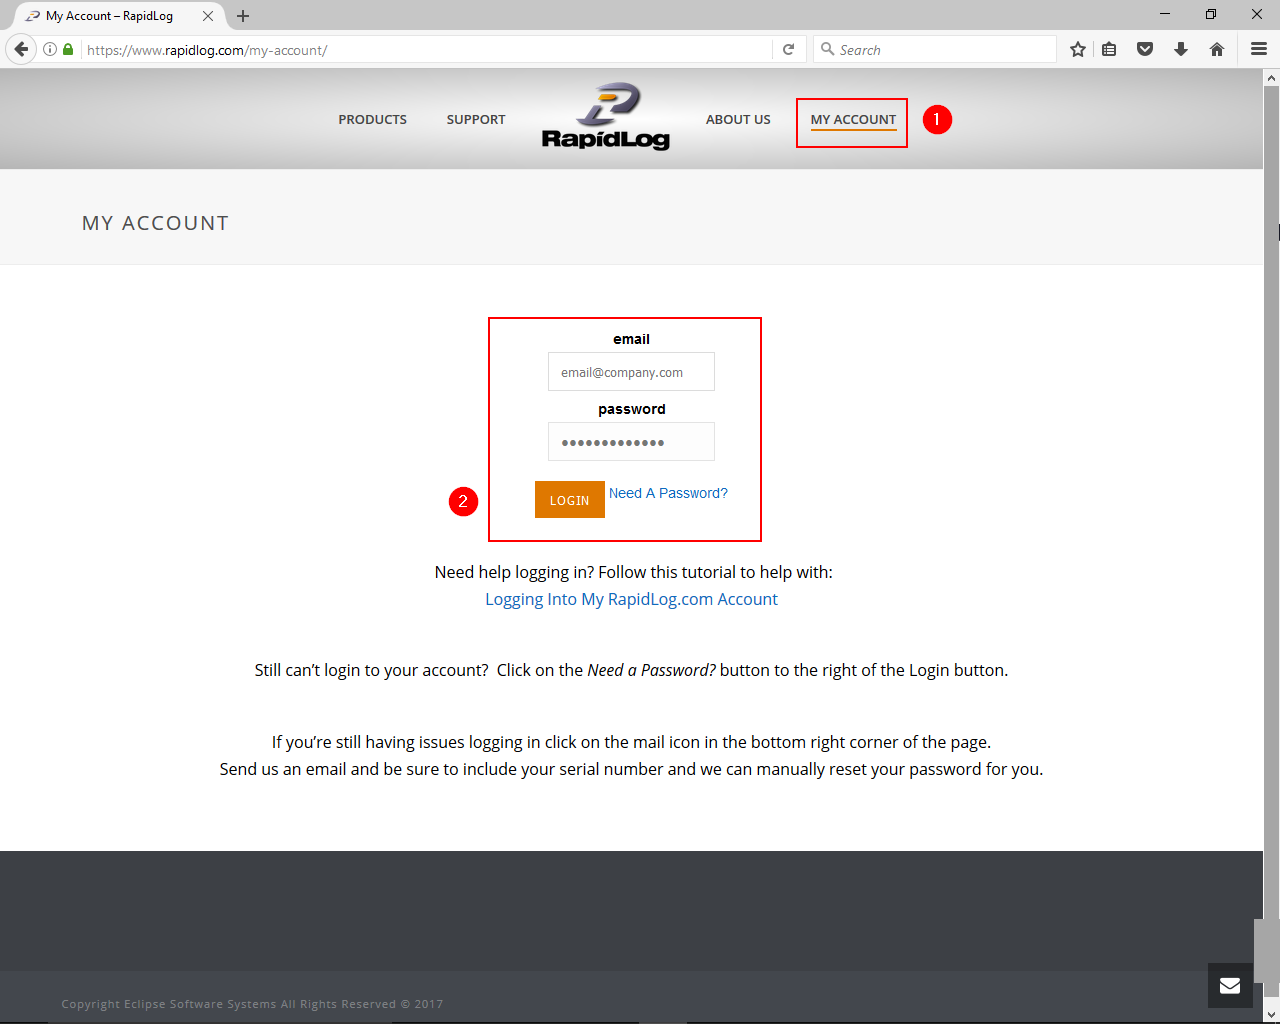
Click on the My Account page.
Type in your credentials and click Login.
Info: If you are already logged in you can skip this step.
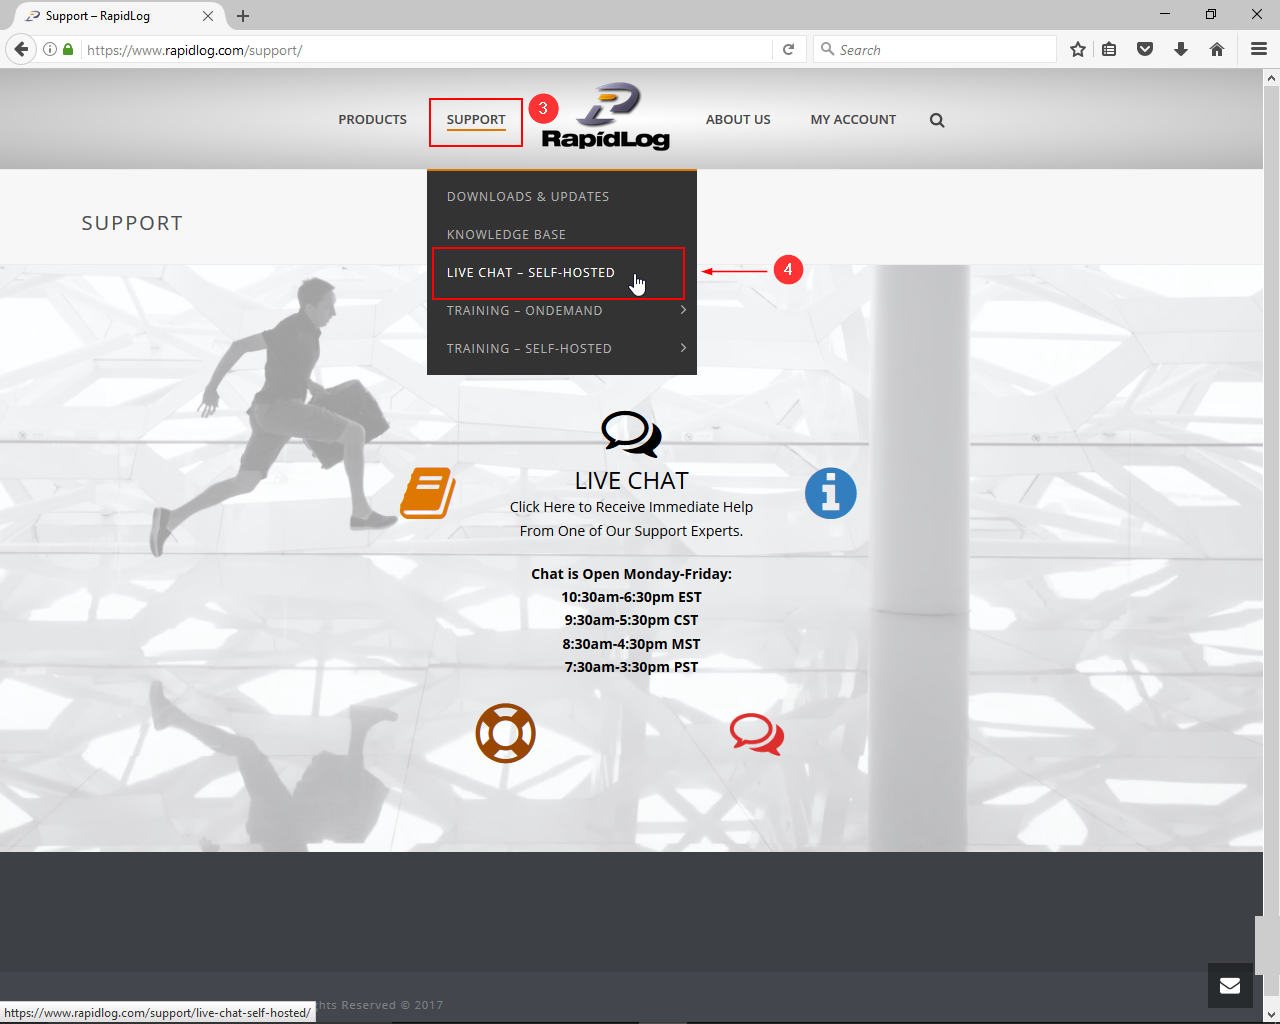
Hover over Support option in the Menu bar.
Click on the Live Chat option.
Info: It will show either OnDemand or Self-Hosted depending on your subscription.
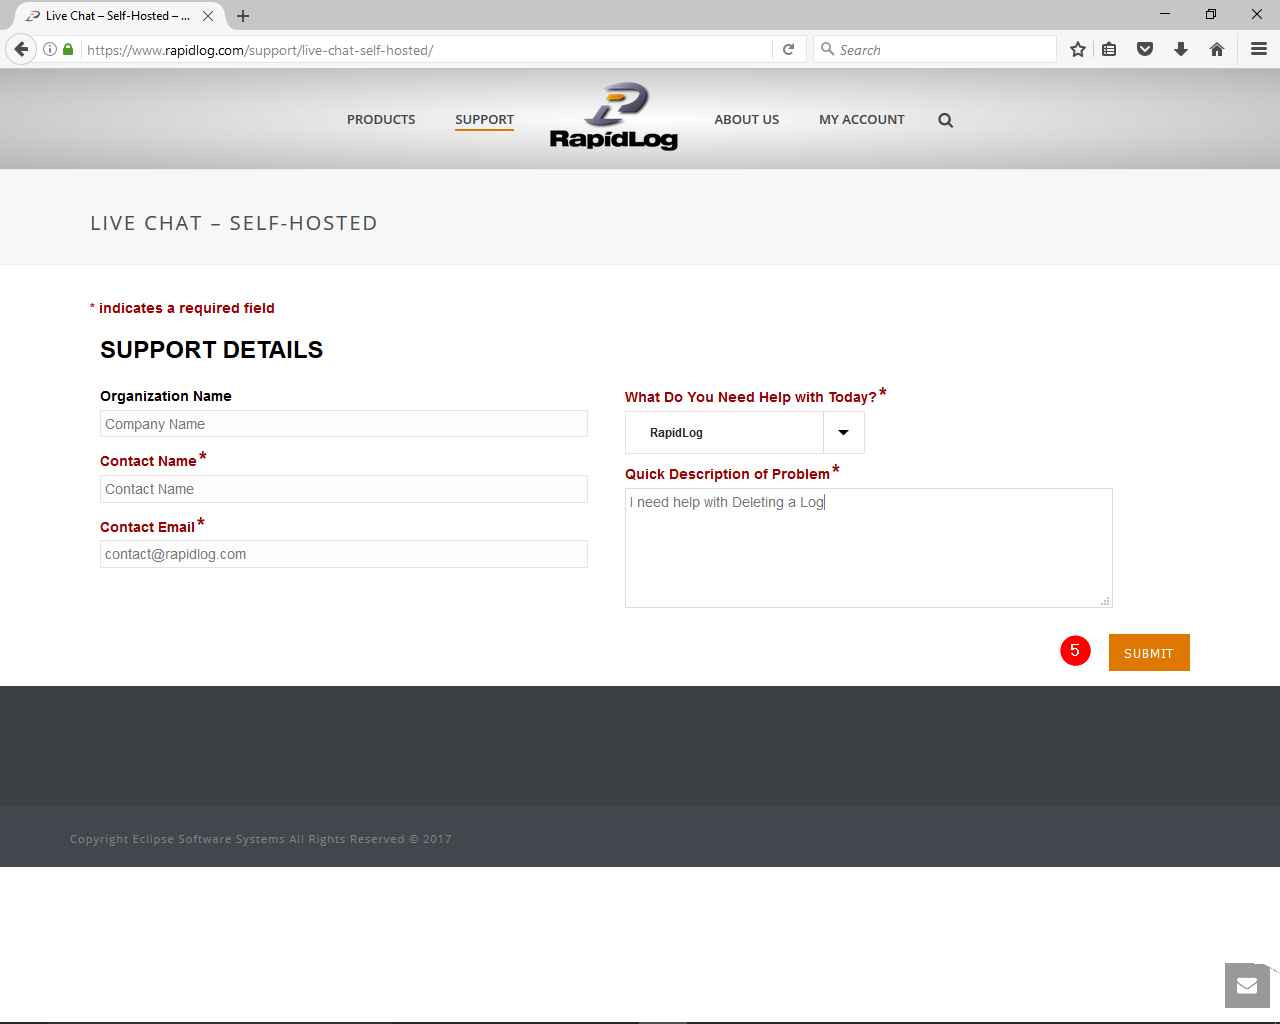
Fill out your contact information and click on the Submit button
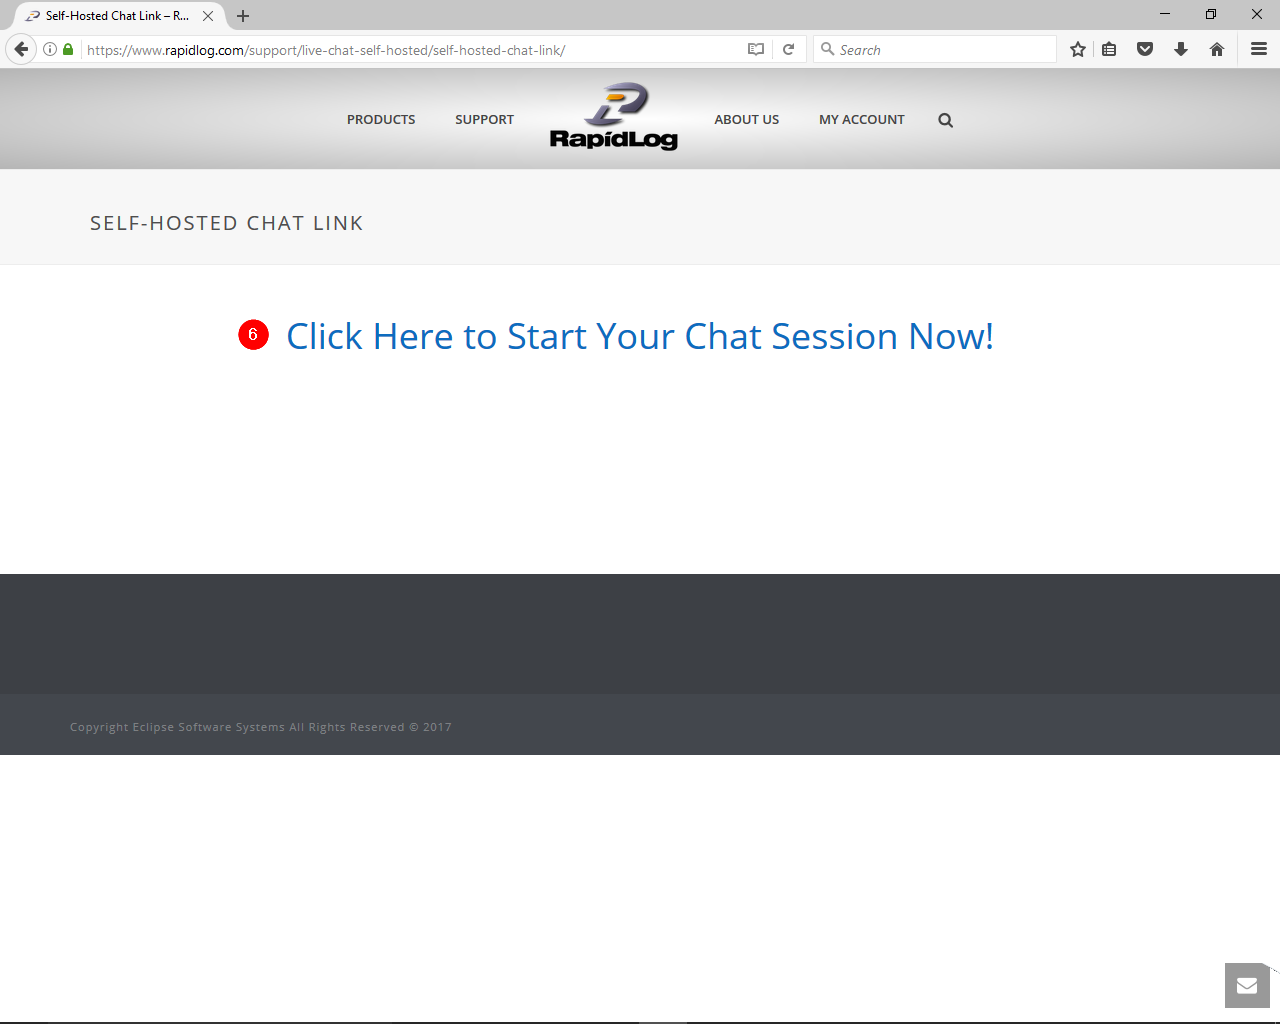
Click on the ‘Click Here to Start Your Chat Session Now!’ link.
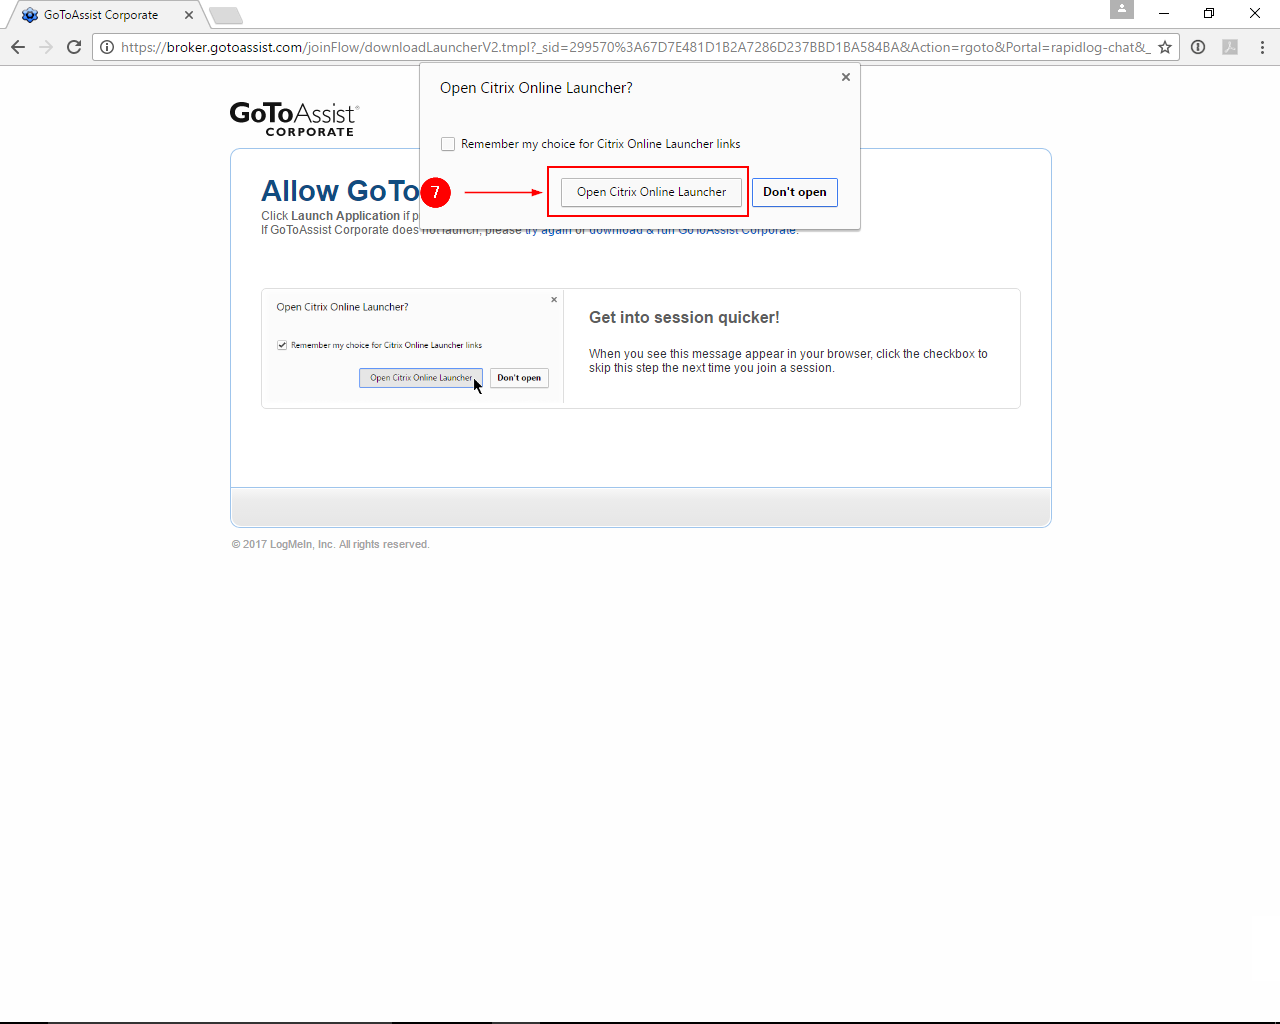
Google Chrome – Click the ‘Open Citrix Online Launcher’ button.
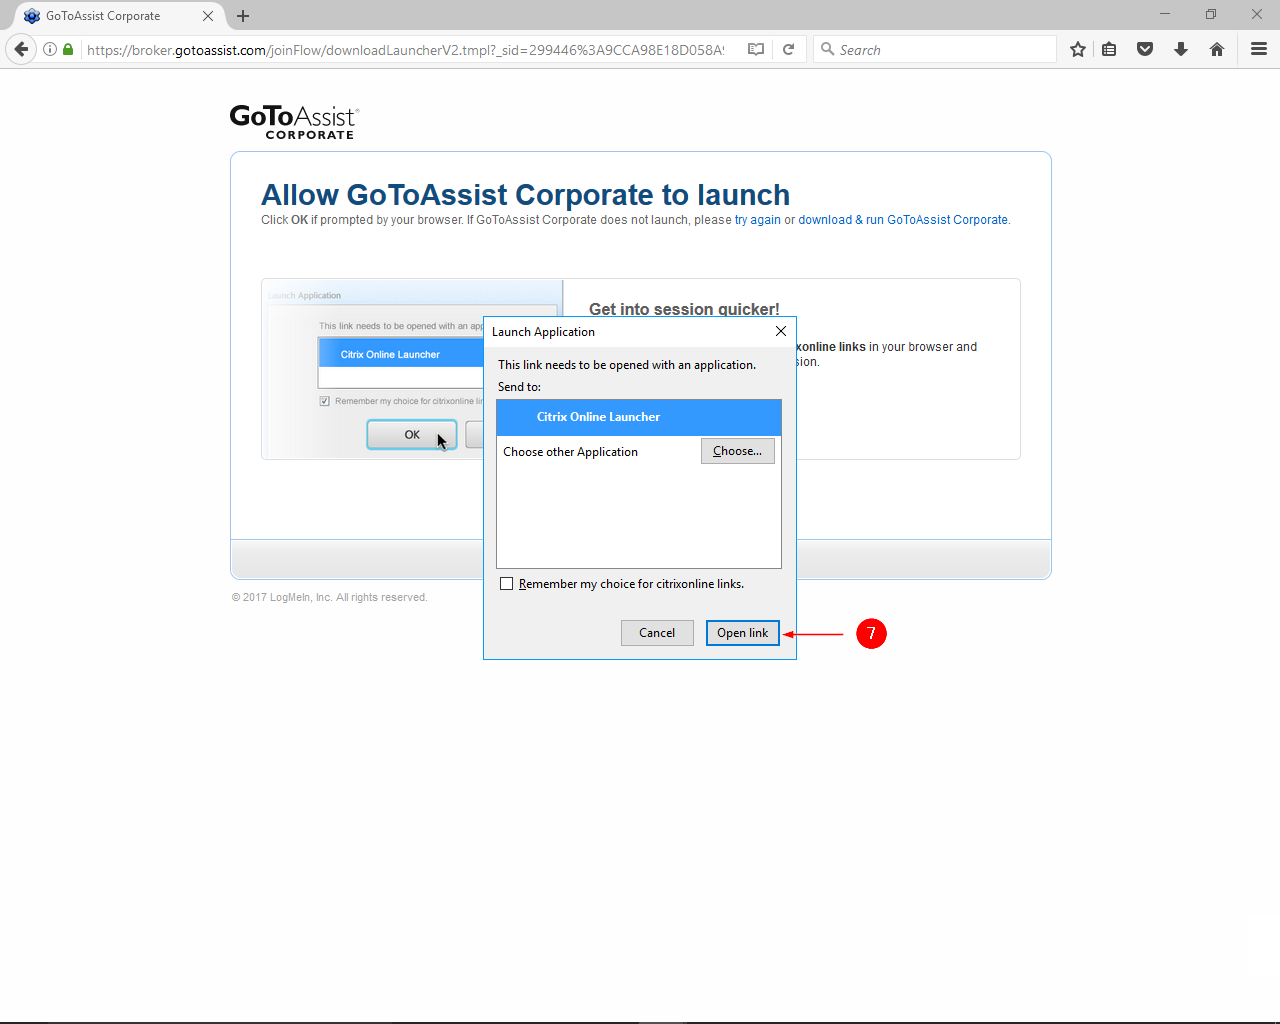
Mozilla Firefox – Click the ‘Open Link’ button.
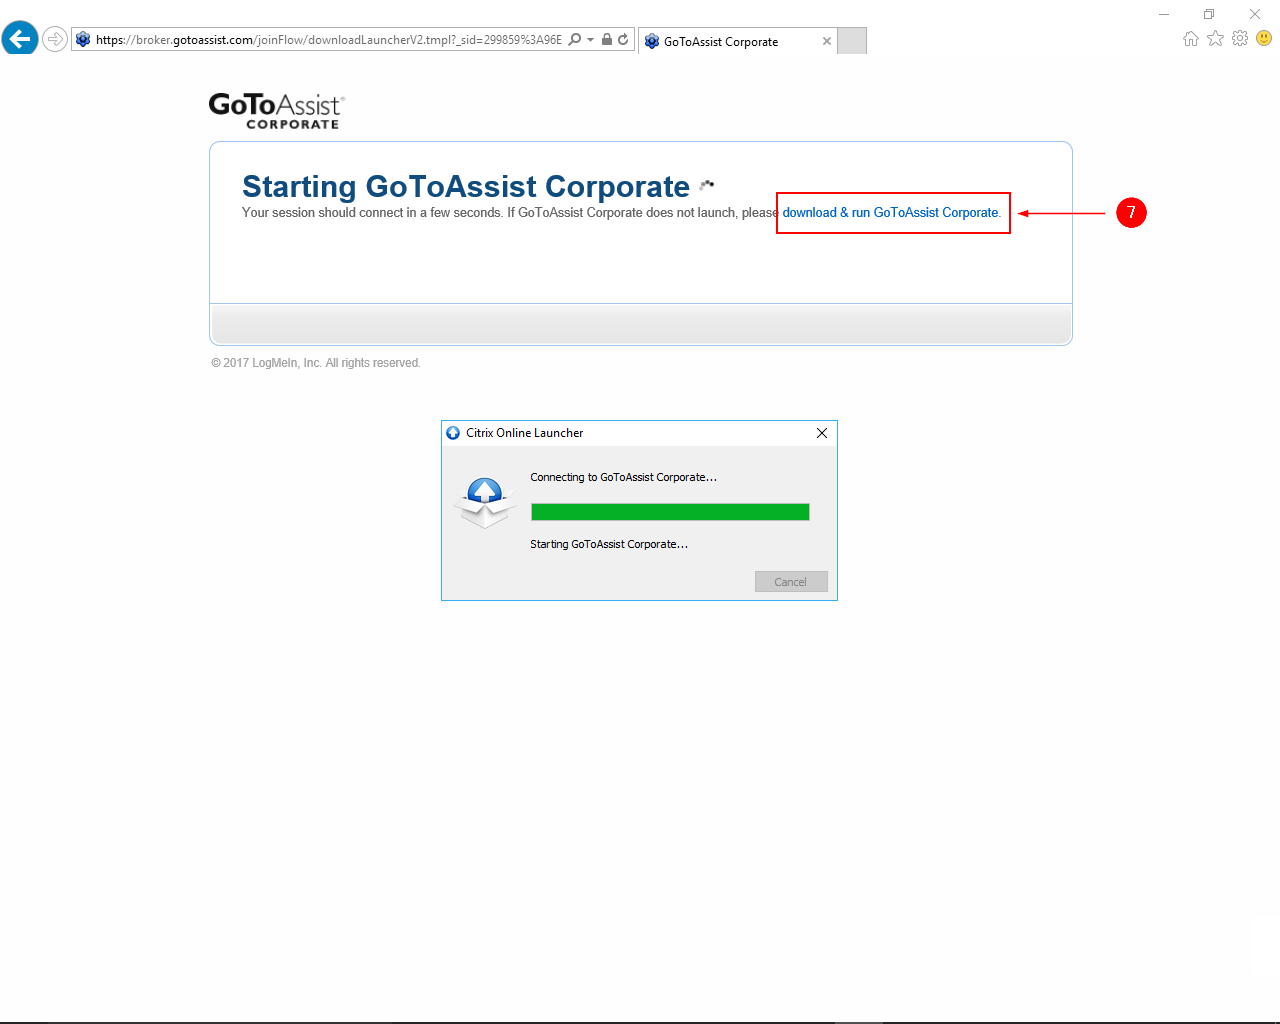
Internet Explorer – It should open up automatically. If it doesn’t click on the ‘download & run GoToAssist Corporate’ option and then run the program.
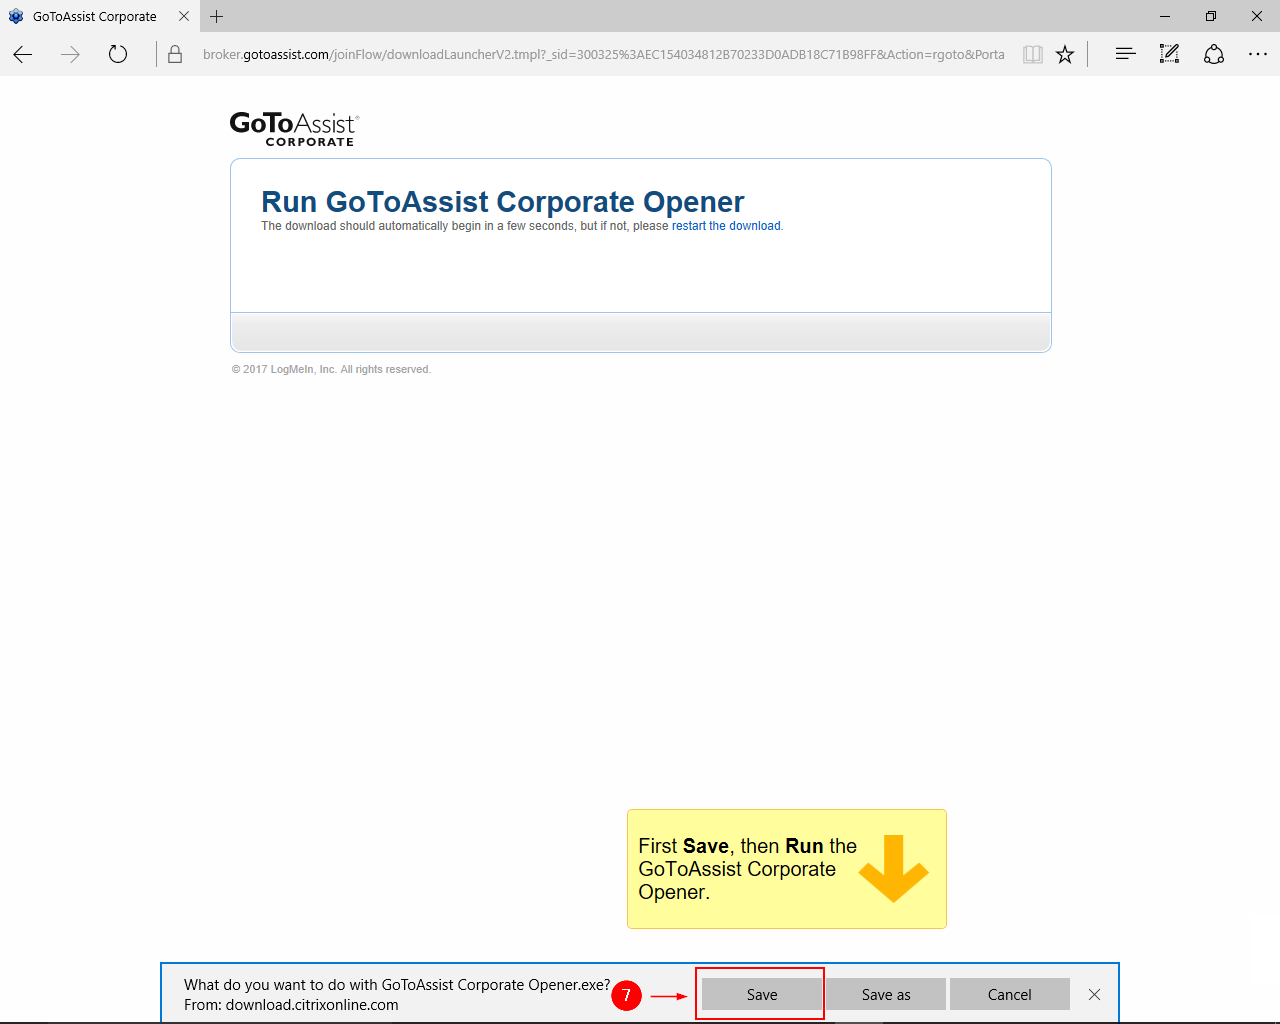
Microsoft Edge:
Click on the ‘Save’ button down below.
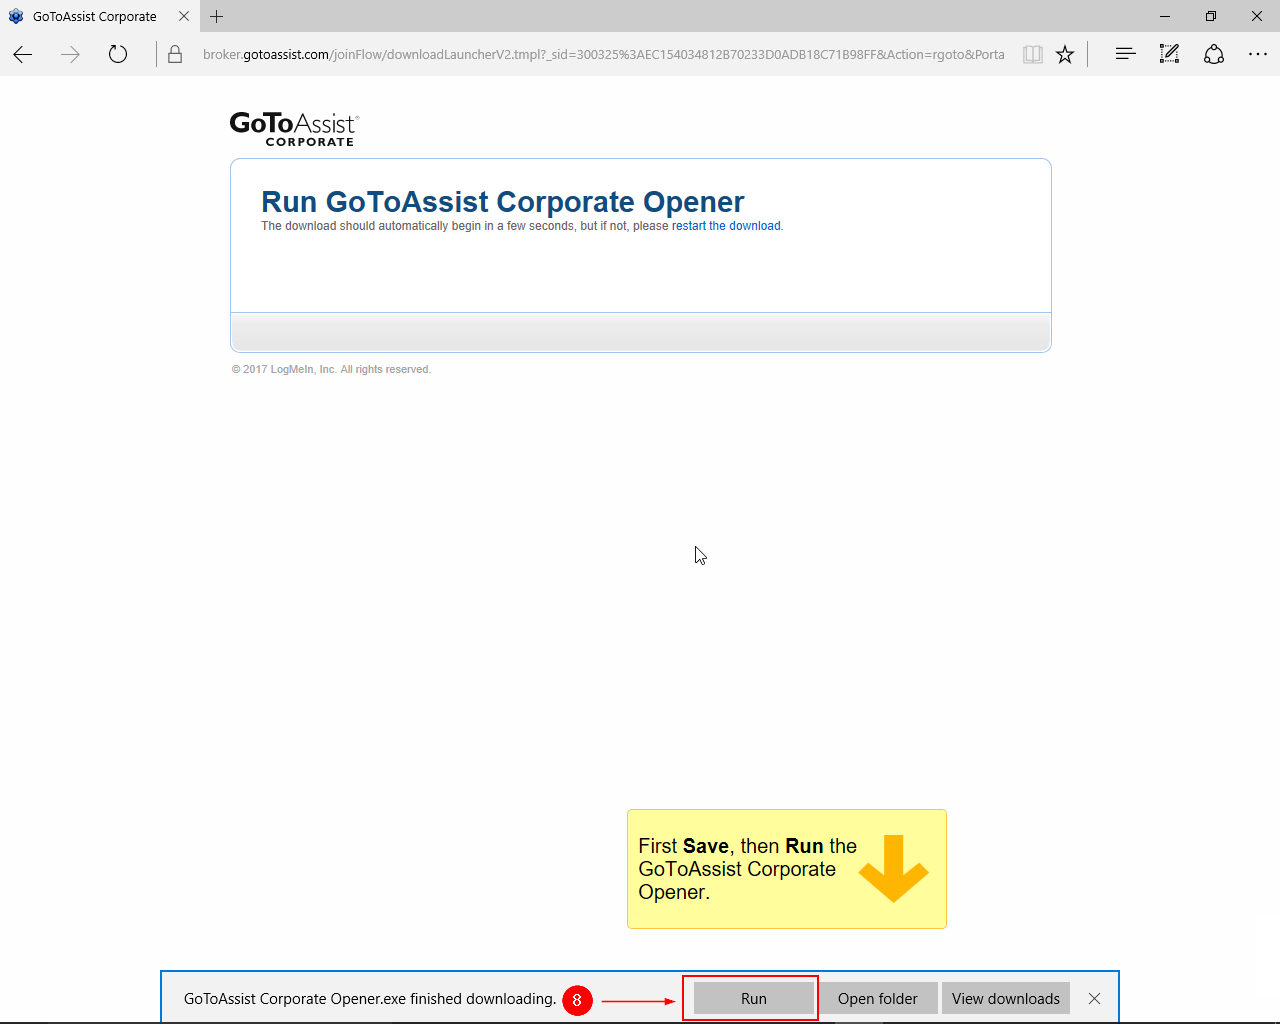
Click on the ‘Run’ button after the download has finished.
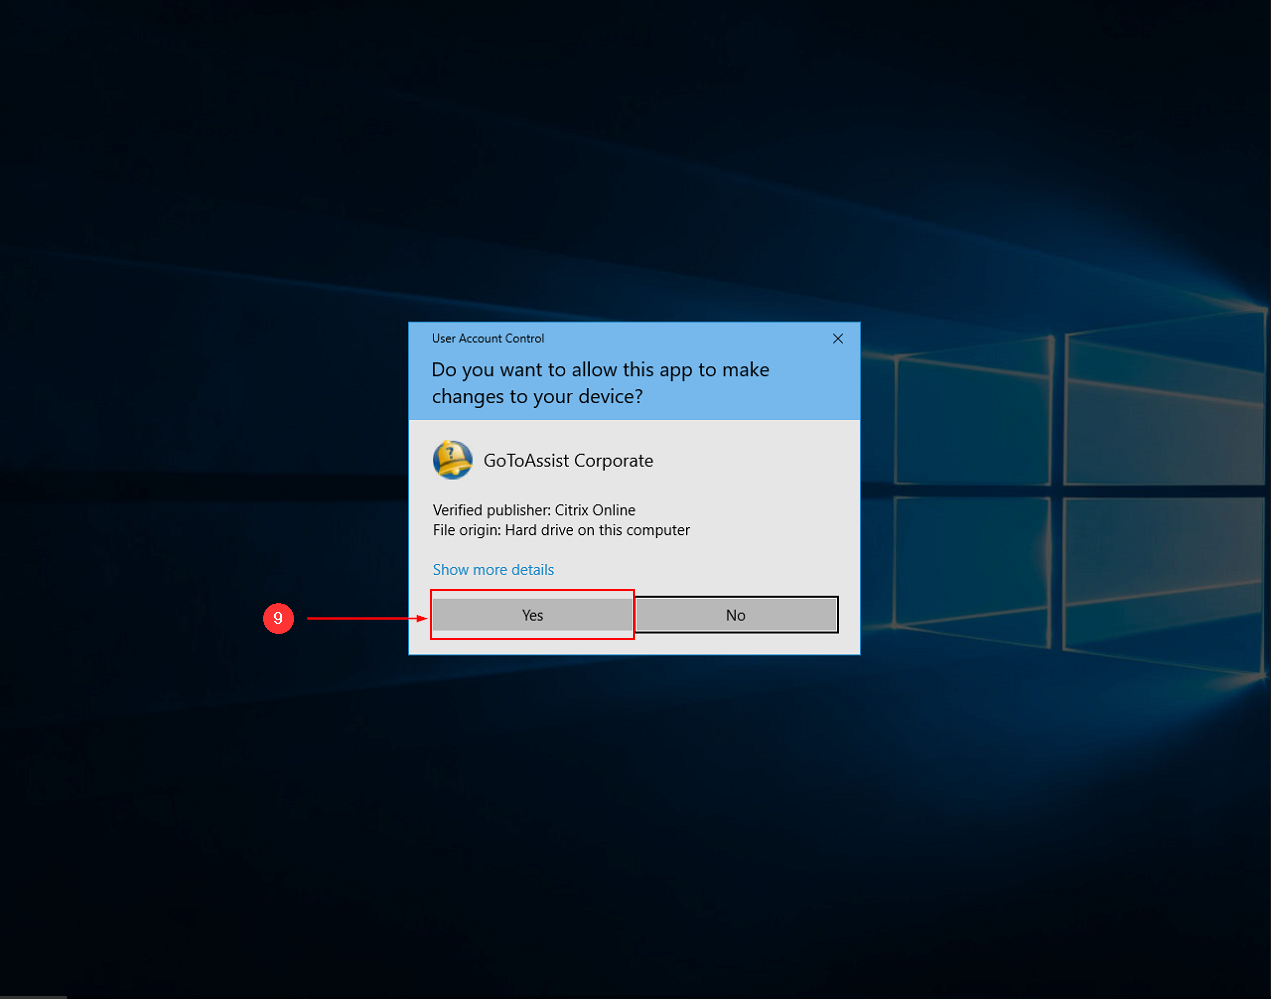
Click on the ‘Yes’ button when Windows asks you if you want to run the program.
Note: At this point the install should be finishing up and connecting you to a RapidLog technical support representative.
Instructions:
Step 1: Click on the My Account page. Step 2: Type in your credentials and click Login. Info: If you are already logged in you can skip this step.
Step 3: Hover over Support option in the Menu bar. Step 4: Click on the Live Chat option. Info: It will show either OnDemand or Self-Hosted depending on your subscription.
Step 5: Fill out your contact information and click on the Submit button.
Step 6: Click on the ‘Click Here to Start Your Chat Session Now!’ link.
Step 7 – Google Chrome: Click the ‘Open Citrix Online Launcher’ button.
Step 7 – Mozilla Firefox: Click the ‘Open Link’ button.
Step 7 – Internet Explorer: It should open up automatically. If it doesn’t click on the ‘download & run GoToAssist Corporate’ option and then run the program.
Step 7 – Microsoft Edge: Click on the ‘Save’ button down below.
Step 8 – Microsoft Edge: Click on the ‘Run’ button after the download has finished.
Step 9: Click on the ‘Yes’ button when Windows asks you if you want to run the program. Note: At this point the install should be finishing up and connecting you to a RapidLog technical support representative.