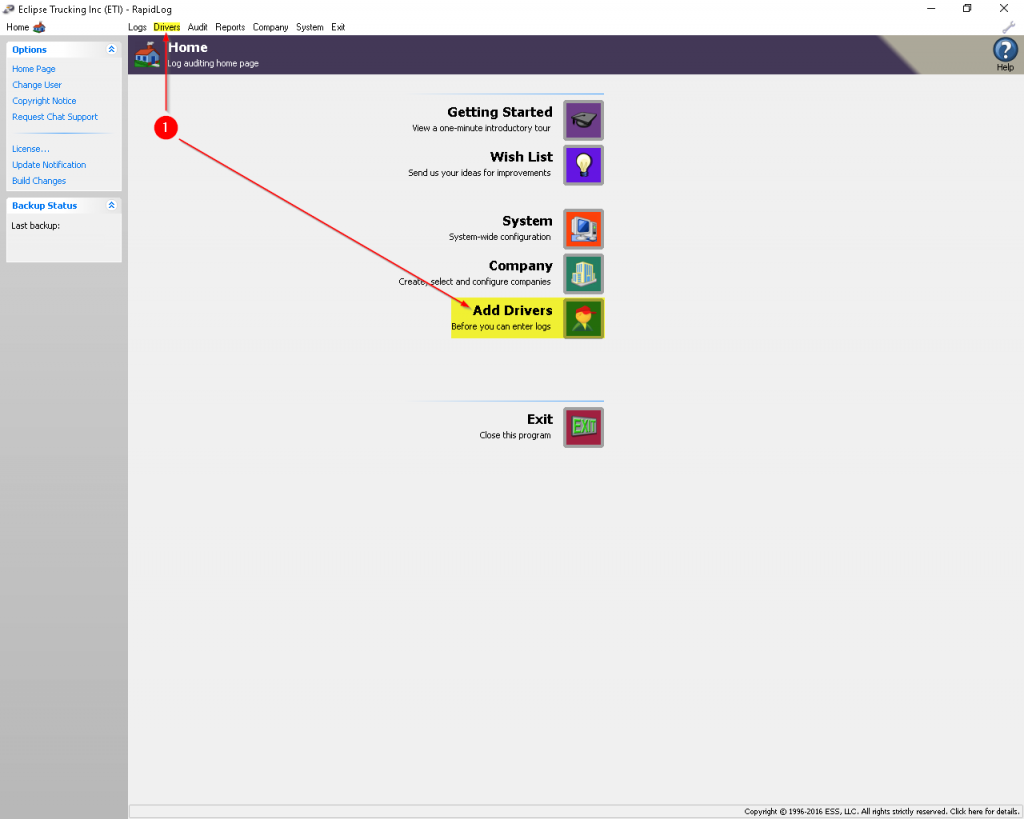
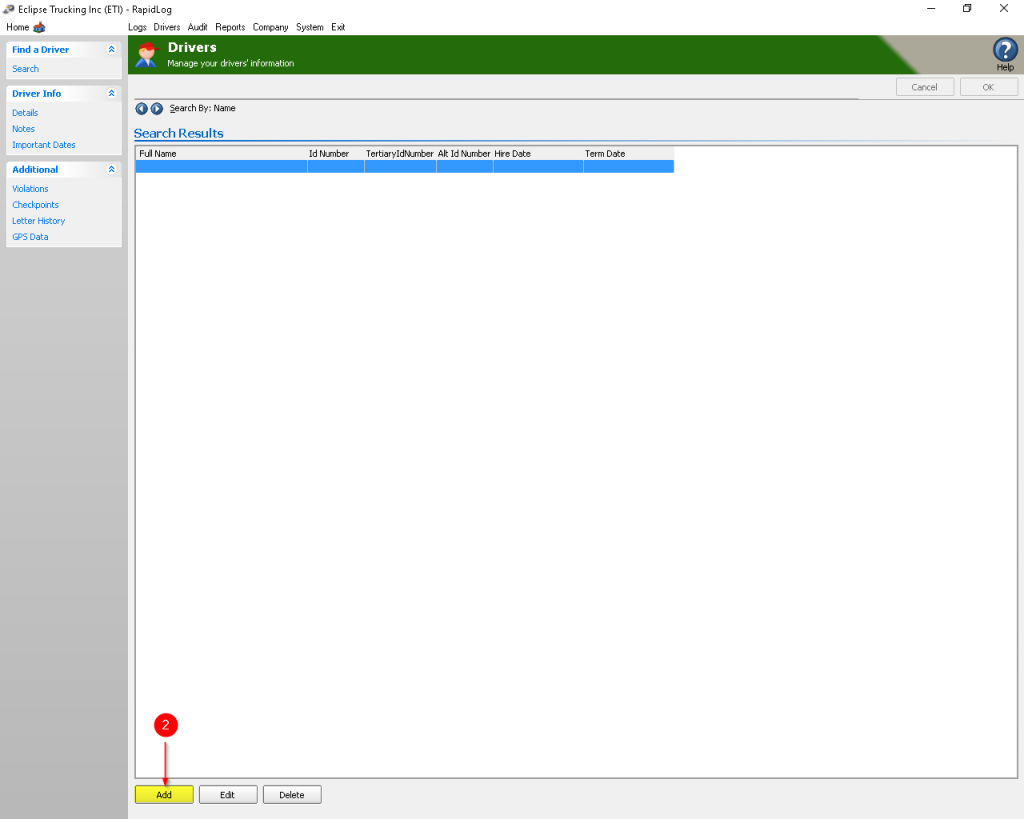
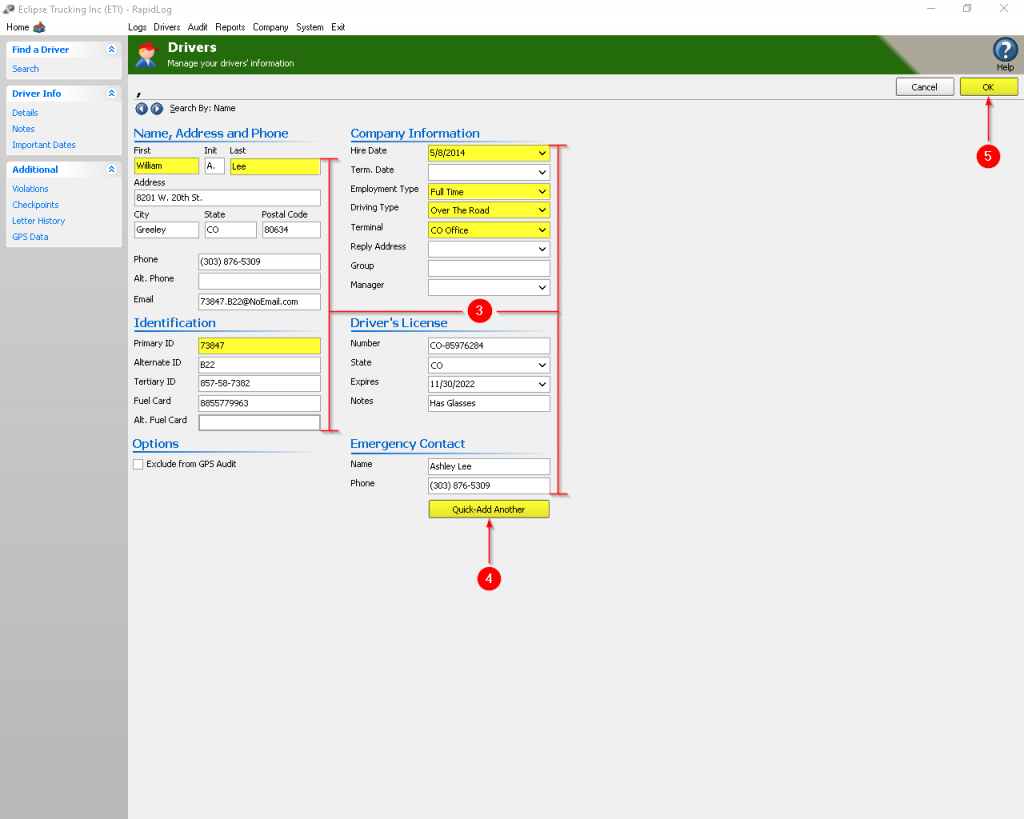
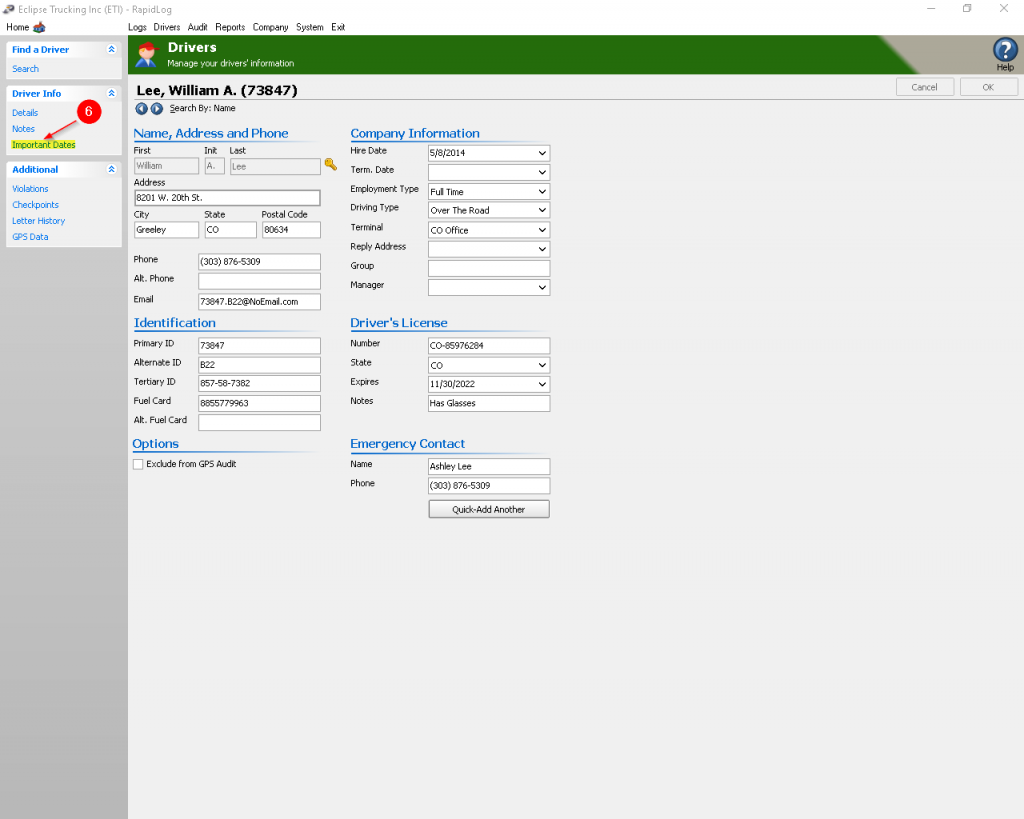
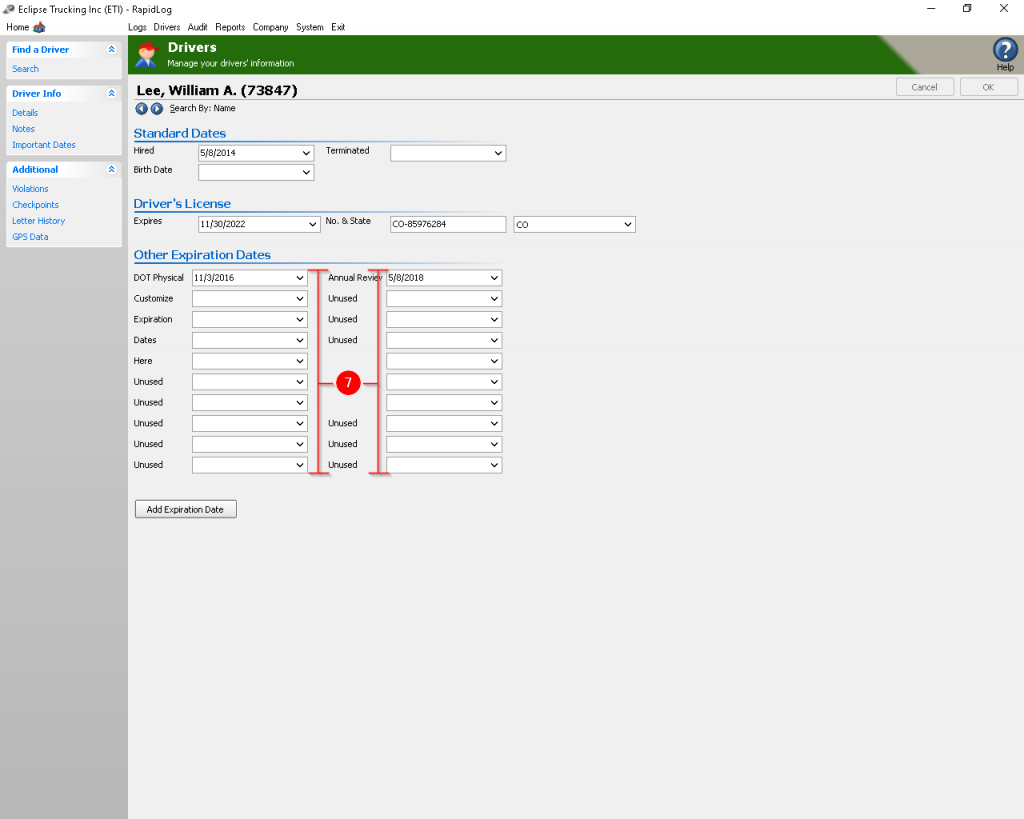
1. Adding Drivers 1. Click on the ‘Drivers’ tab OR icon. 2. Click on the ‘Add’ Button. 3. Fill out driver information. Highlighted fields are required, all others are optional. 4. Click ‘Quick-Add Another’ to add another driver’5. Click ‘Ok’ to save the last driver you enter. *Optional*6. Click on ‘Important Dates’. 7. Add customized expiration dates by changing the text ‘Unused’ to the appropriate item and adding an expiration date. Quick Start Navigation Company SetupAdd DriversRapidLog Pro ConfigurationImage ConfigurationRapidLog Pro ProcessingLITE Processing (Optional)Checkpoints (Optional)Logs PageAuditing LogsRunning Reports