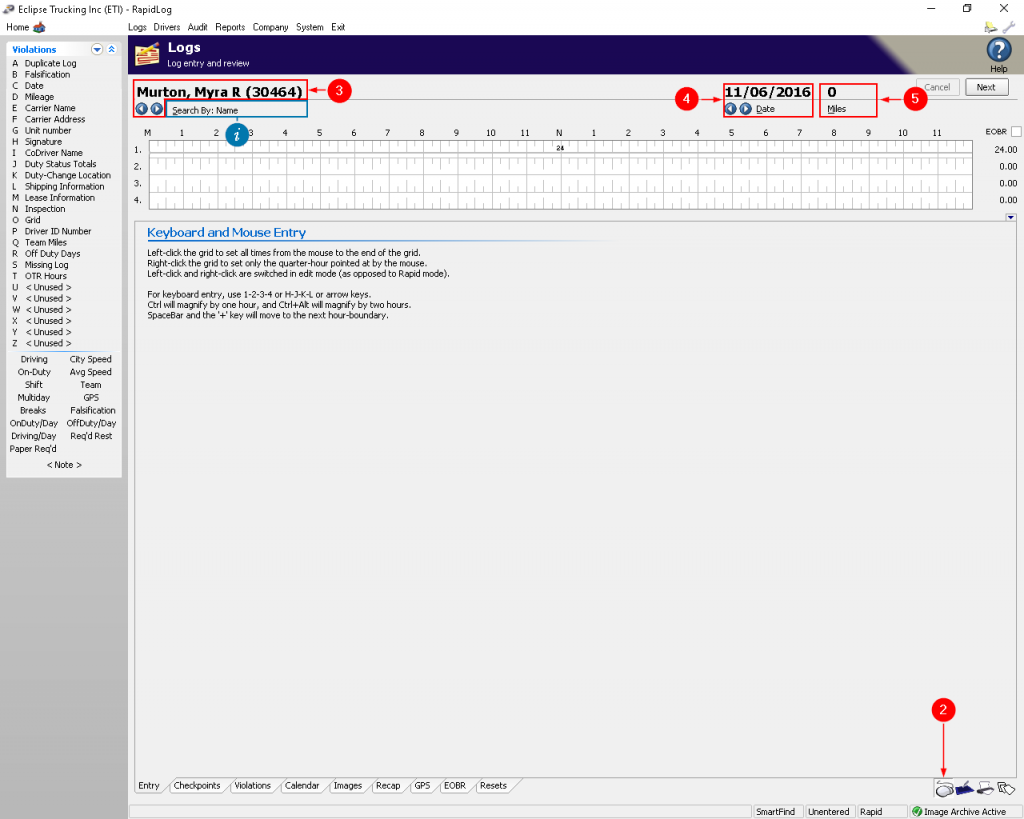
2. Click on the mouse icon to change to ‘Mouse and Keyboard’ entry.
3. Change to the driver of the log that you’re going to enter. If typing, enter the driver name last, first.
i: You can change the search to look for drivers by Name, ID, Alt ID, and Tertiary ID number.
4. Change to the date for the log you’re going to enter.
5. Enter the number of miles the driver wrote on the log.
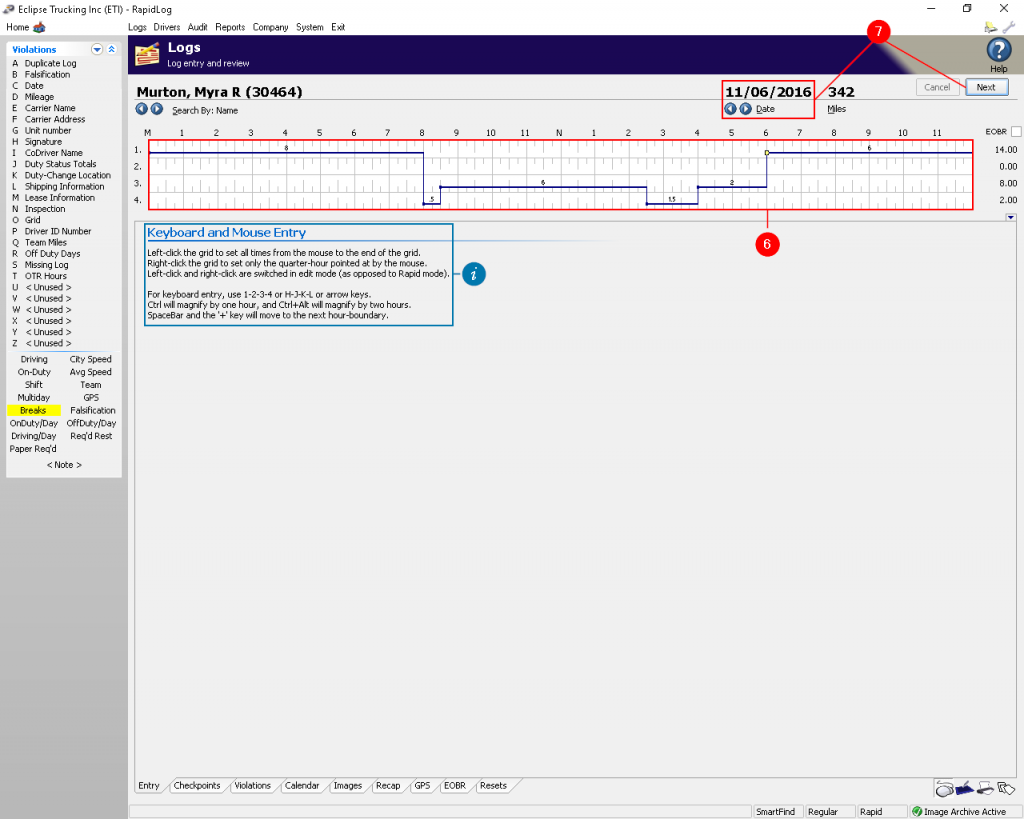
6. Use the mouse/keyboard to draw the grid. Refer to the blue info box on this page for detailed instructions.
i. Follow these instructions for mouse\keyboard entry.
7. Move to the next day by changing the date or clicking the ‘Next’ button.
2. Pick & Configure Scanner
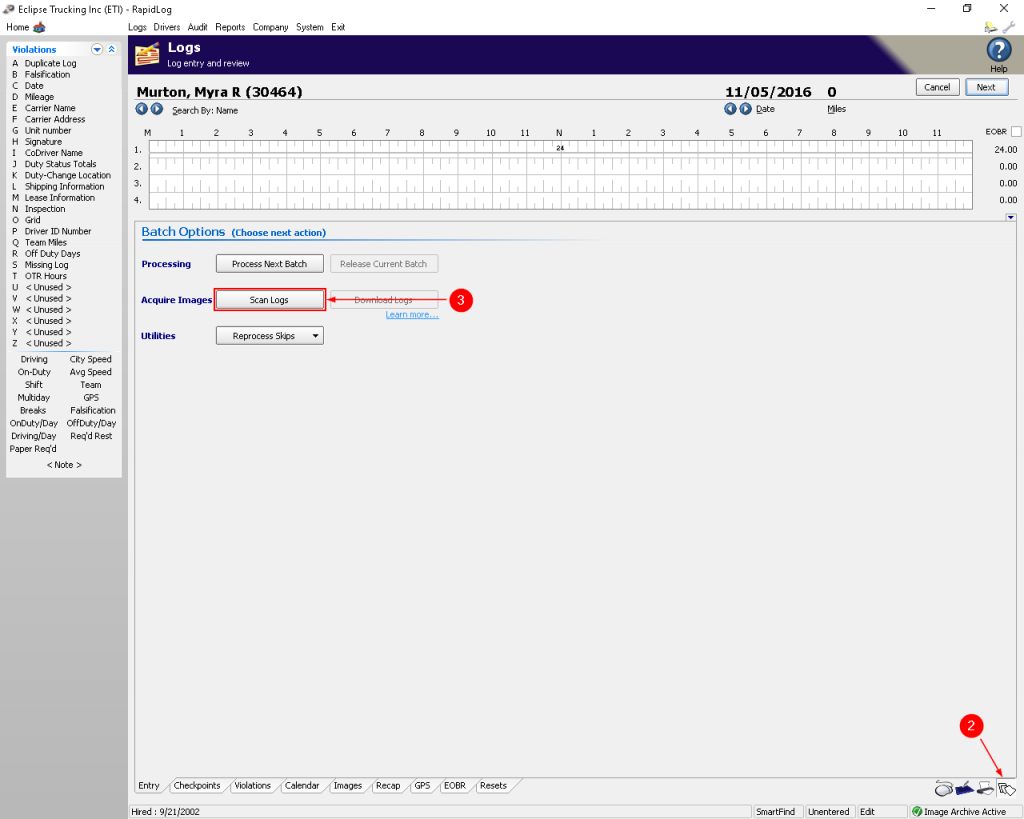
1. Click on the ‘Logs’ tab OR icon.
2. Click on the paper icon to change to scanning entry.
3. Click the ‘Scan Logs’ button under Batch Options.
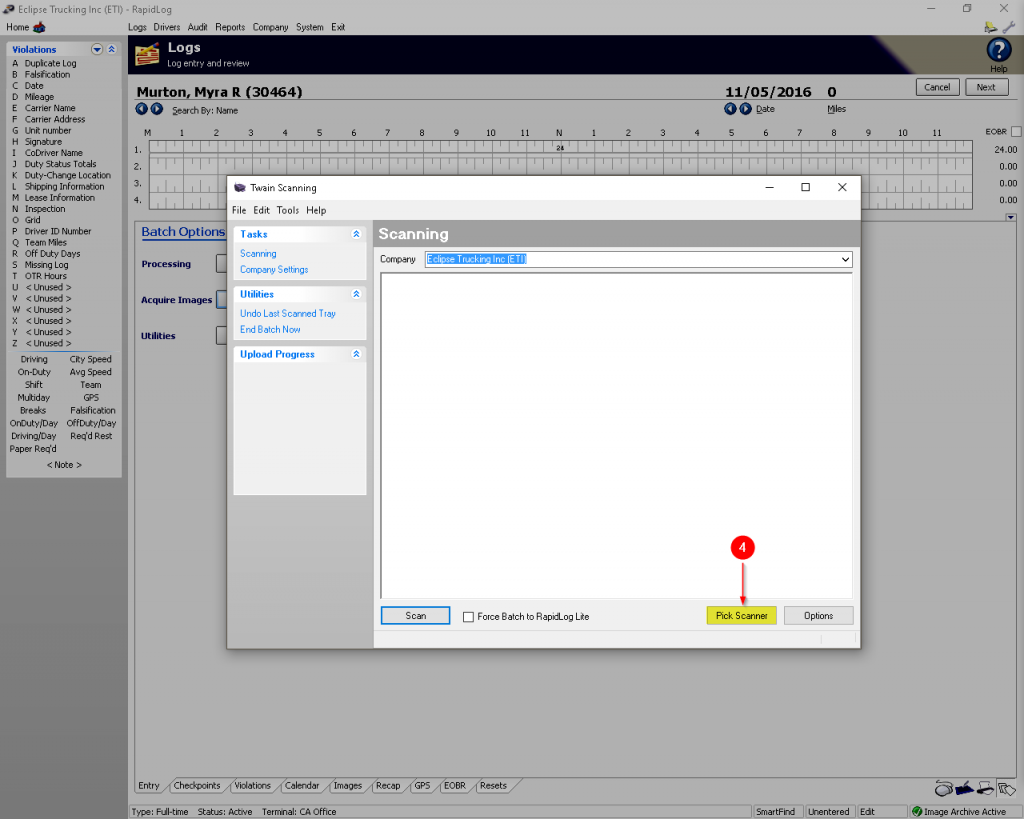
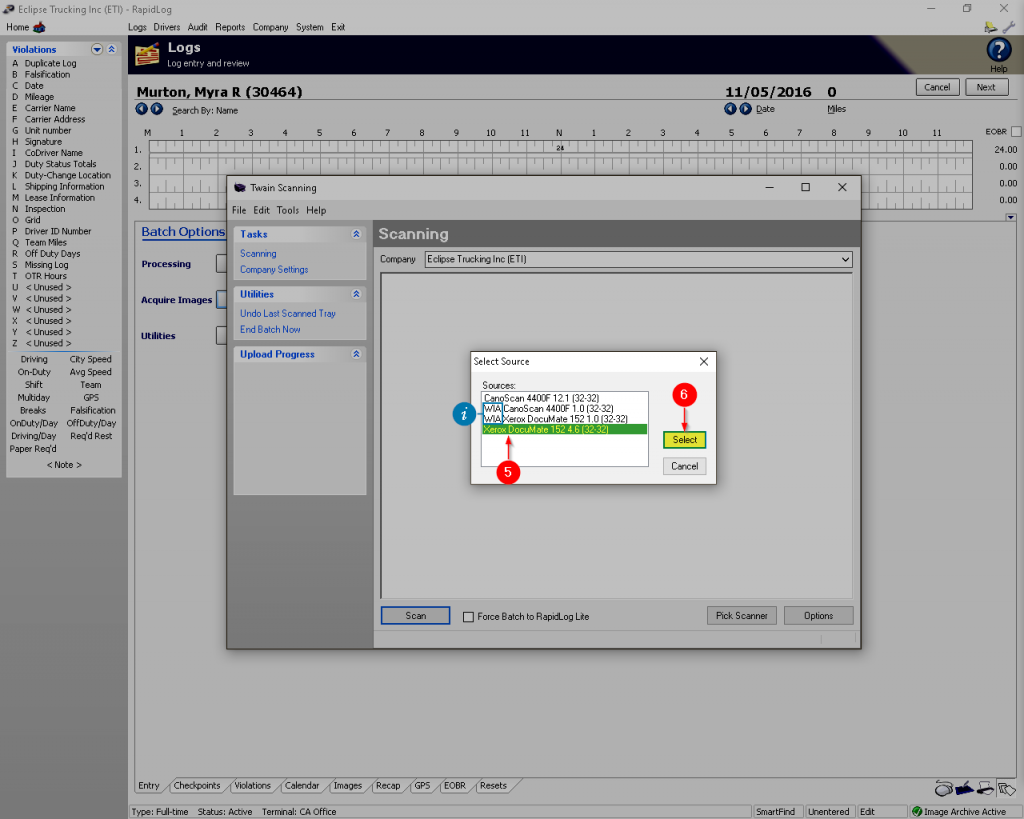
4. Click the ‘Pick Scanner’ button.
i: WIA stands for ‘Windows Imaging Acquisition’. These are the generic windows drivers and should be used as a last resort since they usually have only a fraction of the functionality compared to the TWAIN drivers.
5. Select the scanner you’ll be using from the list.
6. Click ‘Select’ to save your selection for future use.
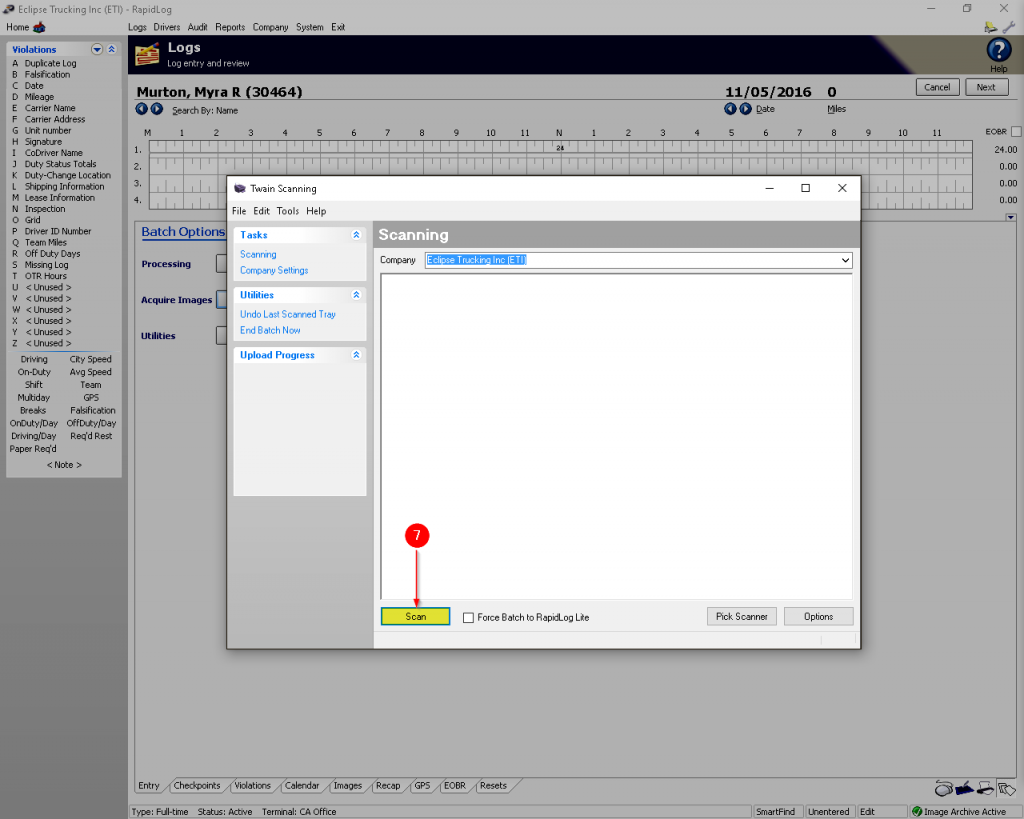
7. Click ‘Scan’ to bring up your scanners drivers.
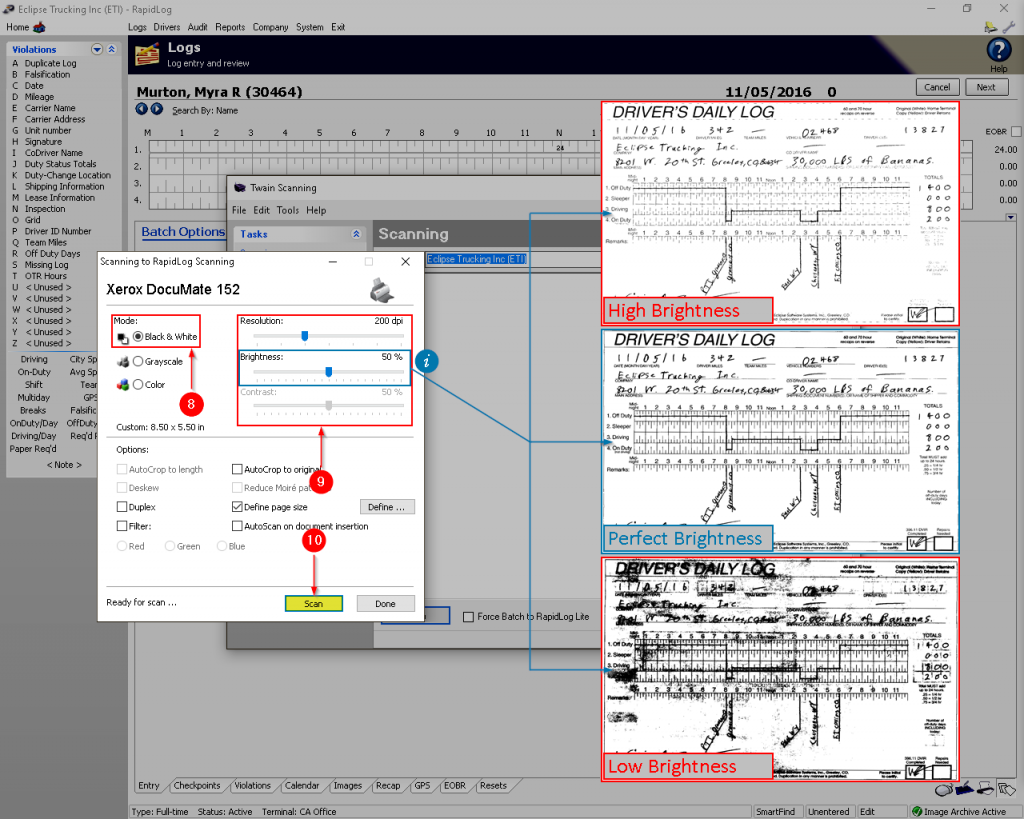
Note: Your drivers will look different from what is seen here, just find the equivalent setting in your scanner drivers.
8. Select ‘Black and White’ as the mode.
9. Set your Resolution(We suggest 200-300 DPI), and Brightness.
i: Adjust your brightness as needed to get a clean scan. The closer your image quality is to the middle image(right), the less work you will have when processing logs.
10. Click ‘Scan’ to tell the scanner to start scanning the logs.
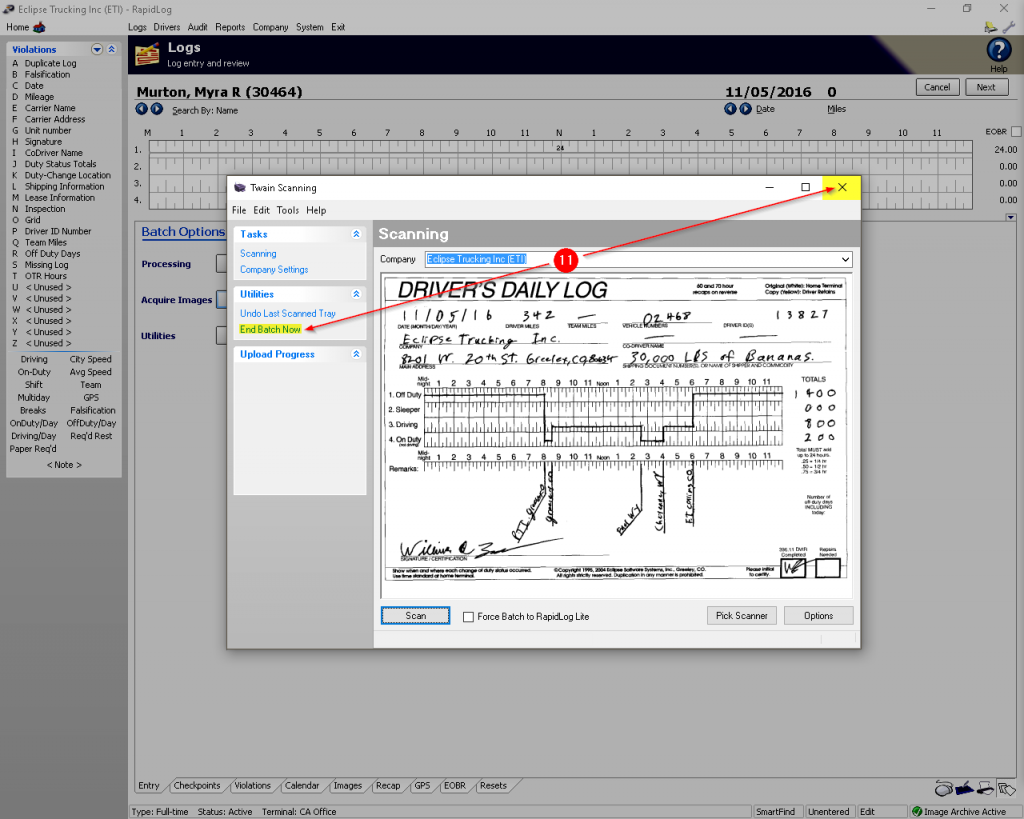
11. Click either ‘End Batch Now’ OR exit Scanning Module.
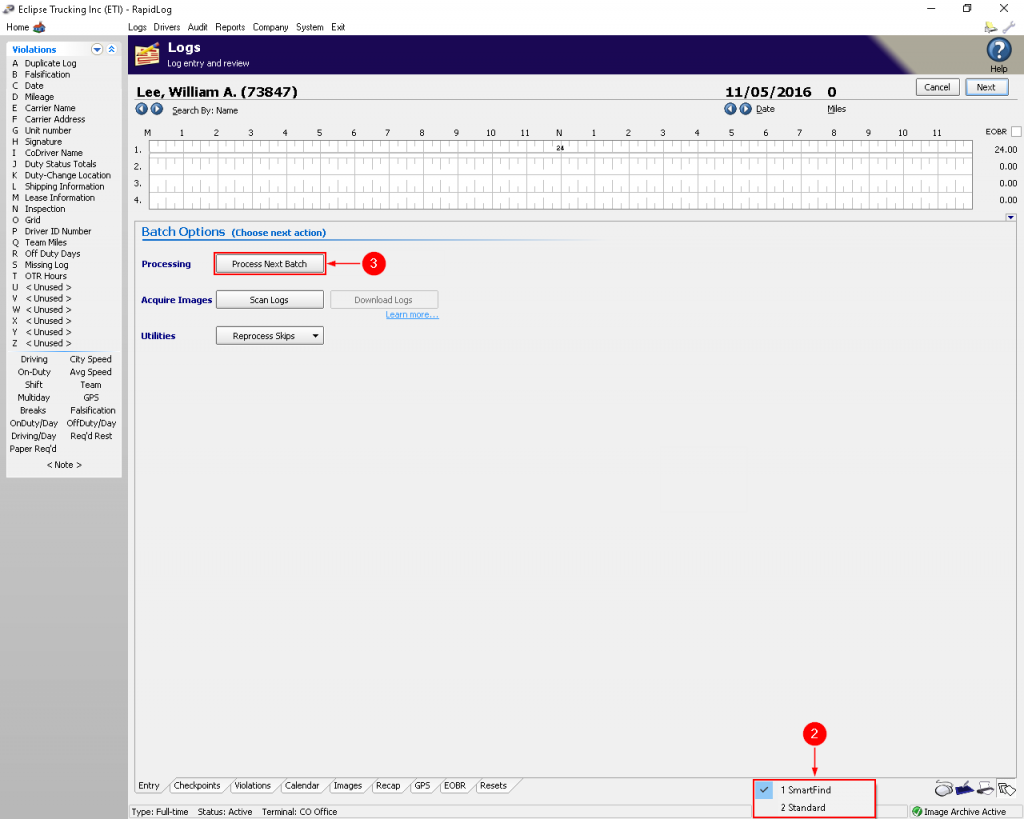
3. LITE Processing
. Click on the ‘Logs’ tab OR icon.
2. Select the scanning profile that matches your logs. (Usually Standard or Smartfind)
3. Click ‘Process Next Batch’ to start processing the logs you’ve scanned.
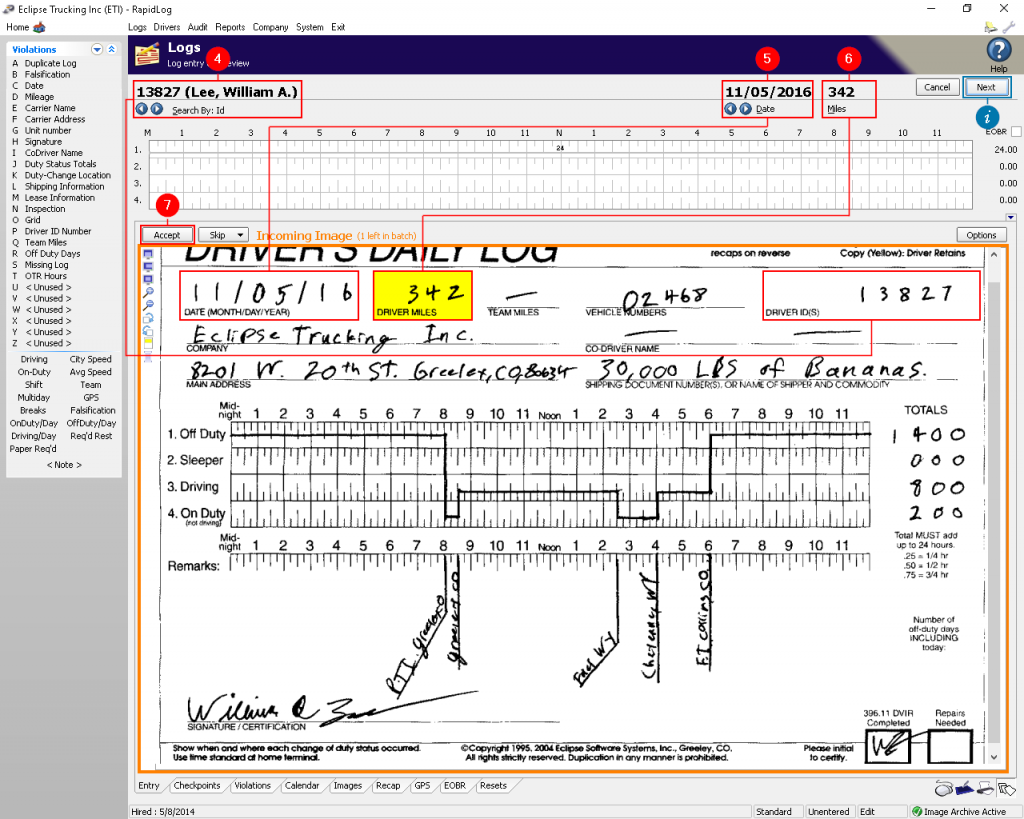
4. Change to the driver shown on the log in the ‘Incoming Image’ section.
5. Change to the date shown on the log in the ‘Incoming Image’ section.
6. Enter the miles shown.
7. Click the accept button to have RapidLog read the grid on the log.
i: The arrows under the duty status grid are confidence indicators. The confidence indicators are used to draw your attention to where the program is unsure.
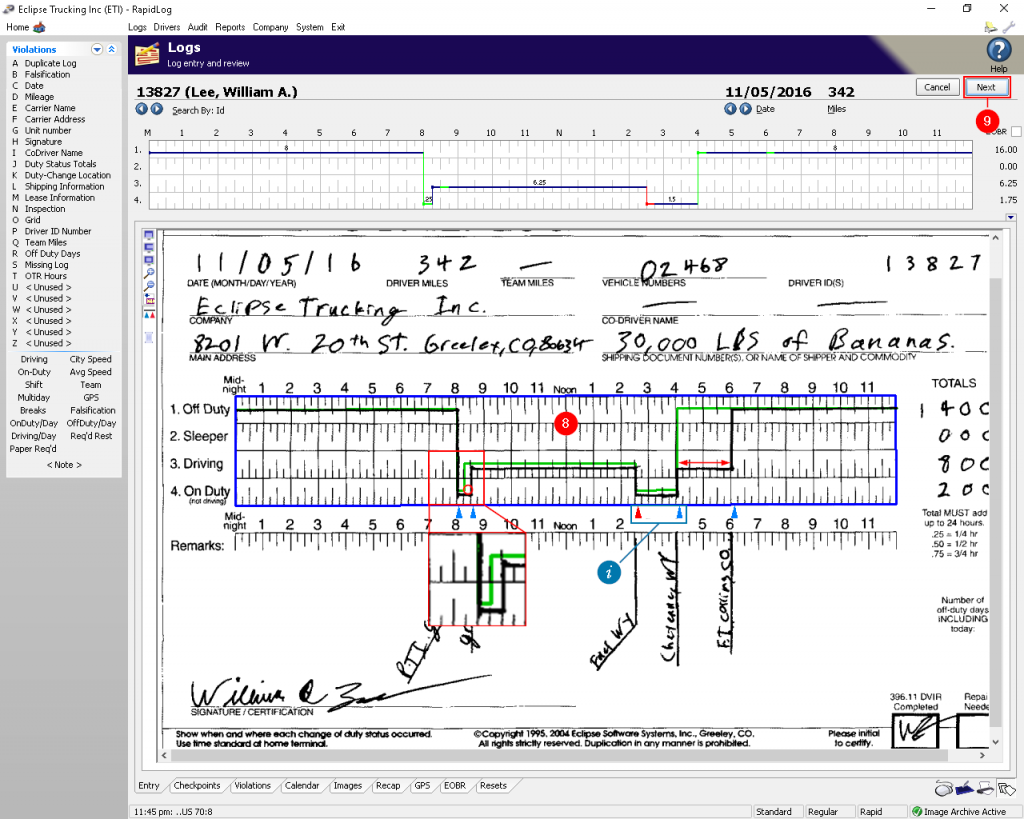
8. Make corrections to the record of duty status. The green line is what RapdiLog Pro read; you want this to match the driver’s line as close as possible. Click for 15 minute corrections, click and drag for sections larger than 15 minutes. Ex: To fix this log we would click in line 4 between 8:15 and 8:30(Red circle) to correct the error. We then would click and drag from 4:00 to 6:00 in line 3(red arrow) to make the second correction.
9. Click ‘Next’ to move onto the next image in the batch.
Repeat steps 4-9 until you’ve finished the batch of scanned images.