If you only have one format of logbooks and will be scanning at 200DPI you can skip this section.
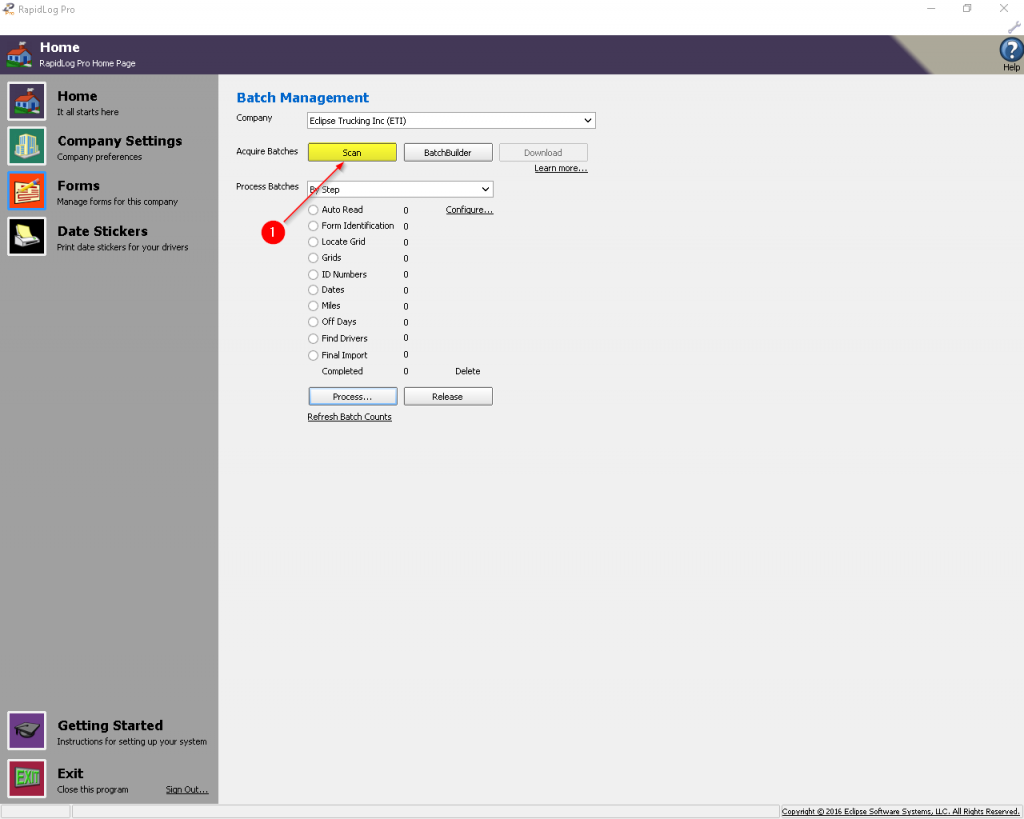
1. Click the ‘Scan’ button to open Scanning Module.
If you only have one format logbook skip to step 5.
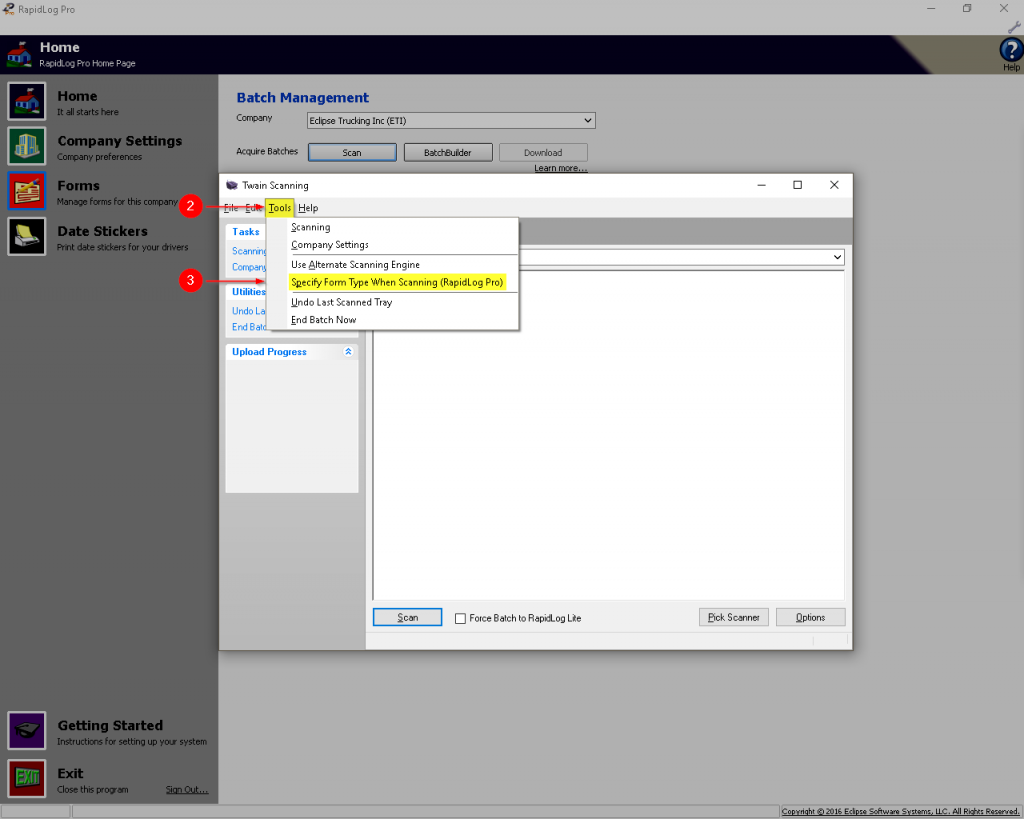
2. Click ‘Tools’.
3. Click ‘Specify Form Type When Scanning’.
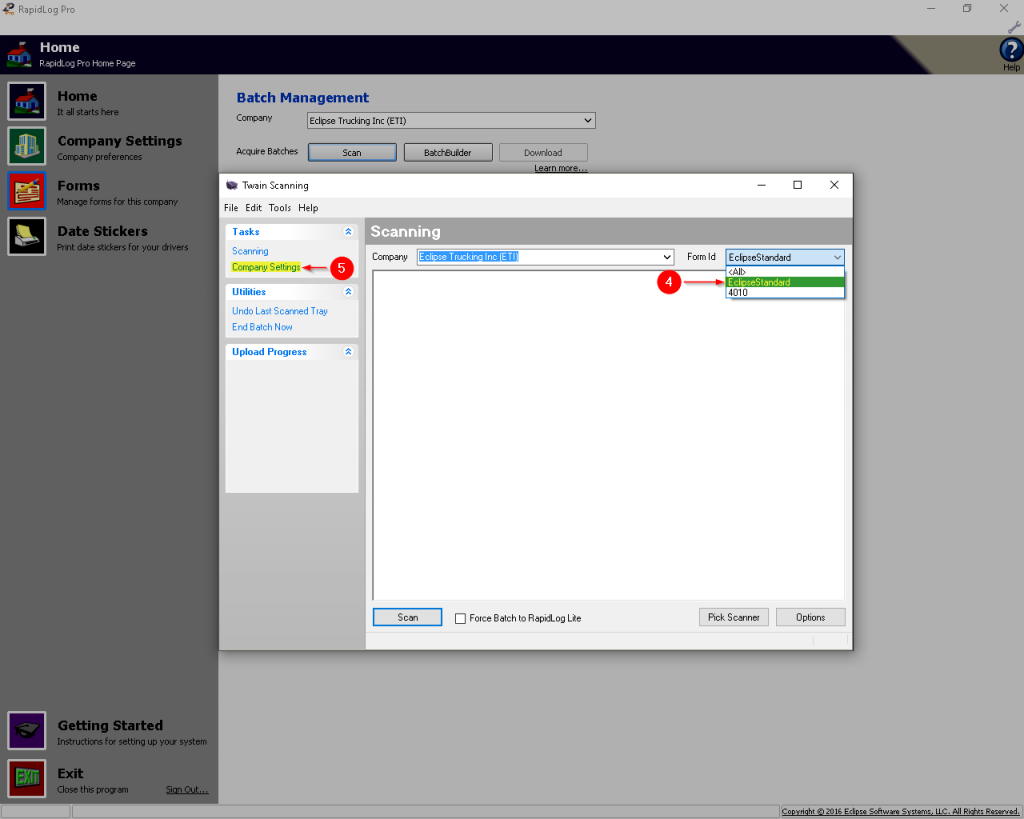
4. Every time you open scanning module you’ll need to specify what type of logs you’ll be scanning in this box.
5. Click on ‘Company Settings’.
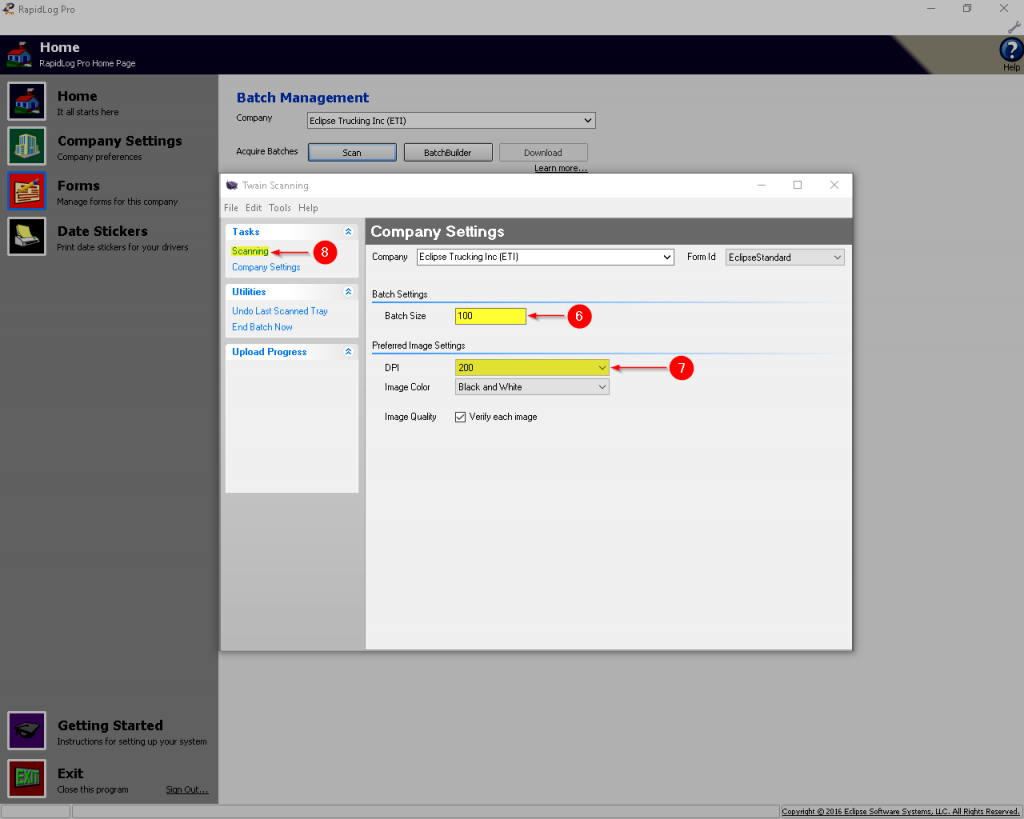
6. If you’d like to change the batch size you can specify it here. (Ex: at 100 when you scan in 150 logs, you would have 1 batch of 100 and one of 50.
7. Specify your preferred DPI(We reccomend 200 or 300 for speed and storage size.
8. Click ‘Scanning’ to get back to the scanning module home screen.
2. Picking and Configuring Your Scanner
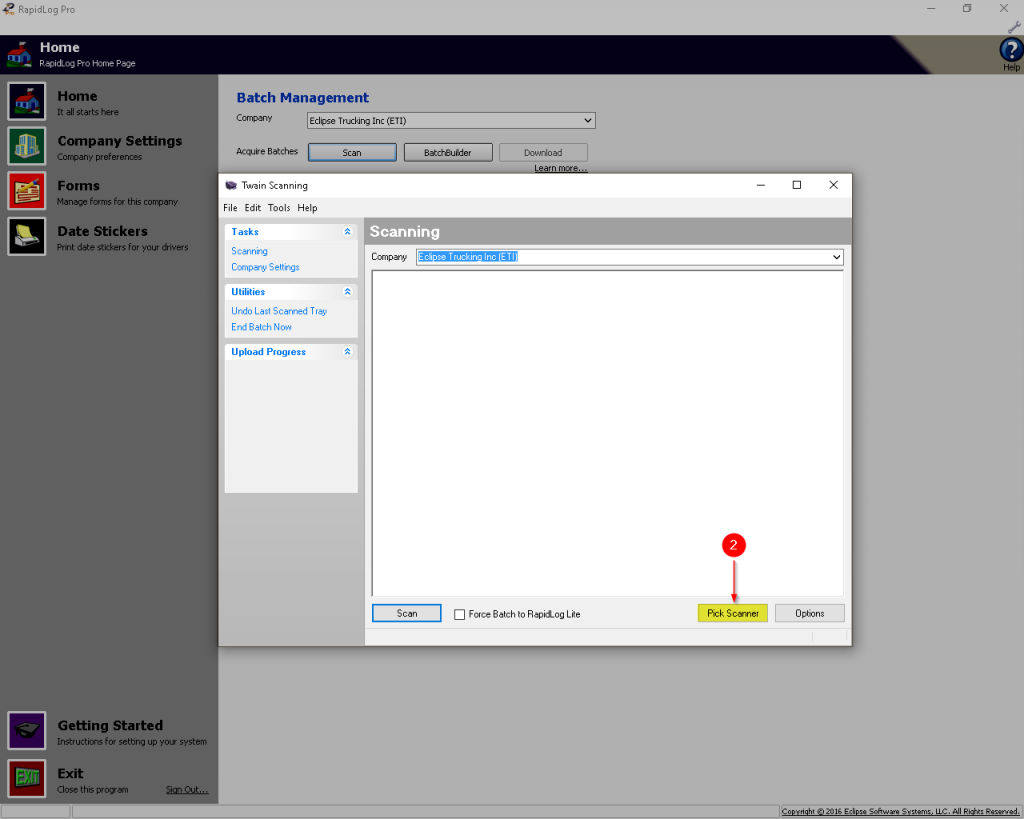
1. Click the ‘Scan’ button to open Scanning Module.
If you only have one format logbook skip to step 5.
2. Click ‘Pick Scanner’
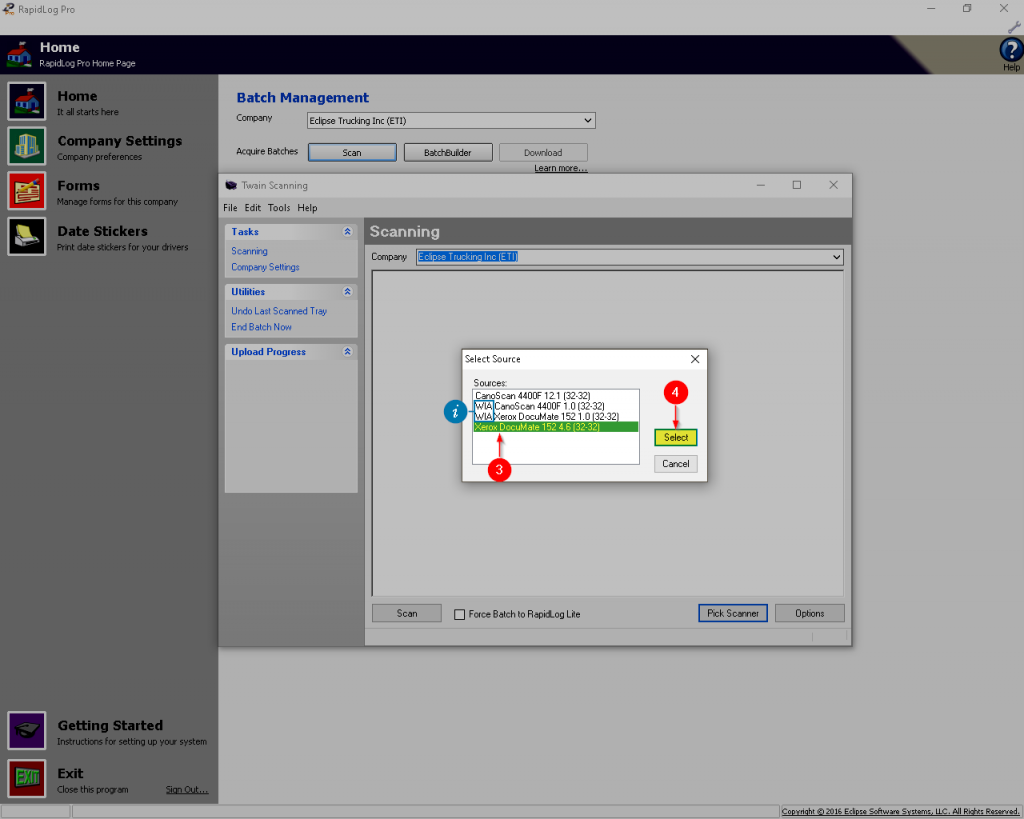
i: WIA stands for ‘Windows Imaging Acquisition’. These are the generic windows drivers and should be used as a last resort since they usually have only a fraction of the functionality compared to the TWAIN drivers.
3. Select the scanner you’ll be using from the list.
4. Click ‘Select’ to save your selection for future use.
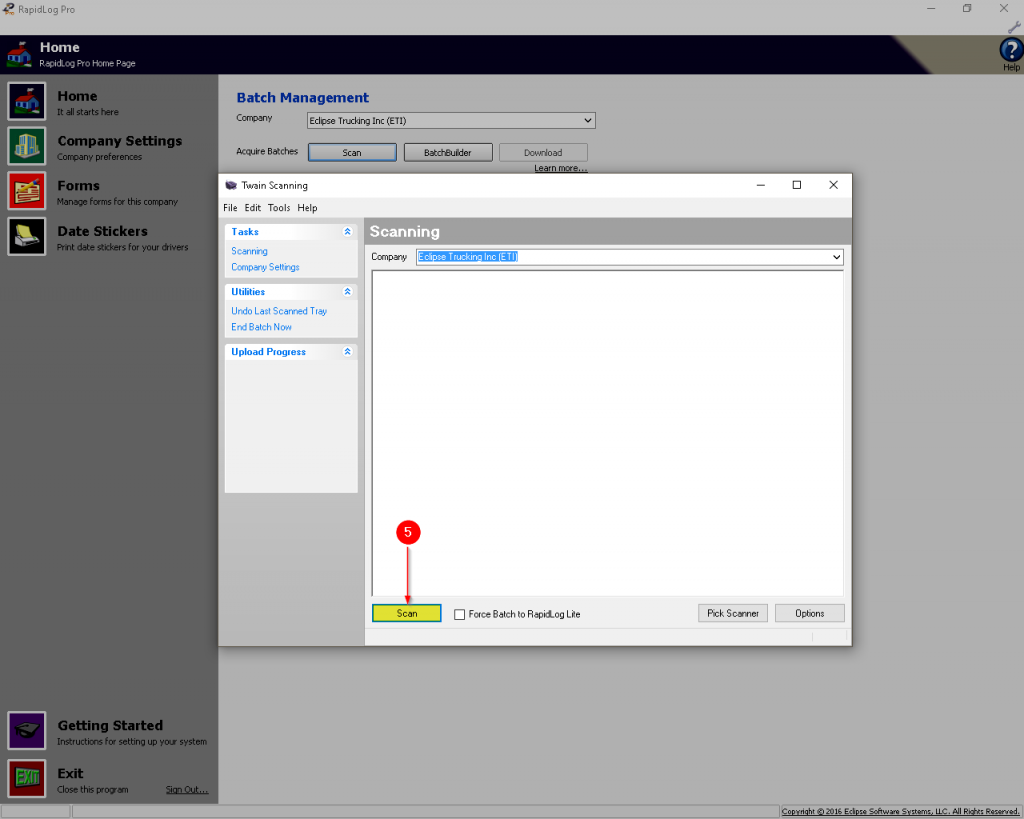
5. Click ‘Scan’ to bring up your scanners drivers.
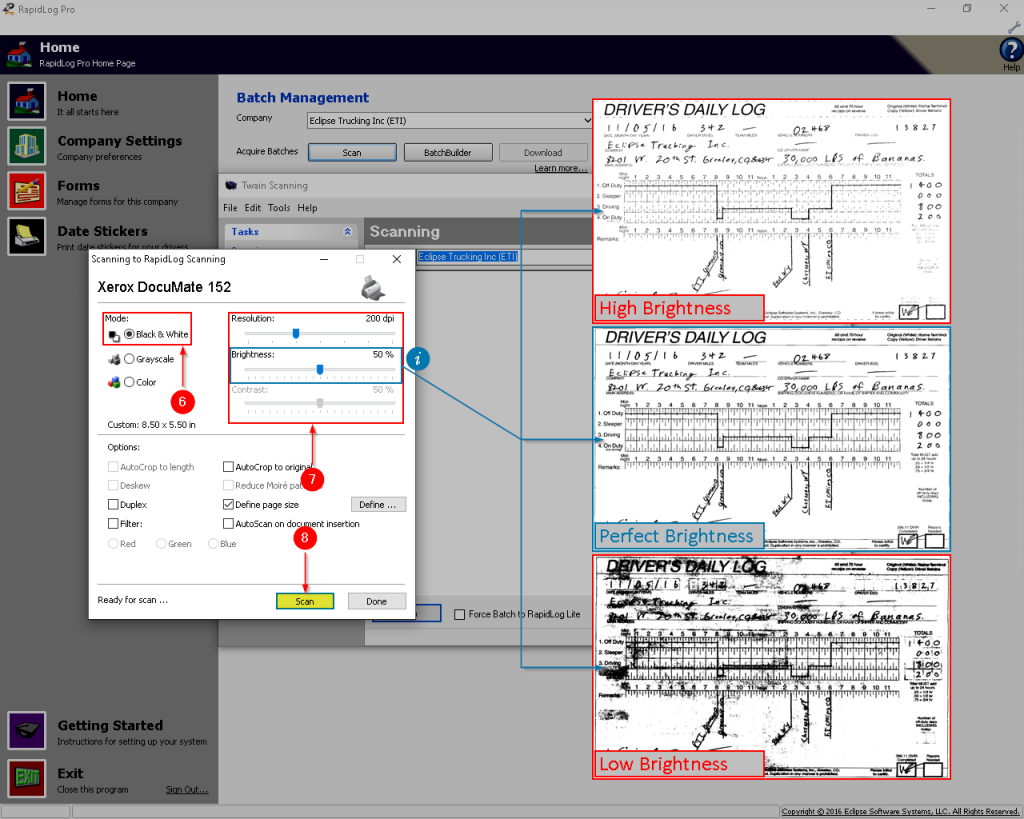
Note: Your drivers will look different from what is seen here, just find the equivalent setting in your scanner drivers.
6. Select ‘Black and White’ as the mode.
7. Set your Resolution(We suggest 200-300 DPI), and Brightness.
i: Adjust your brightness as needed to get a clean scan. The closer your image quality is to the middle image(right), the less work you will have when processing logs.
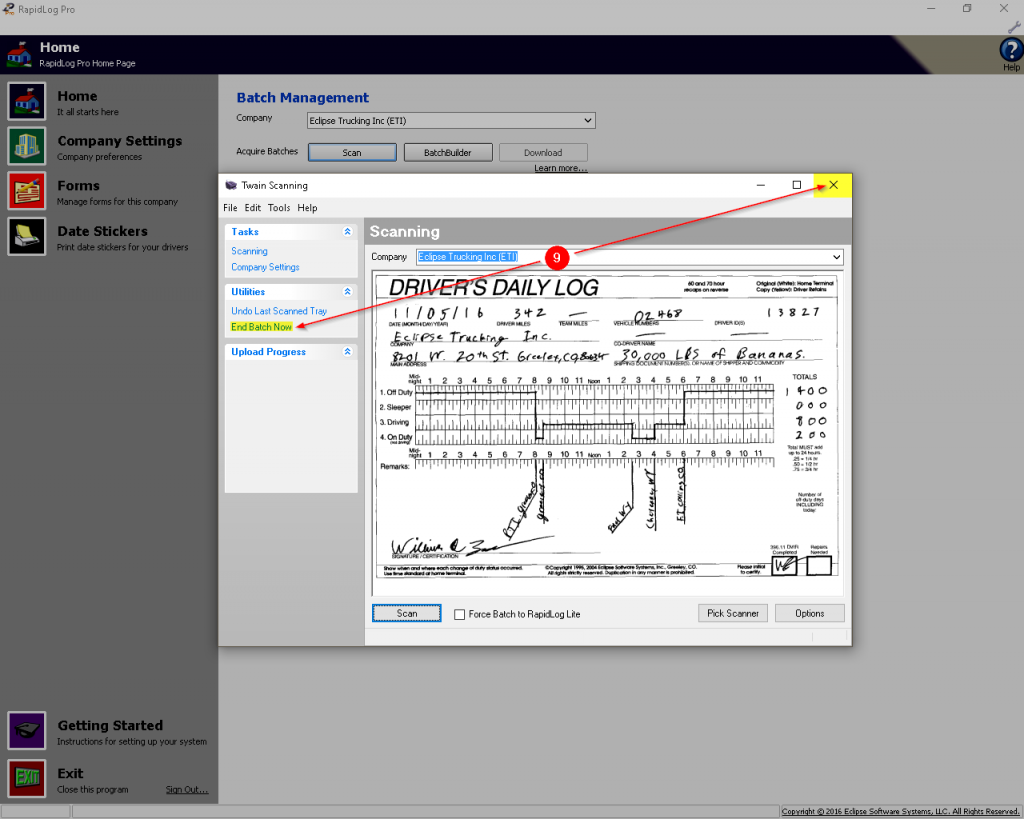
8. Click ‘Scan’ to tell the scanner to start scanning the logs.
9. Click either ‘End Batch Now’ OR exit Scanning Module.
3. Configuring BatchBuilder
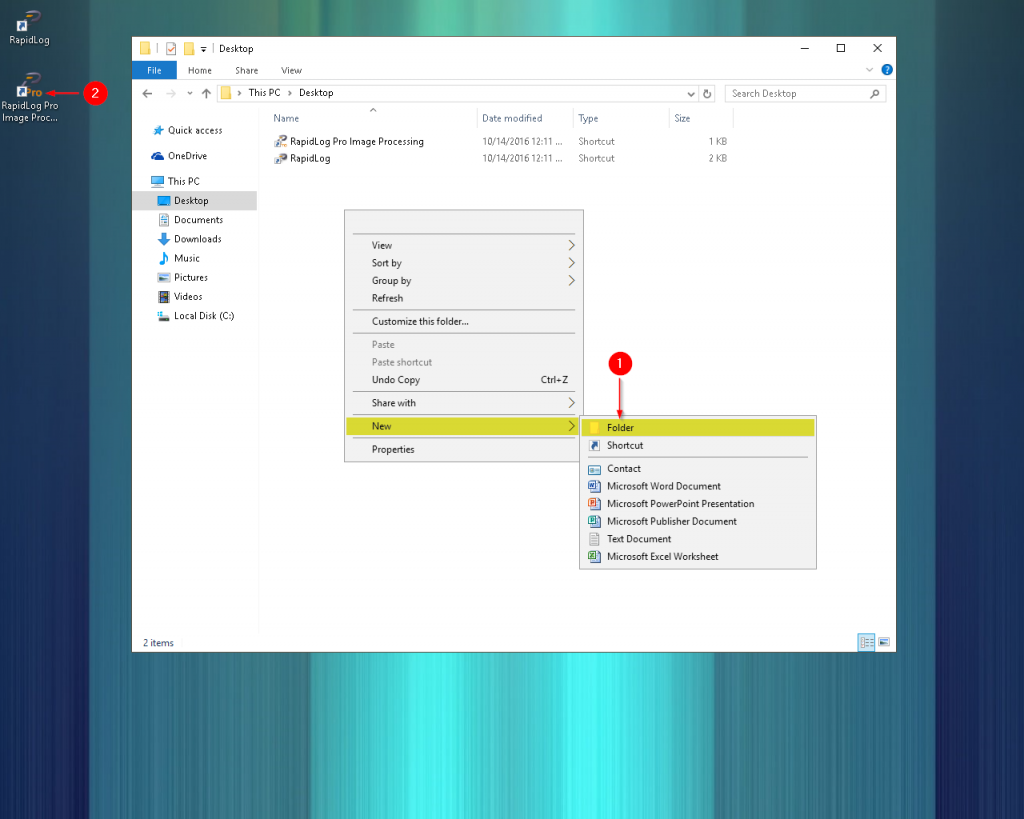
1. Create a new folder for Batch Builder.
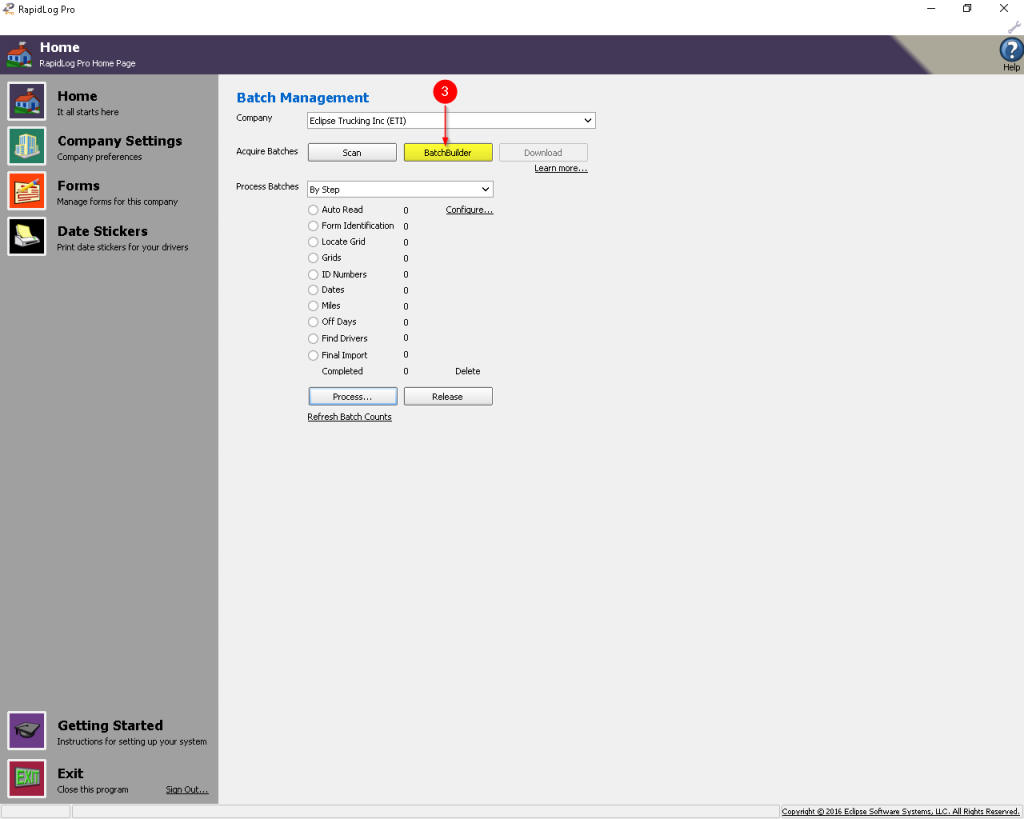
2. Open RapidLog Pro.
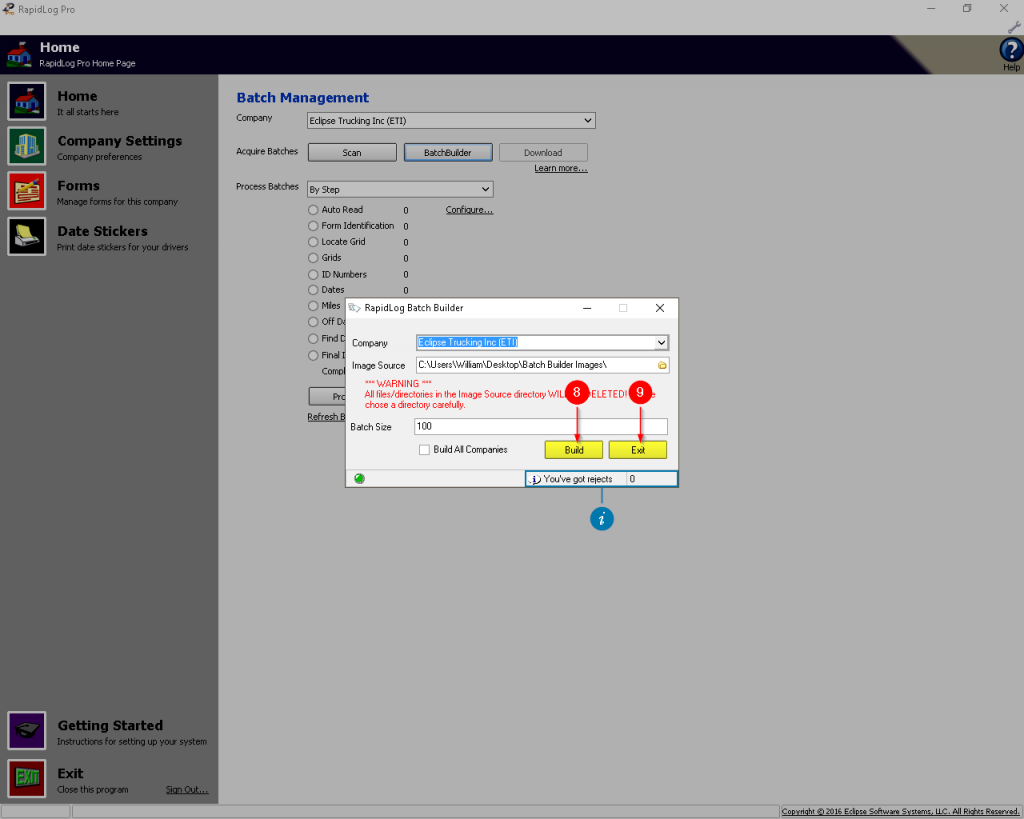
3. Click ‘Batch Builder’.
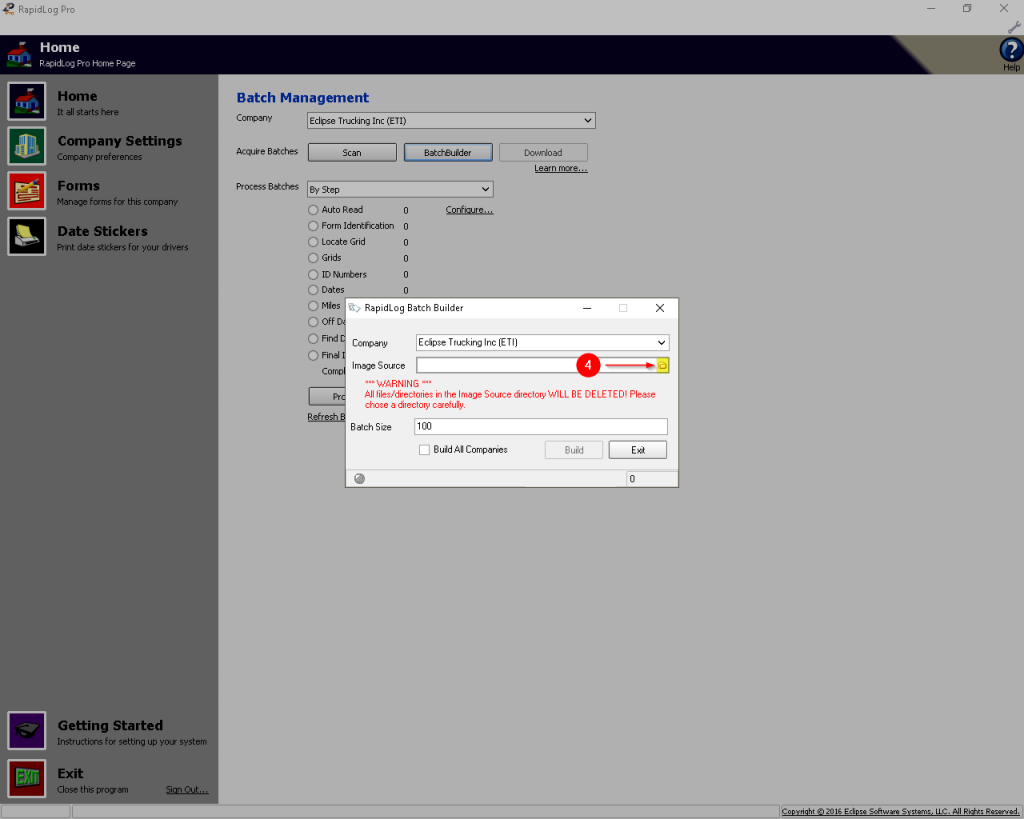
4. Click the folder icon to set an image source.
5. Navigate to and select the folder we created in Step 1.
6. Press the ‘Ok’ button to save the selected folder.
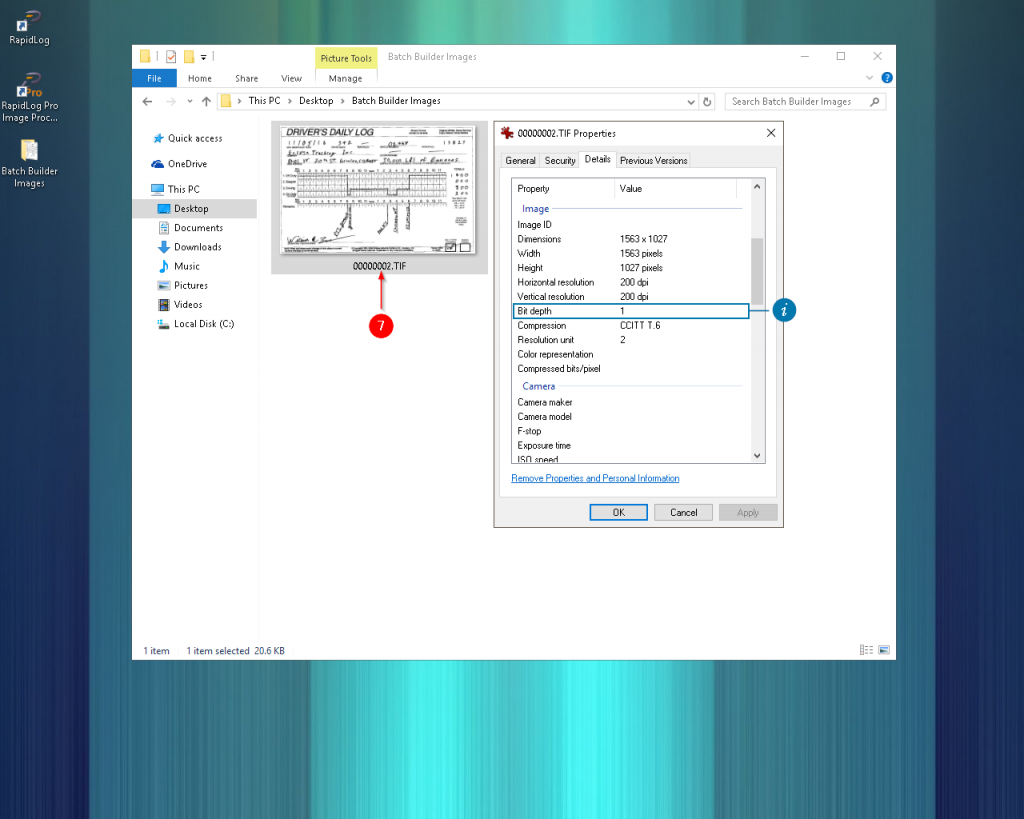
7. Place Black and White .TIF images into the folder created in Step 1.
i: While some properties of the images can change, you ALWAYS must have .TIF images with a Bit Depth of 1 or Batch Builder will delete the image.
8. Press the ‘Build’ button to move the images from Step 7 into a batch for processing.
i: If you see ‘You’ve got rejects’, and a zero in the bottom right, the images from Step 7 were not formatted correctly. Refer back to Step 7: information.